You already know your business is good. But if customers cannot find you online, it might as well not exist. Right now, 81% of shoppers research a business online before making a purchase, and nearly 99% of consumers use the internet to discover local businesses.
Yet, as of 2025, around 27% of small businesses still do not have a website. That gap is costing real revenue every single day. Here is the good news: you no longer need to write a single line of code or hire an expensive developer to get online.
Today, building a professional business website is more accessible, affordable, and beginner-friendly than it has ever been. This guide walks you through every step, from picking a domain name to launching your site, along with the tools, costs, tips, and real-world advice you need to do it right.
Why Every Business Needs a Website
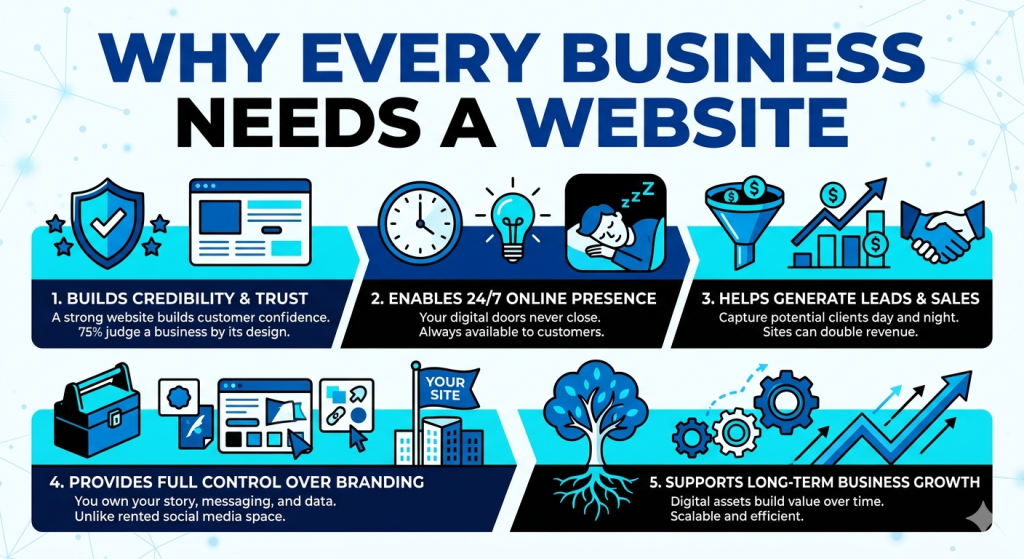
Before getting into the how, it is worth understanding the why. A website is not just a digital business card. It is one of the most powerful tools a business owner has and these numbers make that very clear.
Builds Credibility and Trust
First impressions happen fast. Research shows that 75% of consumers judge a business’s credibility based on its website design and 94% of first impressions are design-related. Without a website, potential customers may simply move on to a competitor who has one.
According to a Statista survey, 84% of consumers consider a business website more credible than its social media presence alone.
Enables 24/7 Online Presence
Your physical store has closing hours. Your website does not. It works around the clock, answering questions, showcasing your products, and capturing leads even while you sleep.
For small businesses, this is a significant advantage over purely offline competitors.
Helps Generate Leads and Sales
A well-built business website does more than inform; it converts. Studies show that small businesses with both a website and social media presence generate 2x more revenue than those relying on social media alone.
Additionally, 70% of website traffic originates from Google, which means strong SEO on your site can become a consistent source of new customers without ongoing ad spend.
Provides Full Control Over Branding
Social media platforms change algorithms, limit reach, and can suspend accounts. Your website is yours. You control the design, the messaging, the user experience, and the data.
This ownership is a long-term asset that grows in value as your business does.
Supports Long-Term Business Growth
Digital presence compounds over time. Businesses that invest in SEO, content, and a well-structured site build organic traffic that keeps delivering results.
Over 65% of business websites already feature a blog because content marketing consistently drives discovery and trust.
A website gives your business the foundation to scale without proportionally increasing your marketing budget.
What You Need Before Creating a Website
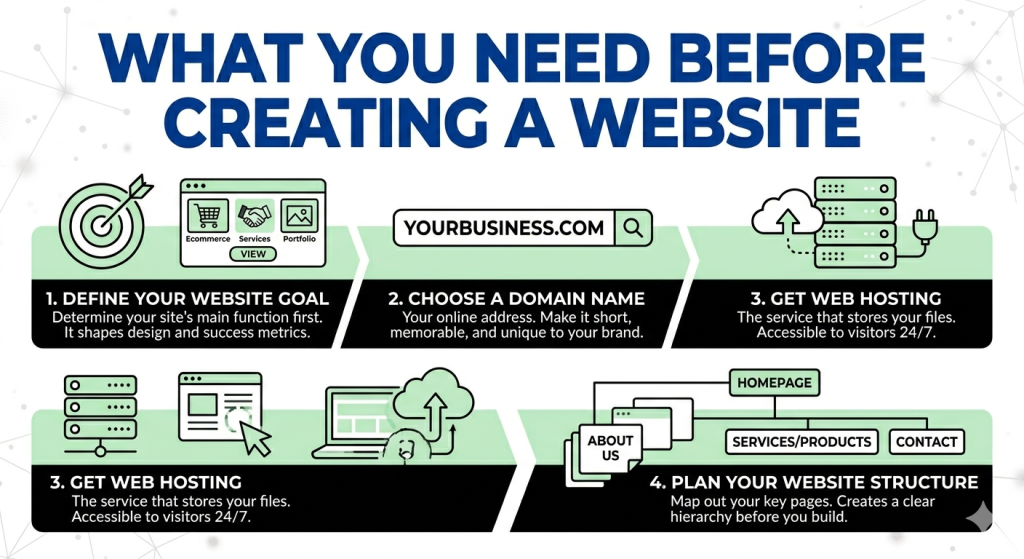
Before you install anything or start browsing themes, a bit of planning will save you a great deal of time later. These are the foundational decisions every business owner should make first.
Define Your Website Goal
Different websites serve different purposes, and knowing yours upfront shapes every decision that follows. A business website focused on services needs a clear contact form and testimonials. An e-commerce site needs a product catalog, cart, and checkout.
A portfolio needs visual galleries and case studies. A blog needs a strong content structure and categories. Define what success looks like for your site before building it, whether that is phone calls, online orders, email signups, or brand awareness.
Choose a Domain Name
Your domain name is your address on the internet. Choose it carefully. The average cost of a standard .com domain is $10 to $20 per year, and many hosting providers include the first year for free.
Here are a few practical tips for choosing a strong domain:
- Keep it short and memorable
- Avoid hyphens and numbers
- Use relevant keywords where it makes sense
- Check that the name is not trademarked or already in use
Tools at major registrars let you check availability instantly.
Get Web Hosting
Web hosting is the service that stores your website files and makes them accessible to visitors. Think of it like renting space on a server that stays connected to the internet at all times.
For most small businesses starting out, shared hosting is the most practical choice, typically costing between $2 and $20 per month. As your traffic grows, you can upgrade to a VPS plan for more resources and control.
Plan Your Website Structure
Even a simple business website needs a clear structure before you start designing. At a minimum, most small business sites include these core pages:
- Homepage: Your first impression. It should clearly communicate who you are, what you do, and what visitors should do next.
- About Page: Tells your story, builds trust, and helps visitors connect with your brand.
- Services or Products Page: The heart of your site. Detail what you offer, with clear pricing and benefits where relevant.
- Contact Page: Make it easy for people to reach you. A simple form, phone number, email, and map if you have a physical location.
Having this structure mapped out before you open any design tool will keep the build process smooth and organized.
Step-by-Step Guide to Make a Website for Your Business
Now that you have a clear foundation, it is time to build. These steps take you from a blank slate to a live, fully functional business website. You do not need coding skills, a large budget, or prior design experience to follow along.
Step 1: Choose the Right Website Platform
The platform you choose determines how you build, manage, and grow your website.
There are two main categories: website builders (all-in-one hosted platforms like Wix and Squarespace) and content management systems (CMS) like WordPress that you self-host.
Website builders are fast and require almost no technical setup. They are great for very simple sites, but they can be limiting as your needs grow.
A CMS like WordPress gives you far more flexibility, a much larger ecosystem of themes and plugins, and significantly better long-term SEO capabilities.
WordPress is the clear leader here. It powers over 43% of all websites on the internet, holding a commanding 60%+ share among sites using a known CMS.
The platform is free to use, open-source, and backed by one of the largest developer communities in the world.
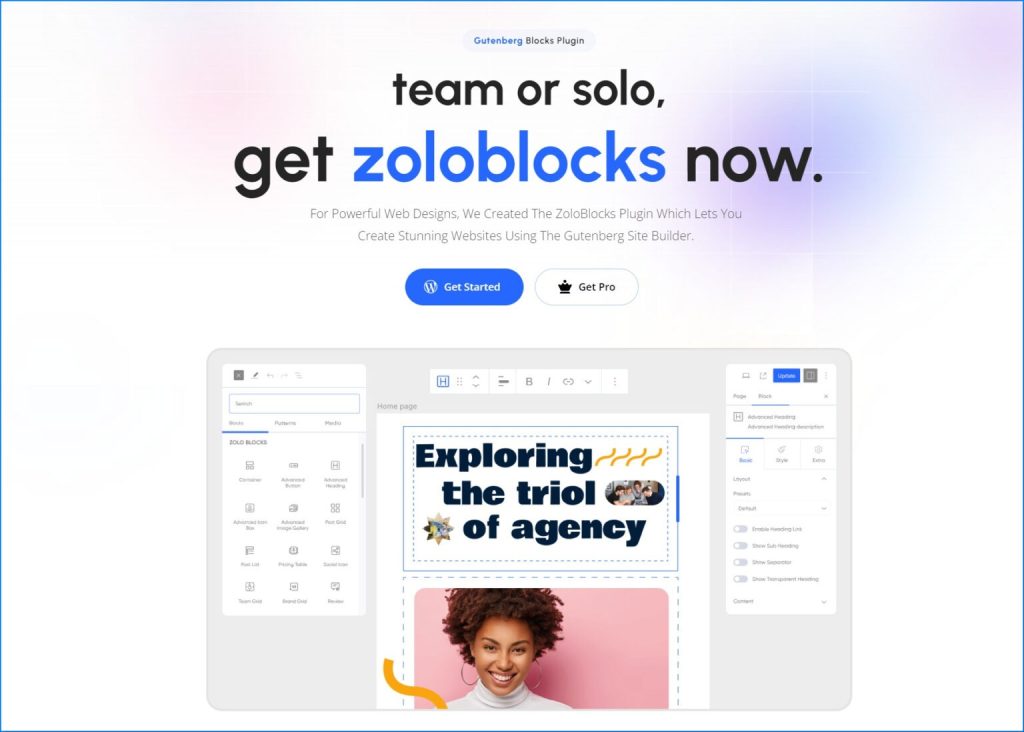
One of the biggest advantages of building with WordPress today is the Gutenberg block editor, which lets you design pages visually without any code. And when you add ZoloBlocks on top of it, the editor becomes a genuinely powerful design tool.
ZoloBlocks is a Gutenberg block plugin from BdThemes that gives you 65+ advanced blocks, 300+ ready-made patterns, and 100+ complete page templates. It loads 0KB when blocks are not active on a page, meaning your site stays fast without sacrificing design flexibility.
Pro Tip: If your primary goal is long-term SEO growth and brand ownership, choose a self-hosted CMS like WordPress over a hosted website builder. The initial setup is slightly more involved, but the long-term advantages in performance, flexibility, and rankings are significant.
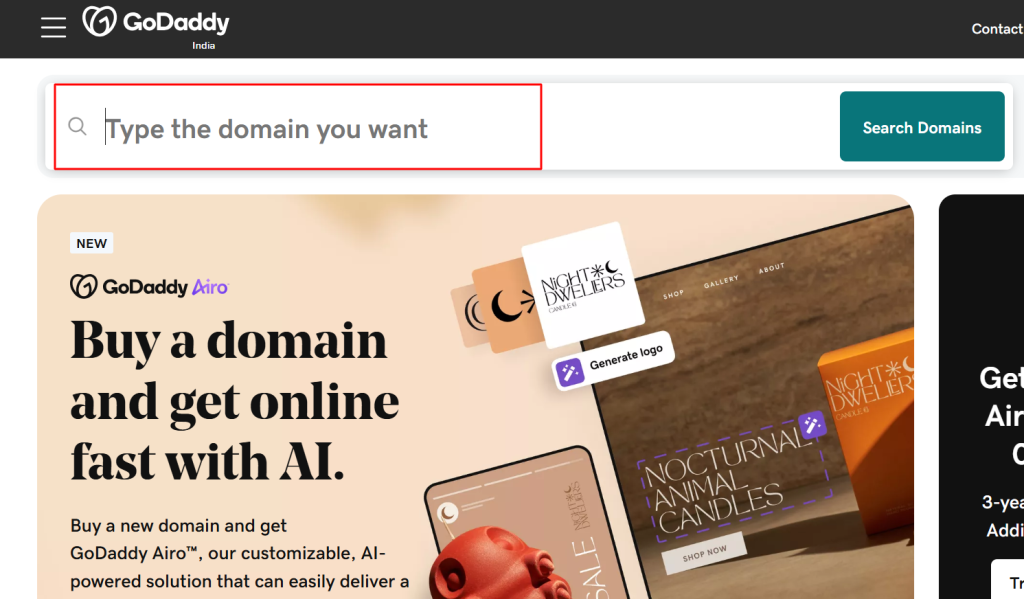
Step 2: Register a Domain Name and Buy a Hosting Plan
A domain name is your website’s address on the internet (like www.yoursite.com). It’s the first thing people notice about your brand, so picking the right one is crucial.
Use tools like Namecheap or Name to check if your preferred name is available.
Selecting the Right Hosting Provider
A hosting provider is where your website’s files are stored. Think of it as renting space on the internet. Choosing the right hosting is critical because it affects your website’s speed, security, and performance.
Types of Hosting:
- Shared Hosting: Ideal for beginners. Affordable but shares resources with other sites.
- VPS Hosting: Offers better performance and control, suitable for growing websites.
- Managed WordPress Hosting: Optimized specifically for WordPress. Handles updates, security, and backups automatically.
Popular Hosting Providers:
- Hostinger: A budget-friendly option for those looking to build a website at a low cost.
- GreenGeeks: Leading provider of green energy web hosting services.
- Bluehost: Recommended by WordPress.org, starting at around $2.95/month.
- SiteGround: Known for speed and excellent customer support.
| Item | Typical Cost |
| Domain name (.com) | $10 to $20 per year |
| Shared hosting | $2 to $10 per month |
| Managed hosting | $7 to $30 per month |
| Free domain (first year) | Included with most plans |
Pro Tip: Register your domain for two or three years upfront if you are confident in your business name. Multi-year registration costs less per year and protects you from renewal price increases.
Step 3: Install WordPress
Most hosting providers offer one-click WordPress installation, making it easy even for beginners. Here’s how it works:
- Log in to your Hosting Dashboard and access your control panel (cPanel).
- Find the WordPress Installer. Look for icons like “WordPress” or “Softaculous Installer.”

- Run the Installer: Click “Install,” choose your domain, and fill in basic site details like your website name and admin credentials.
- Complete Setup: Once installed, you’ll receive login details to access your WordPress dashboard.
Pro Tip: Some hosting providers offer WordPress pre-installed when you sign up, making the process even faster.
Understanding the WordPress Dashboard
Once you’ve installed WordPress, it’s time to get familiar with the dashboard, your website’s control center. Here’s an overview of the key sections:
- Posts: For creating blog content.
- Pages: Used for static content like About, Contact, or Services pages.
- Media: Manages images, videos, and other media files.
- Plugins: Add extra functionality to your website.
- Appearance: Customize your site’s look with themes and menus.
- Settings: Configure site basics like your website title, timezone, and URL structure.
Step 4: Choose a Website Theme and Install Plugins
A WordPress theme controls your website’s appearance, including layout, colors, and typography. There are thousands of free and premium themes available. When choosing one, prioritize mobile responsiveness, fast load times, and compatibility with the Gutenberg block editor.
How to Choose a Theme:
- Responsiveness: Ensure it’s mobile-friendly. Over 62% of web traffic comes from mobile devices.
- Speed Optimized: A lightweight theme improves loading times and user experience.
- Gutenberg Compatibility: Look for themes built to work with block-based editors and plugins like ZoloBlocks.
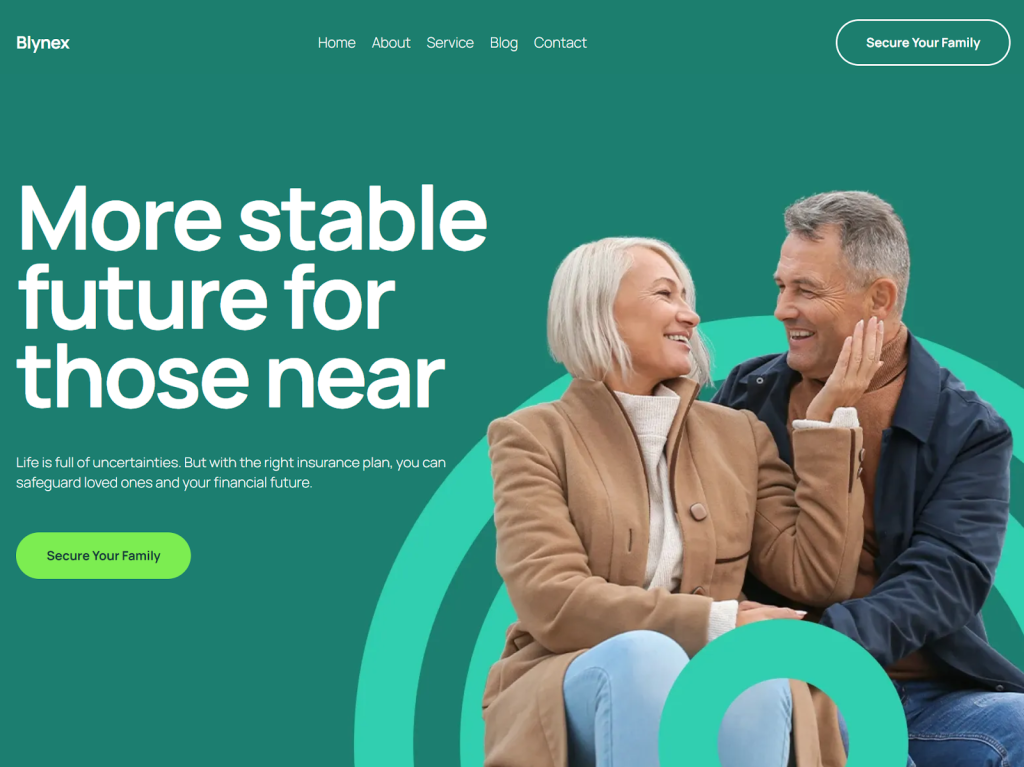
If you want a theme designed specifically for Gutenberg, BdThemes offers Blynex, a clean, flexible block theme built from the ground up for the Gutenberg editor. It pairs naturally with ZoloBlocks, giving you both the structural foundation and the advanced design tools in a single ecosystem.
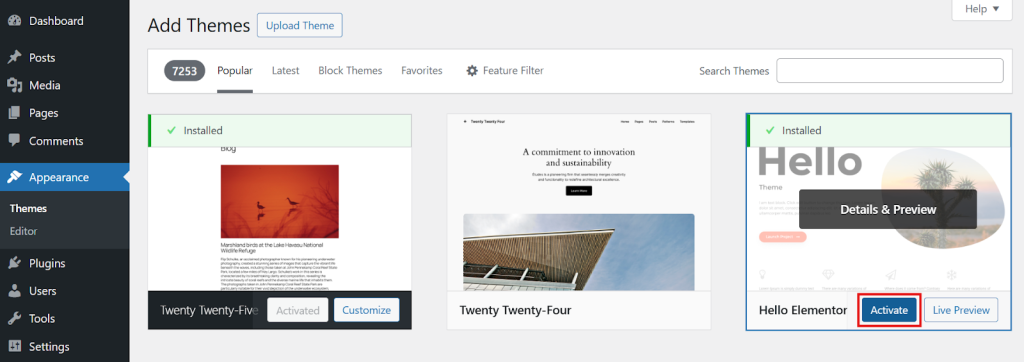
To install a theme:
- Go to Appearance → Themes → Add New Theme
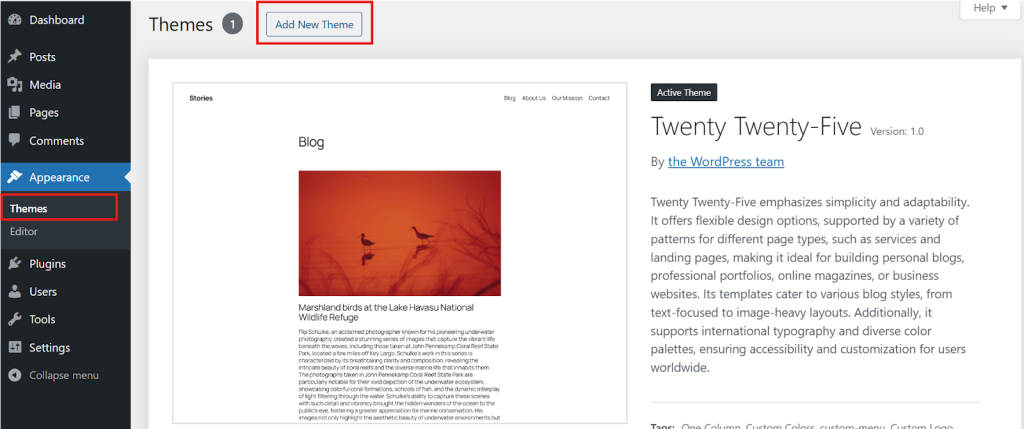
- Browse or upload your chosen theme, click Install, then Activate.
Installing Essential Plugins
Plugins extend WordPress’s functionality. Think of them as apps for your website. Here are the must-have plugins to install first:
- ZoloBlocks: A Gutenberg block plugin with 65+ advanced blocks, 300+ patterns, and ready-made templates. The primary design tool used throughout this guide.
- Yoast SEO: Optimizes your website for search engines.
- Wordfence: Provides security features to protect your site.
- WP Super Cache: Improves website performance by caching pages.
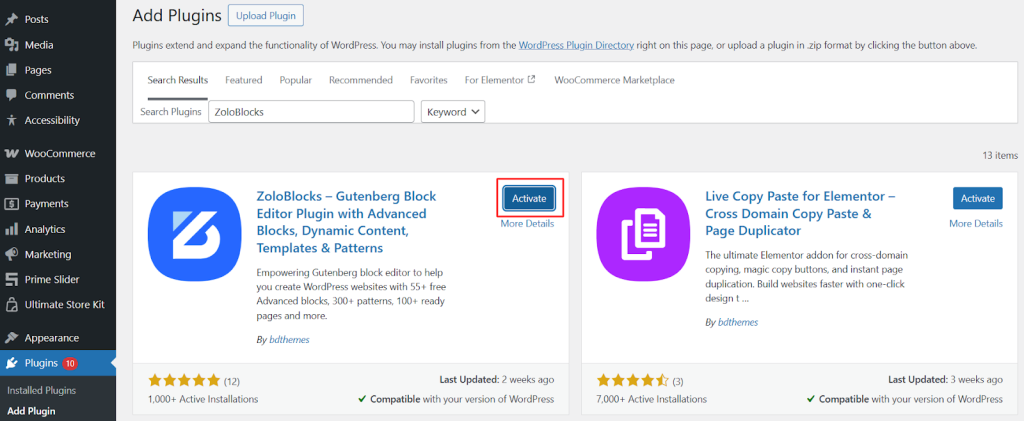
To install any plugin:
- Go to Plugins → Add New in your dashboard.
- Search for the plugin name (e.g., “ZoloBlocks”).
- Click Install.
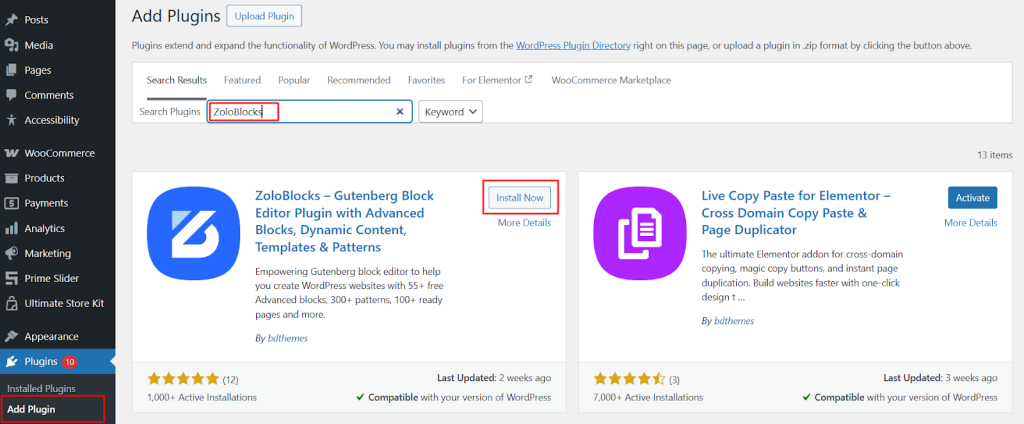
- Then hit Activate.
Step 5: Customize Your Website Design
With your theme and plugins installed, it is time to make the site look like yours.
Customization happens through the WordPress block editor, also known as Gutenberg.
Every piece of content, a heading, an image, a button, a section, is a block that you can move, style, and configure independently through a visual interface.
The native Gutenberg editor is capable and easy to learn, but it has limits when it comes to creating truly polished, professional designs.
This is where ZoloBlocks makes a real difference. With ZoloBlocks installed, you gain access to a much wider library of blocks, each purpose-built for specific design needs.
You can also import any of its 300+ pre-designed patterns with a single click and have a professional-looking section on your page in seconds.
Here is a closer look at the ZoloBlocks blocks that are most useful during the design phase:
Advanced Heading

Headings make your webpage organized and easy to read. The Advanced Heading block lets you style your content headings dynamically in minutes, with full control over typography, color, size, and animation, so your sections always look intentional and polished.
Advanced Paragraph
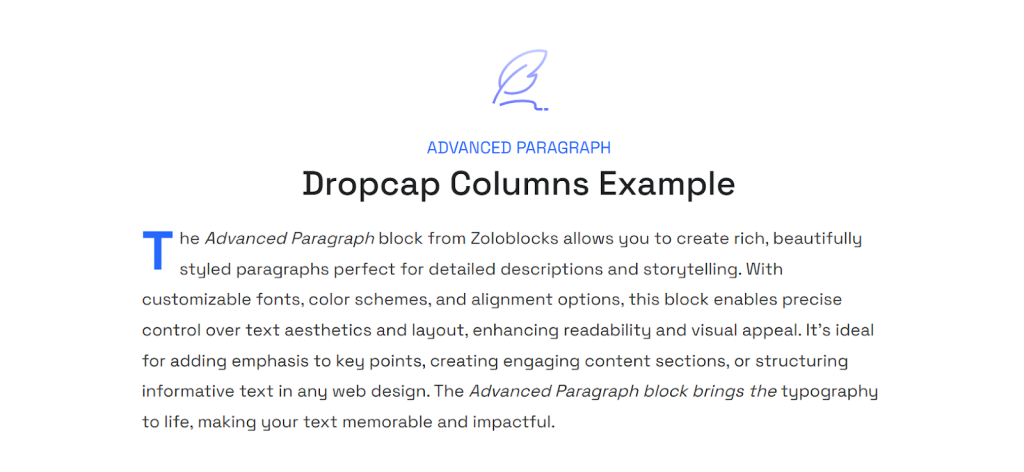
Go beyond plain body text. The Advanced Paragraph block gives you full control over text styling, line height, spacing, and responsive font sizes, so your copy looks great on every screen size without manual adjustments.
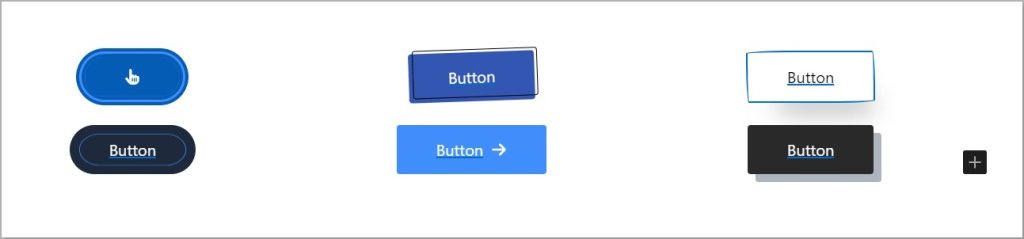
Advanced Button
Buttons make websites interactive and drive action. The Advanced Button block is a prebuilt, fully customizable button element with hover effects, icon support, custom sizing per device breakpoint, and multiple style presets, making your calls-to-action stand out without any custom CSS.
Advanced Image
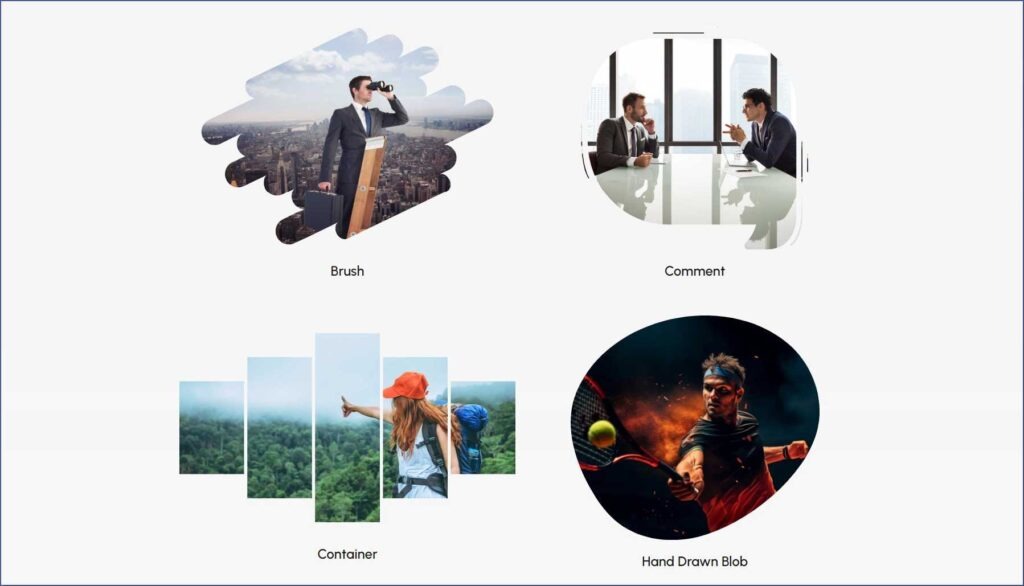
Images shape how visitors perceive your brand. The Advanced Image block lets you customize image size, alignment, borders, and hover effects directly within the editor, giving you full control over visual storytelling without leaving the page.
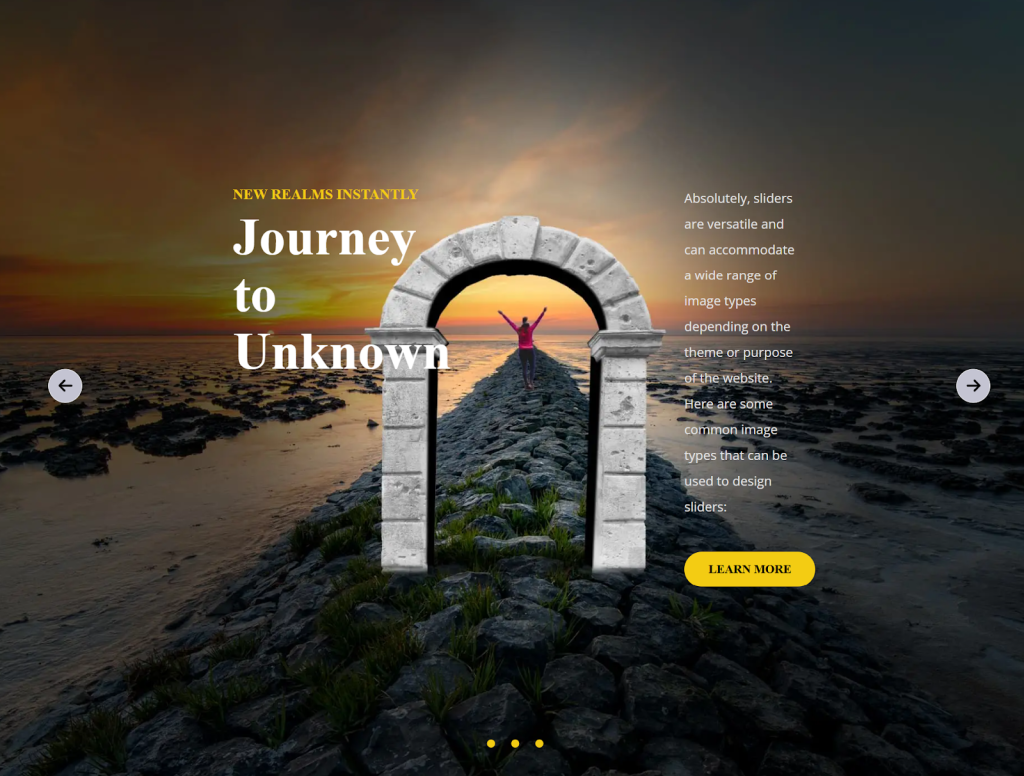
Slider
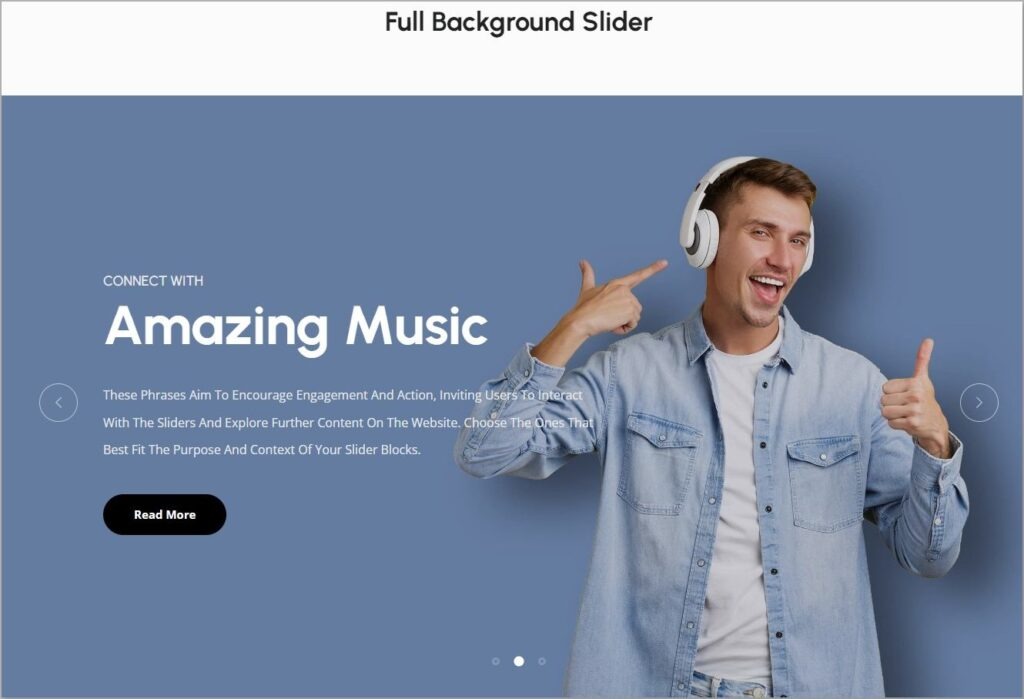
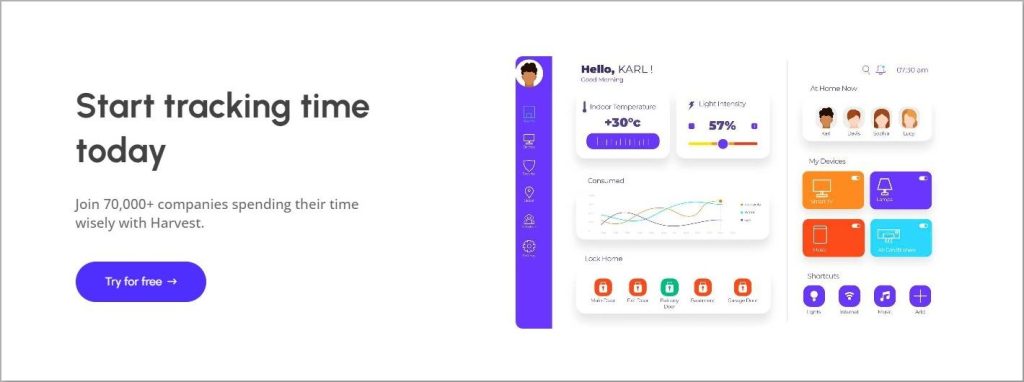
A Slider section is a dynamic way to showcase multiple images or messages one at a time. It works like an animated slideshow where content changes automatically or users scroll through manually, making it ideal for hero sections, featured products, or key announcements.
Container
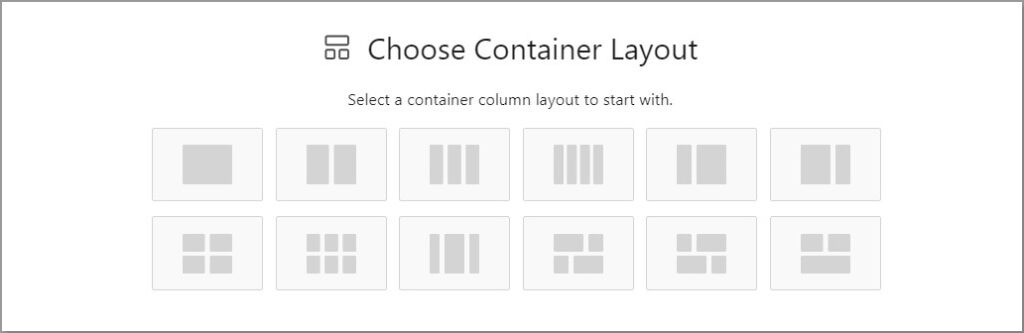
A Container element is like a blank canvas for dynamic section design. It holds other blocks and lets you arrange them however you want, giving you total control over the layout and visual structure of every section on your page.
When customizing your overall design, focus on three main areas:
- Layout and Structure: Make sure your content flows logically and pages are easy to navigate. Use Containers to group related elements and create consistent section spacing throughout.
- Colors and Typography: Choose a color palette that reflects your brand and stick to two or three fonts for readability. Apply them consistently through Advanced Headings and Advanced Paragraphs across every page.
- Consistency: Every page should feel like it belongs to the same site, with matching headers, footers, and spacing. Import patterns from the ZoloBlocks Library to maintain visual consistency without rebuilding from scratch each time.
Pro Tip: A Google study found that 53% of mobile users abandon a site that takes more than three seconds to load. Keep your design lean by compressing images before upload and limiting heavy animations on mobile views.
Step 6: Add Essential Pages
With your design framework in place, it is time to build out the actual content of your site. Start with the core pages that every business website needs.
ZoloBlocks provides specific blocks for each page type that make building them faster and the result more professional.
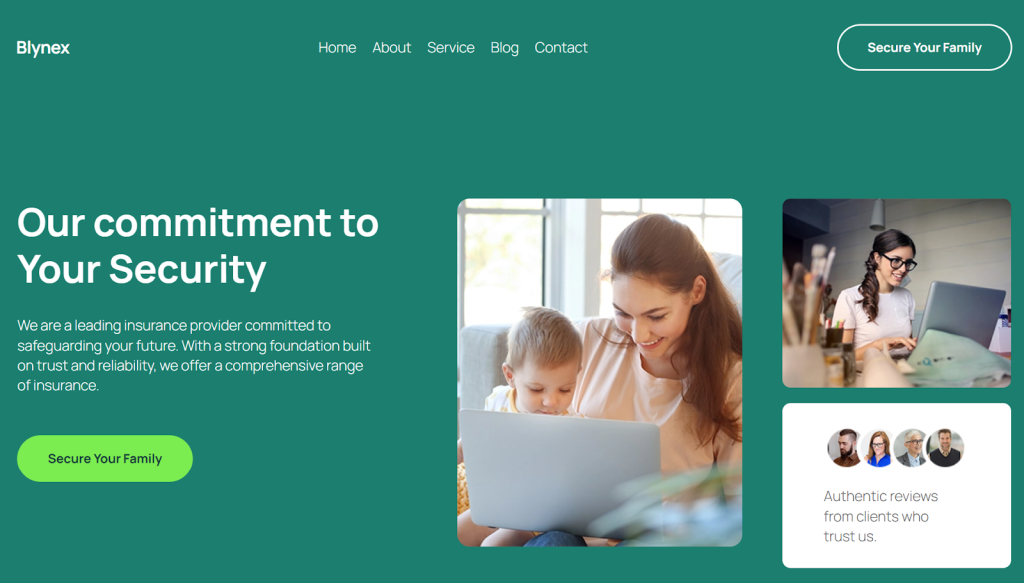
Homepage
Your homepage is the most important page on your site. It should immediately communicate who you are, who you serve, and what action you want visitors to take. Use a strong headline, a brief description of your value, and a clear call-to-action button.
ZoloBlocks blocks to use on your homepage:
- Call To Action: The CTA section typically includes buttons or links that prompt users to take a specific action, such as signing up, learning more, or purchasing. Place it prominently above the fold to guide visitors toward your most important conversion goal as soon as they land.
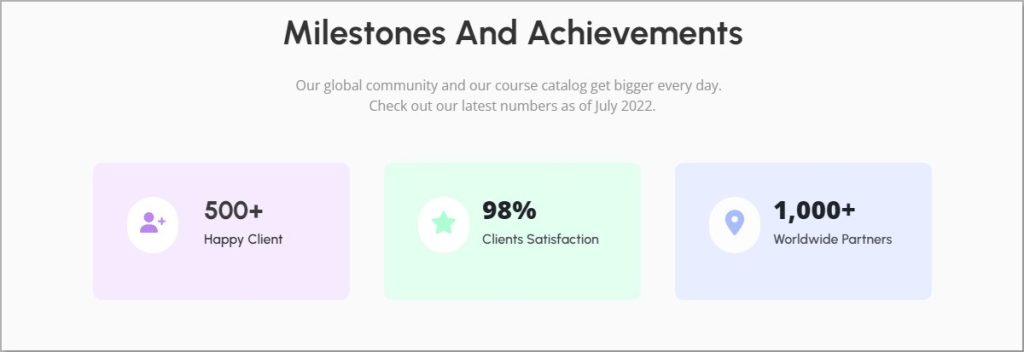
- Counter: A Counter section is like a digital scoreboard that shows numbers counting up. Use it to highlight achievements, milestones, or statistics like years in business, clients served, or projects completed. It adds a dynamic, engaging element that draws attention to your most impressive numbers.
- Slider: Build an animated, multi-slide hero section that showcases your key messages, products, or services in a visually engaging rotating format.
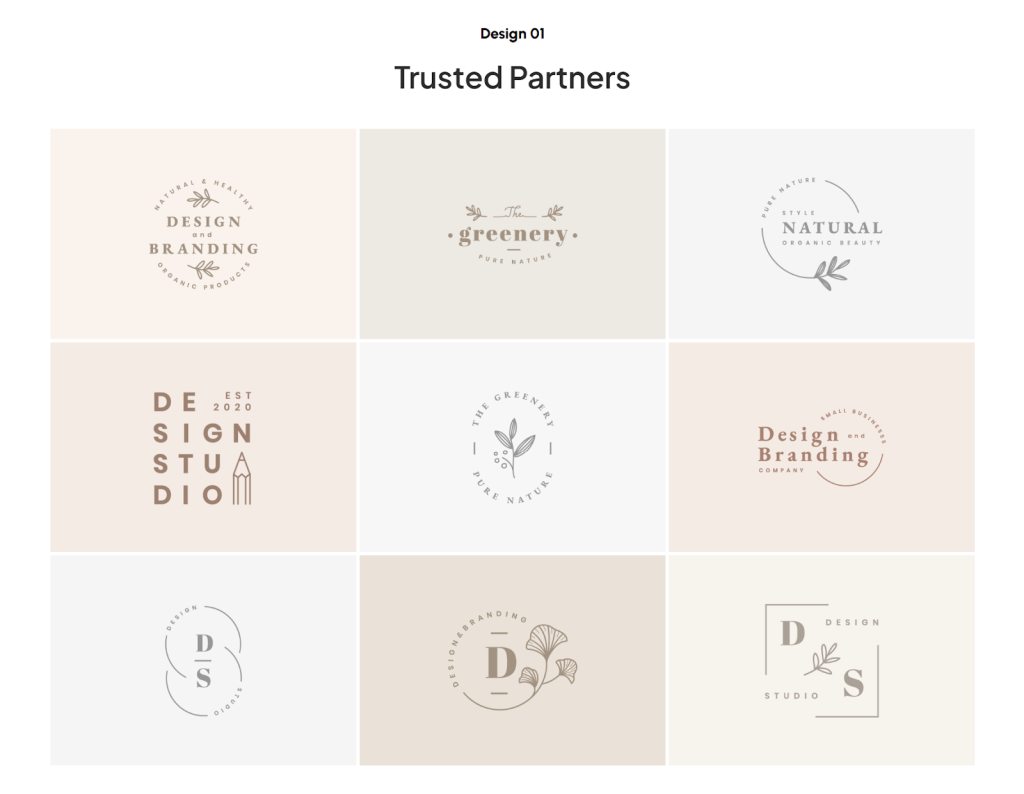
- Brand Grid: The Brand Grid section is like a gallery where you can display client logos or partner brands all in one place. Showing recognizable names your business is associated with builds credibility and trust at a glance.
- Review Carousel: The Review Carousel cycles through customer testimonials, displaying names, photos, ratings, and feedback. It is a powerful way to highlight positive experiences and bolster confidence in your brand among first-time visitors.

- Marquee: Create a scrolling text or image marquee for announcements, promotions, or client logo tickers. It grabs attention with dynamic, eye-catching movement that draws the eye without disrupting page flow.
About Page
The About page is where trust gets built. Share your story, your team, and your mission. Real photos perform far better than stock images here. People want to see who is behind the business.
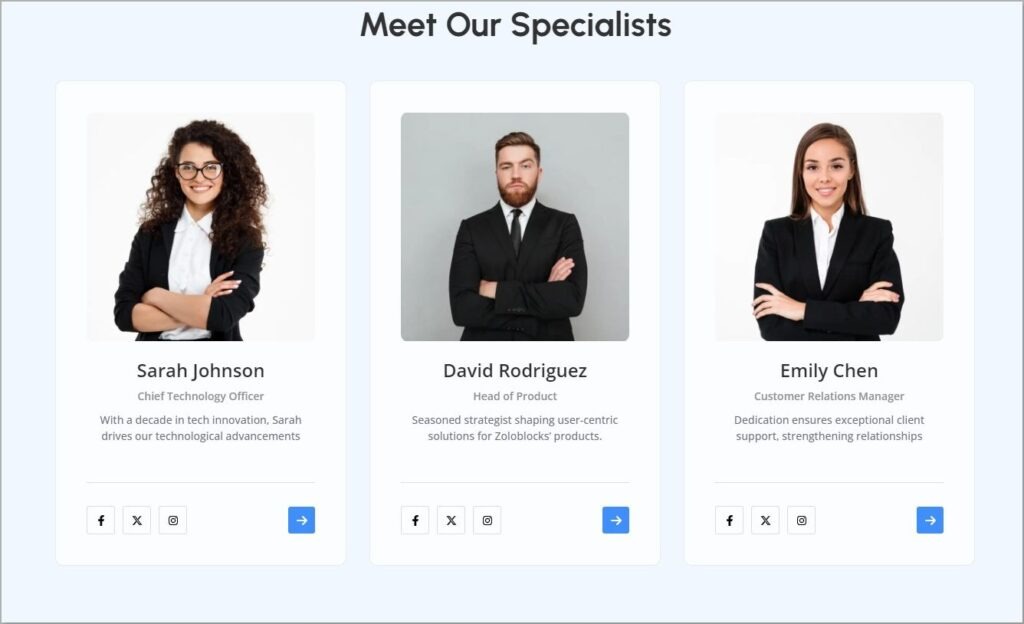
- Team Grid: The Team Grid is a neat arrangement of pictures and short descriptions of each team member. It puts a human face on your business, making it easier for visitors to connect and build trust before they ever contact you.
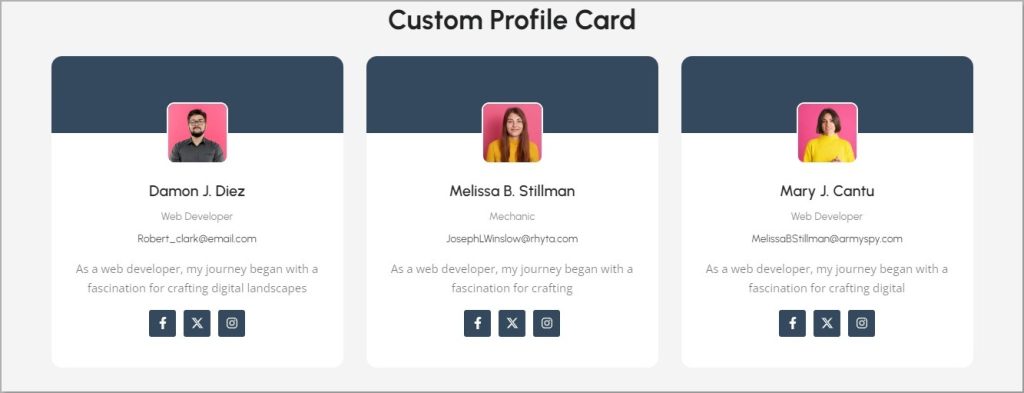
- Profile Card: Profile Cards are small cards with pictures and short details about individuals. Perfect for spotlighting a founder, key contributor, or featured team member with just enough detail to make a strong impression.
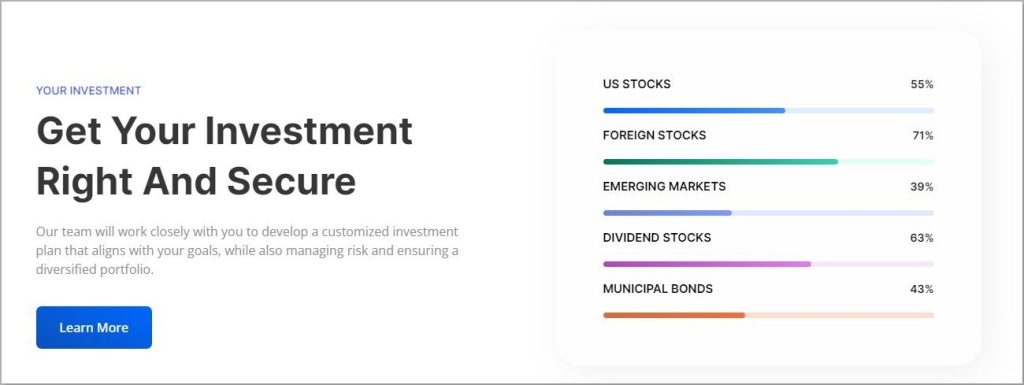
- Progress Bar: A Progress Bar is a visual indicator that lets visitors know specific data at a glance. Use it to represent areas of expertise, skill levels, or company milestones in a format that is more engaging than a plain text list.
Services or Products Page
This is where visitors decide whether to engage with you. Be specific about what you offer, who it is for, and what the outcome is. If you have multiple offerings, consider a separate page for each to improve both clarity and SEO.
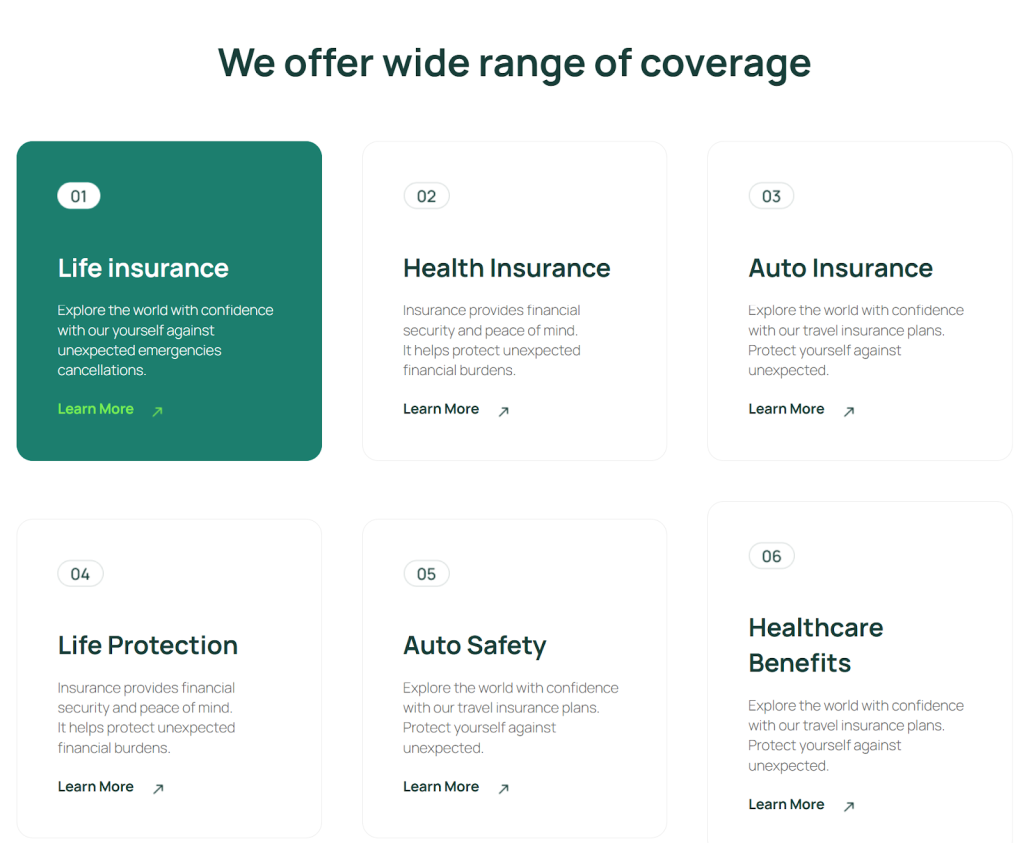
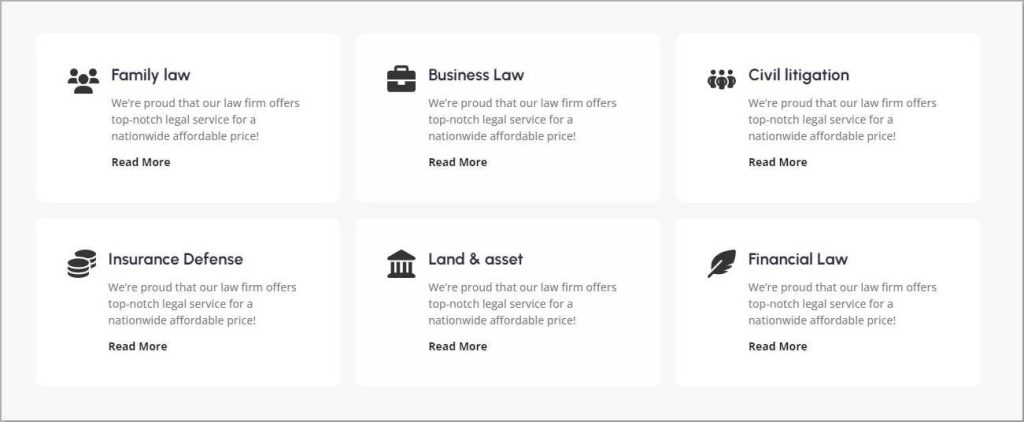
- Advanced Icon Box: The Advanced Icon Box lets you design a section with an icon, description, and button. It is specifically used to present service features, key benefits, or short notes in a clean, scannable grid that communicates value quickly.
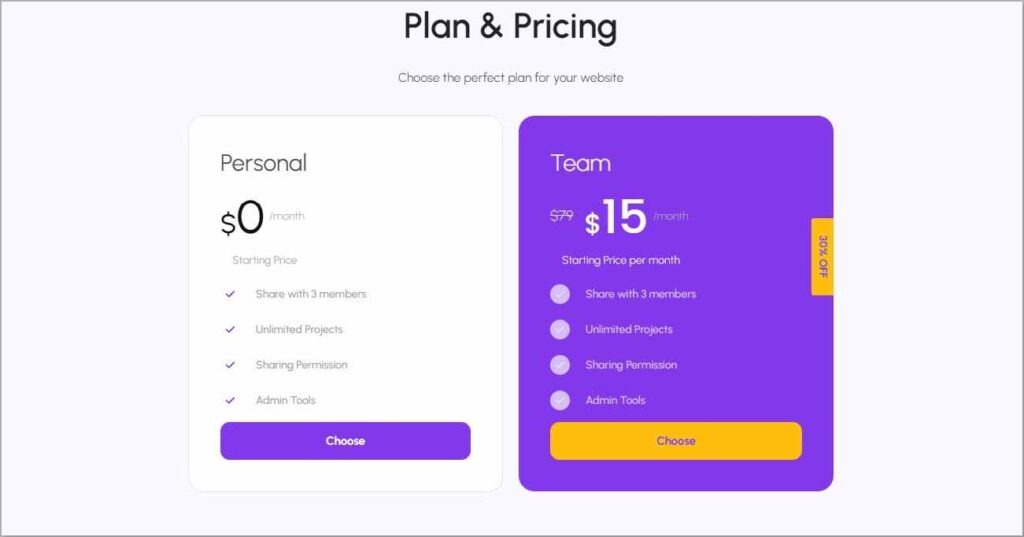
- Pricing Table: The Pricing Table shows pricing plans for any software or service in a clear tier comparison format. It helps visitors understand exactly what features or services they get at each price point, removing hesitation from the buying decision.
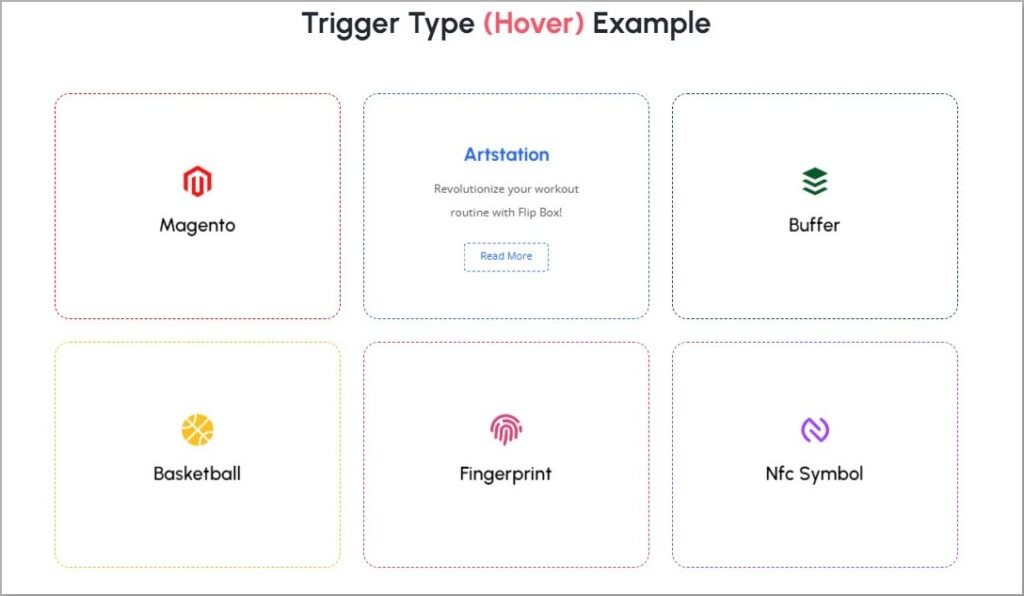
- Flip Box: A Flip Box is like a digital card that reveals different content on each side when hovered. Show a service teaser on the front and full details on the back, adding interactivity and depth without cluttering the page.
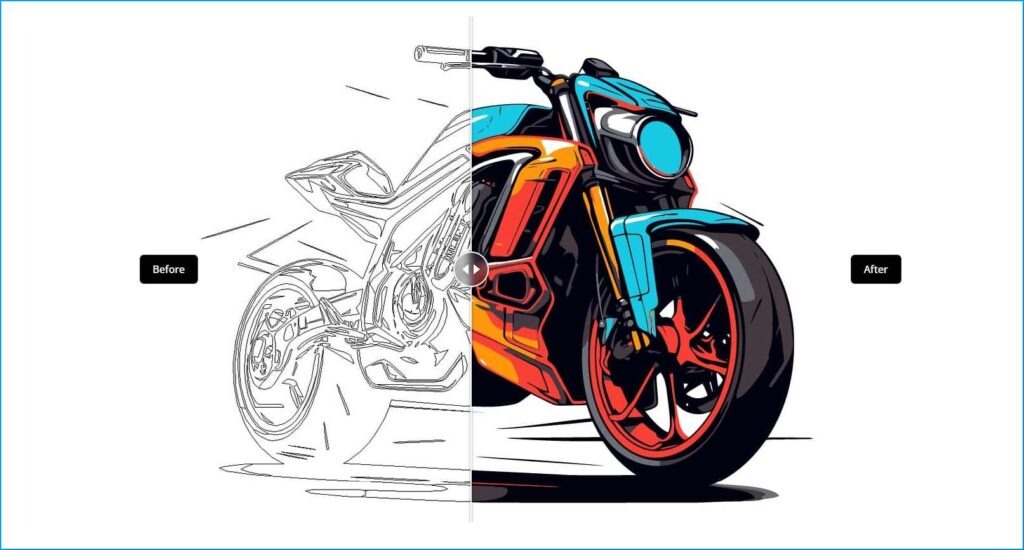
- Image Compare: Image Compare lets users interactively slide between two images to see changes over time or before-and-after results. It is highly effective for product demonstrations, renovation showcases, or design transformations.
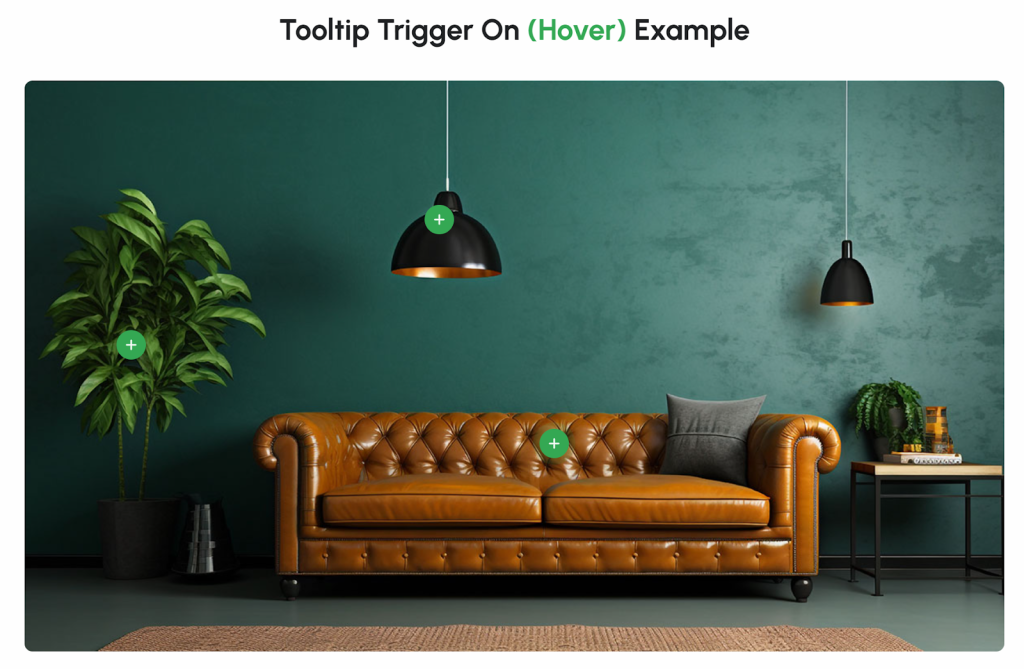
- Image Hotspot: Add interactive hotspot labels directly onto product or service images. Visitors can click or hover to reveal details about specific features, turning a static photo into an informative, engaging experience.
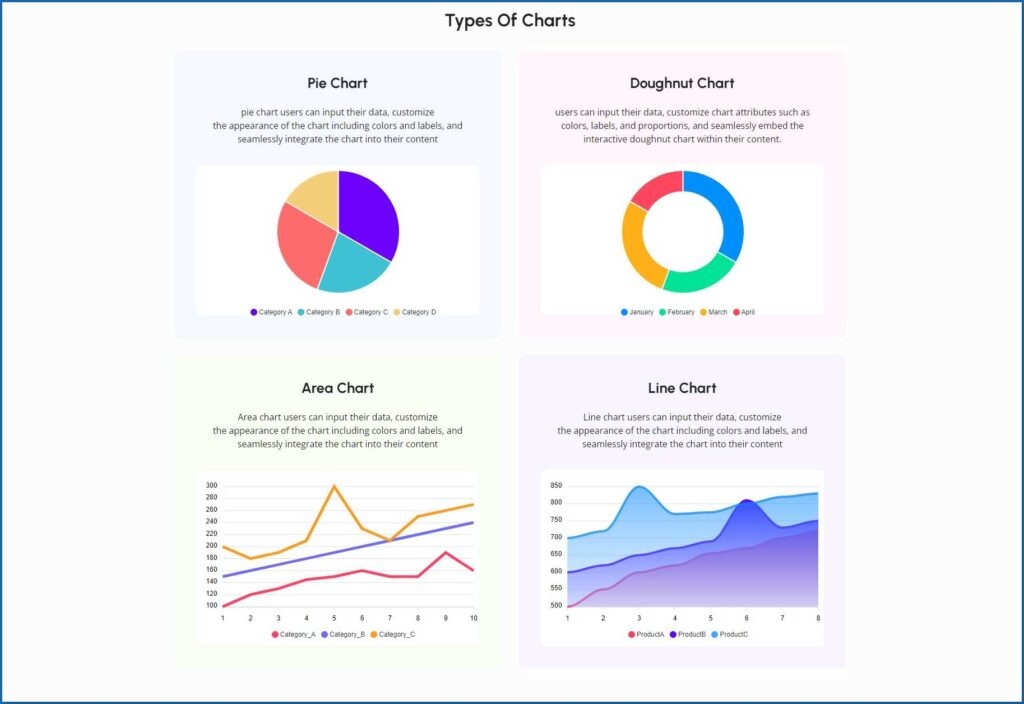
- Charts: Charts offer an easy and engaging way to visualize data with bar, line, pie, and area options. Use them to present performance statistics, market comparisons, or results data in a format that is far more compelling than a plain text list.
Contact Page
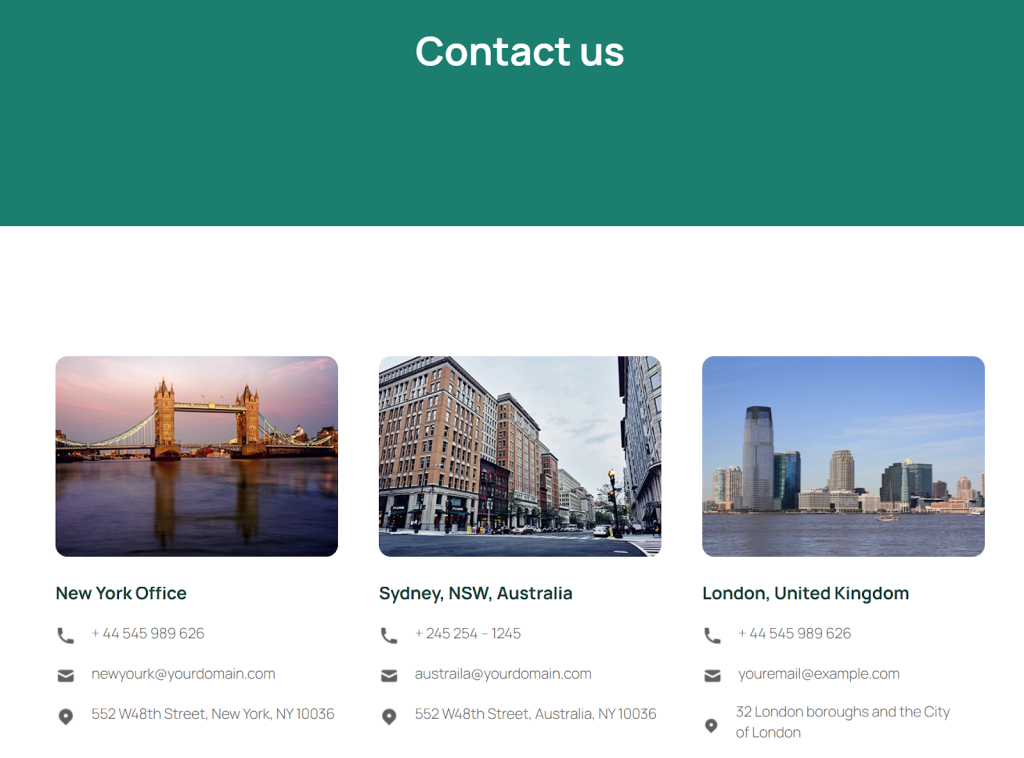
The Contact page should make it as easy as possible for people to reach you. A simple form, phone number, address, and a map embed are all you need.
Removing friction from this page directly increases the number of inquiries your business receives.
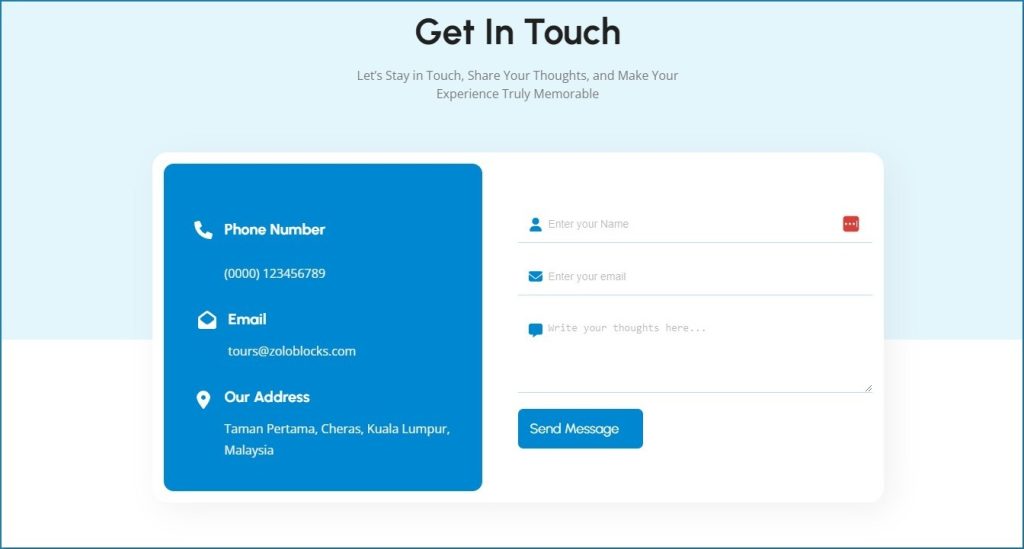
- Form Builder: The ZoloBlocks Form Builder simplifies creating interactive contact forms directly in the Gutenberg editor. Whether you need a basic contact form or a more detailed inquiry form, it lets you gather valuable information from visitors without installing a separate form plugin.
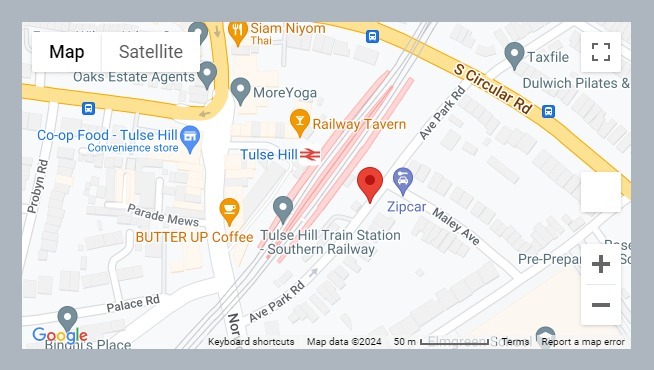
- Google Map: A Google Map embedded on your Contact page helps visitors locate your business instantly. They can get directions, check your exact address, and see surrounding landmarks, removing any friction from finding you in person.
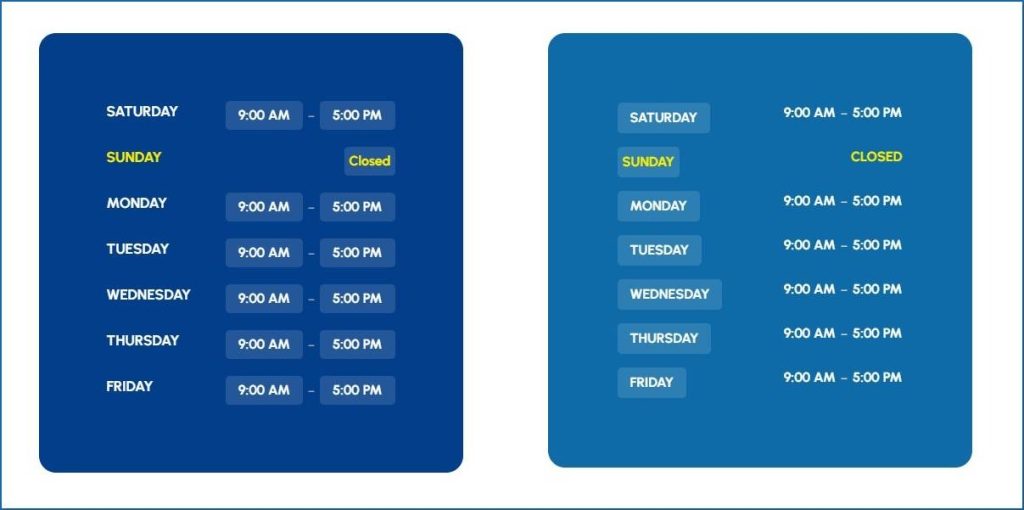
- Business Hours: The Business Hours block makes it simple to display your opening schedule in a clean, professional format. Visitors immediately know when they can reach you, which reduces unnecessary contact form submissions asking basic availability questions.
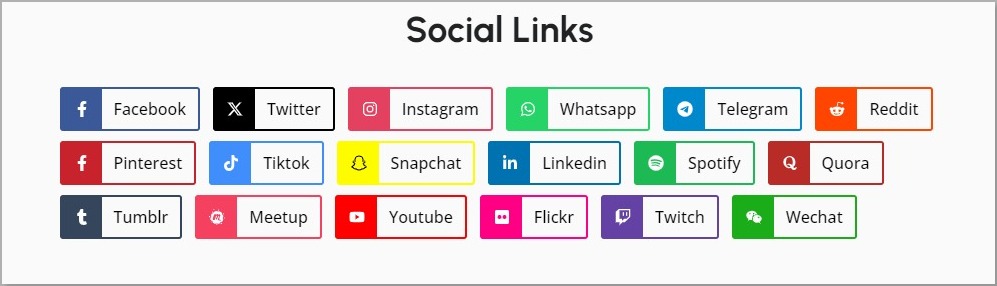
- Social Links: The Social Links section displays icons for your social media profiles. Adding these to your Contact page gives visitors alternative ways to reach or follow you, and reinforces your brand’s online presence beyond the website itself.
Across all pages, keep your navigation simple. A top menu with five or fewer items is ideal.
Too many choices overwhelm visitors and increase bounce rates. For complex sites, the Mega Menu block lets you build structured, multi-column dropdown navigation with icons directly in Gutenberg.
Adding Navigation Menus
Good navigation helps visitors find what they need quickly. WordPress makes it easy to create menus:
- Go to Appearance → Menus in the dashboard.

- Give a name to your Menu and click on Create Menu.
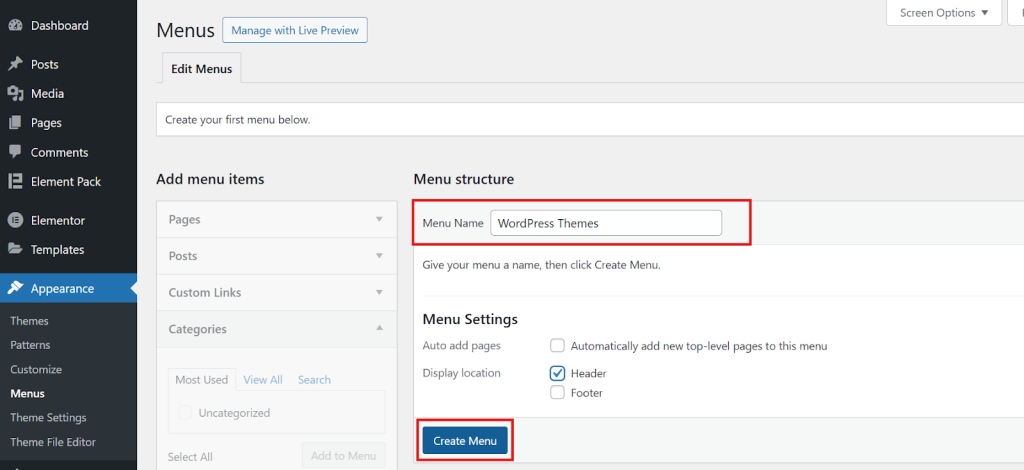
- Select the pages, posts, and categories you want to include.
- Arrange the menu items using drag-and-drop.
- Assign the menu to your preferred location (header, footer, or sidebar) and save.
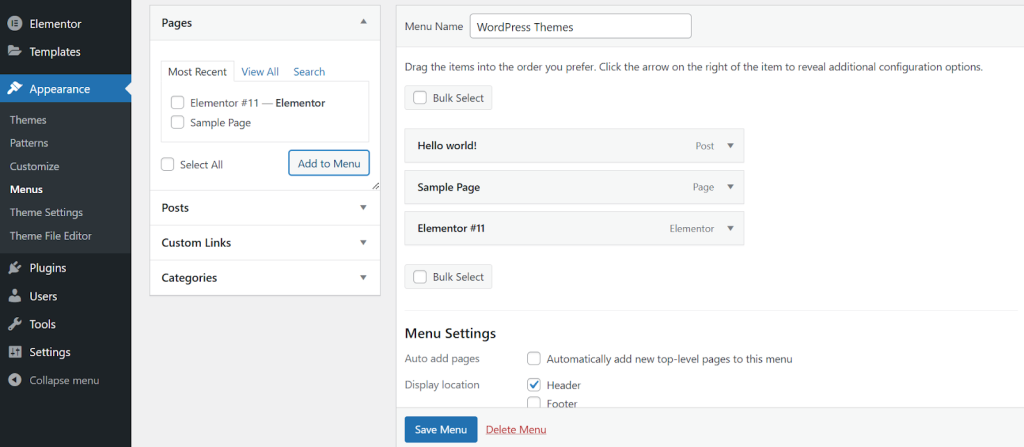
A well-structured menu improves user experience and helps search engines crawl your site more effectively.
Editing or Adding Important Pages in Your Website
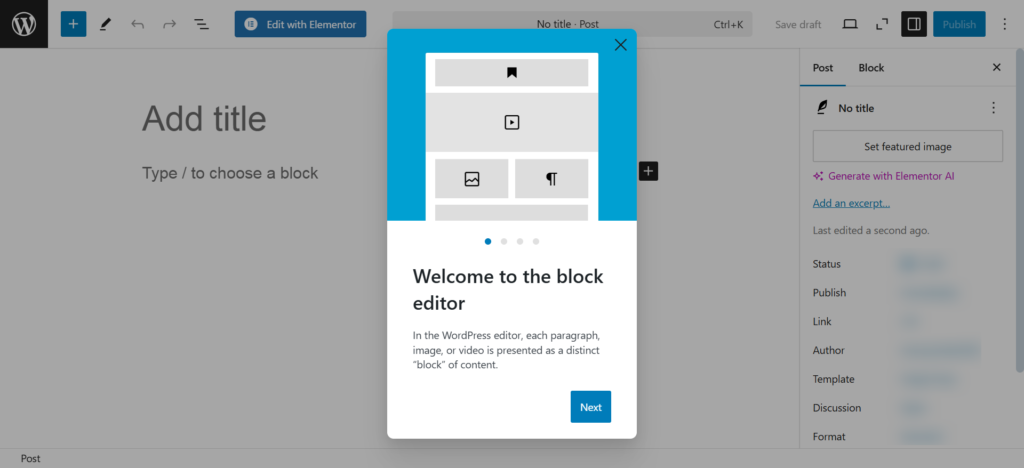
By default, Gutenberg is the standard editor in WordPress. If you have a new WordPress installation (WordPress 5.0 or later), it is enabled automatically. To access it:
- Go to WordPress Dashboard → Posts → Add New Post.
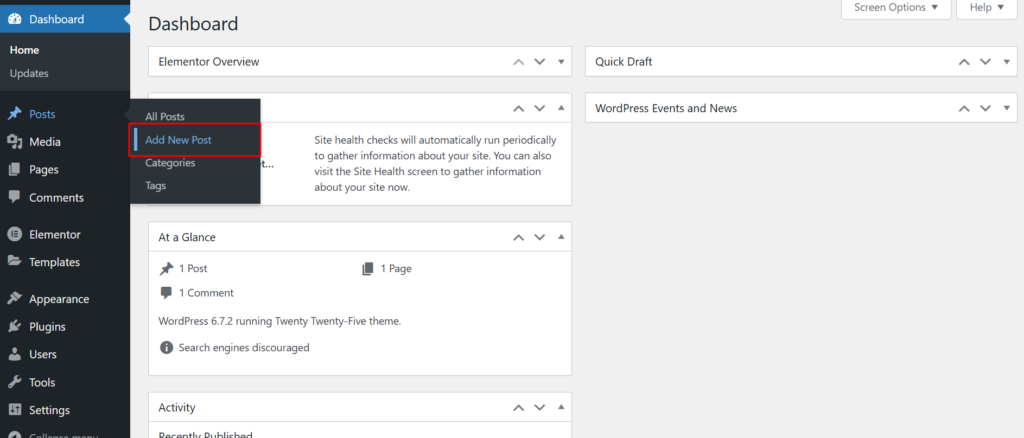
- The Gutenberg editor will open, displaying an empty canvas with a placeholder for the post title and the first block.
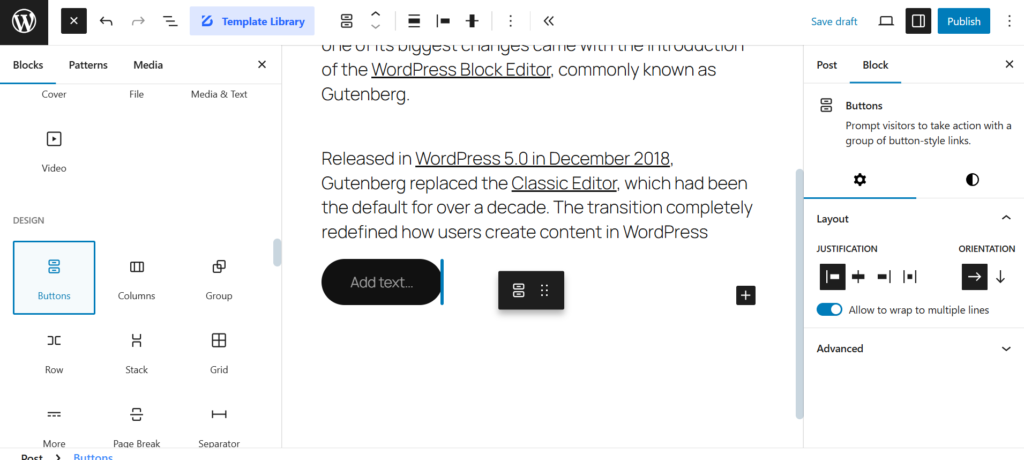
- Click the “+” button (top left or inline) to add a new block.
- Use the search bar to find specific blocks quickly.

- Drag and drop blocks directly into the content area.
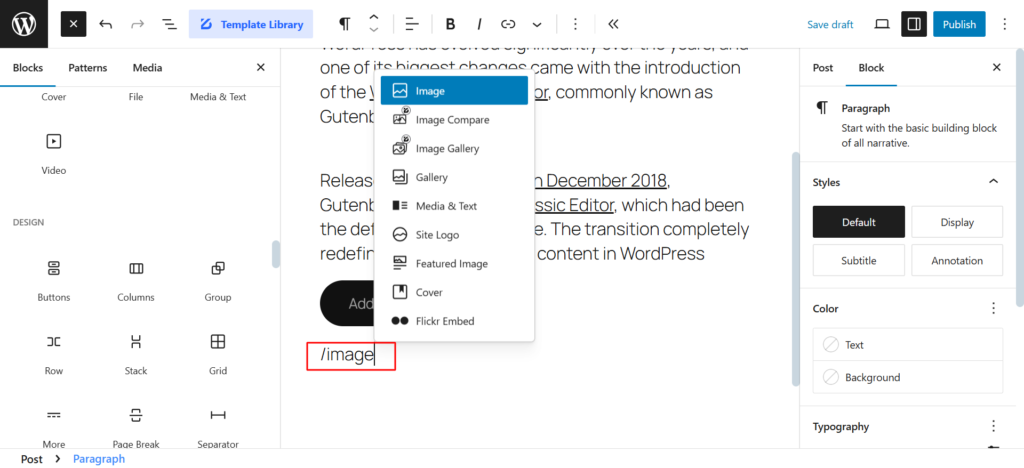
- Instead of clicking the “+” button, type “/” followed by a block name (e.g., /image) to insert blocks instantly.
- Use the ZoloBlocks plugin to unlock advanced layout blocks with animations, gradients, and custom effects.

Step 7: Adding Content to Your Website
Once your design is in place, it’s time to focus on adding content.
High-quality content engages visitors and improves SEO, helping your site rank higher in search results. When you build a website, content is the key to driving traffic and achieving your goals.
Creating Pages and Posts
WordPress organizes content into two main types: Pages and Posts.
- Pages: Used for static content like your Home, About, Services, and Contact pages.
- Posts: Ideal for blog articles, news updates, or any content published regularly.
How to Add a New Page:
- In your dashboard, go to Pages > Add New Page.
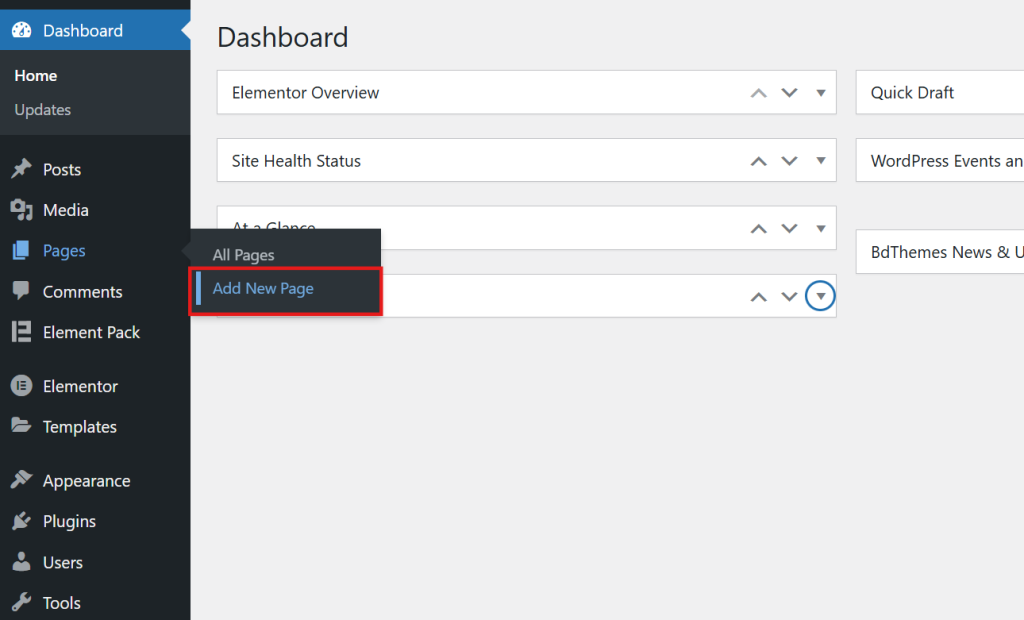
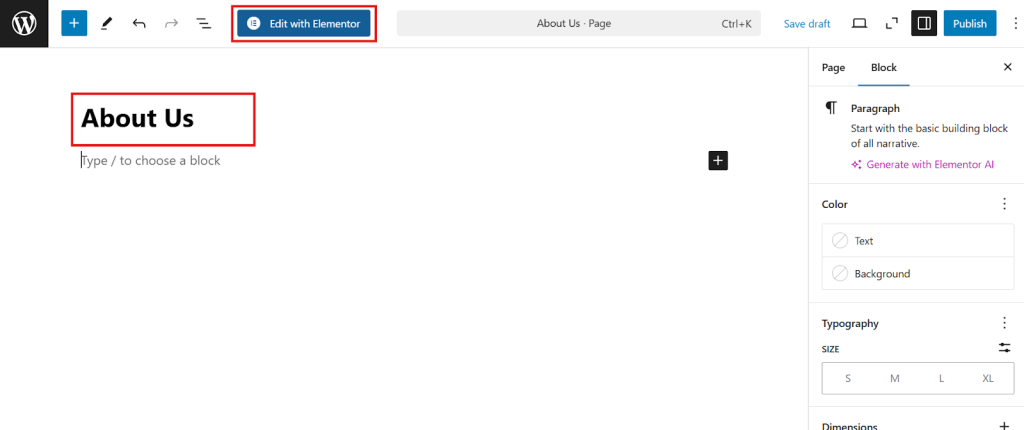
- Add a title (e.g., “About Us”) and use the WordPress editor or Elementor to design the layout.
- Click Publish when you’re ready.

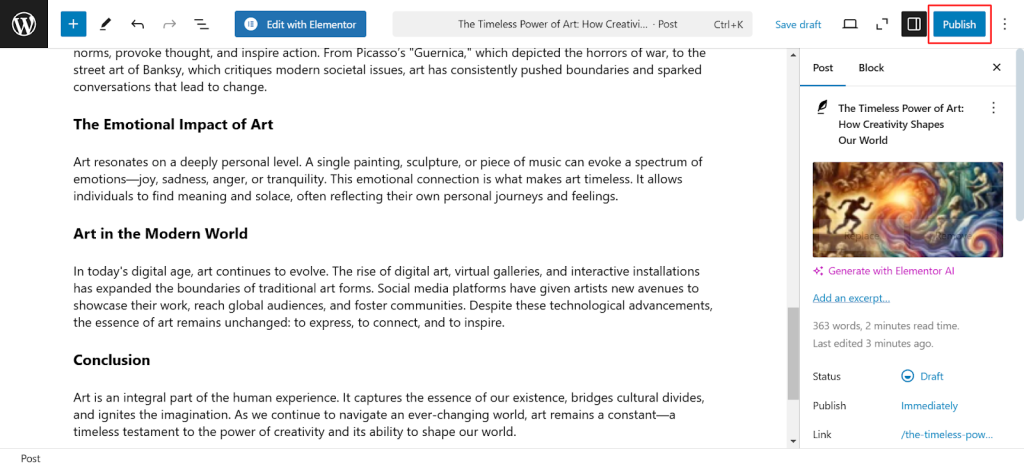
How to Add a New Post:
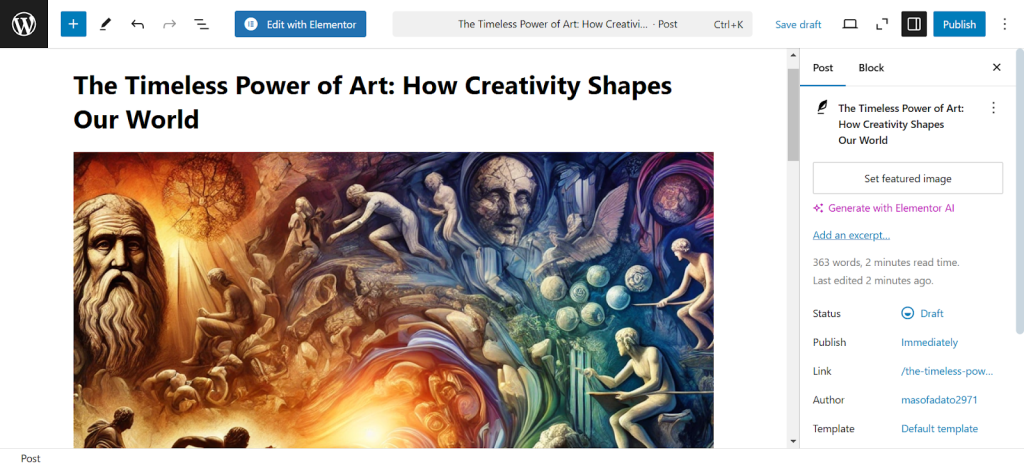
- Go to Posts > Add New Post.
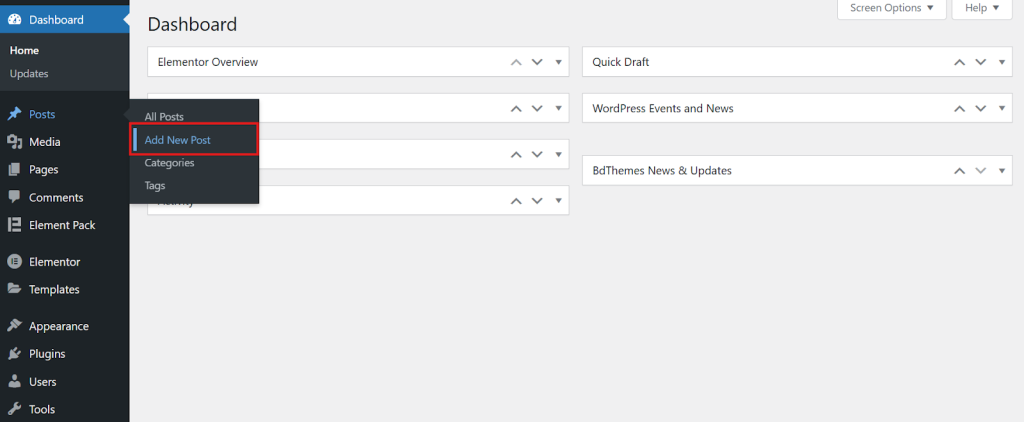
- Write your content, format it with headings and add images.
- Assign categories and tags to organize your content.
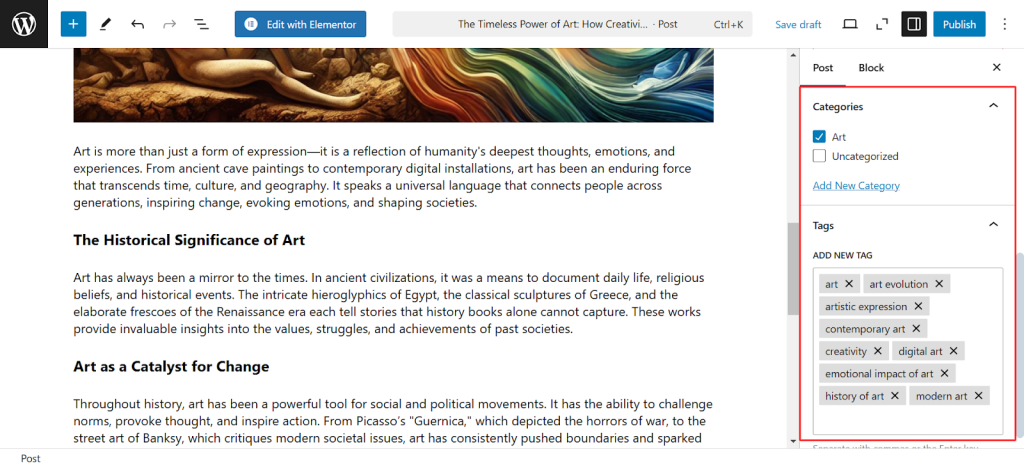
- Click Publish to make it live.
Organizing Content with Categories and Tags
Proper content organization improves user experience and SEO.
- Categories: Broad topics that group-relatedgroup related content (e.g., “Web Design,” “SEO Tips”).
- Tags: Specific keywords related to your post’s content (e.g., “WordPress website builder,” “responsive design”).
Organizing content effectively helps search engines understand your site structure, boosting your rankings.
Adding Media: Images, Videos, and More
Visual content makes your website more engaging. To add media:
- Go to Media > Add New Media File to upload images, videos, PDFs, etc.
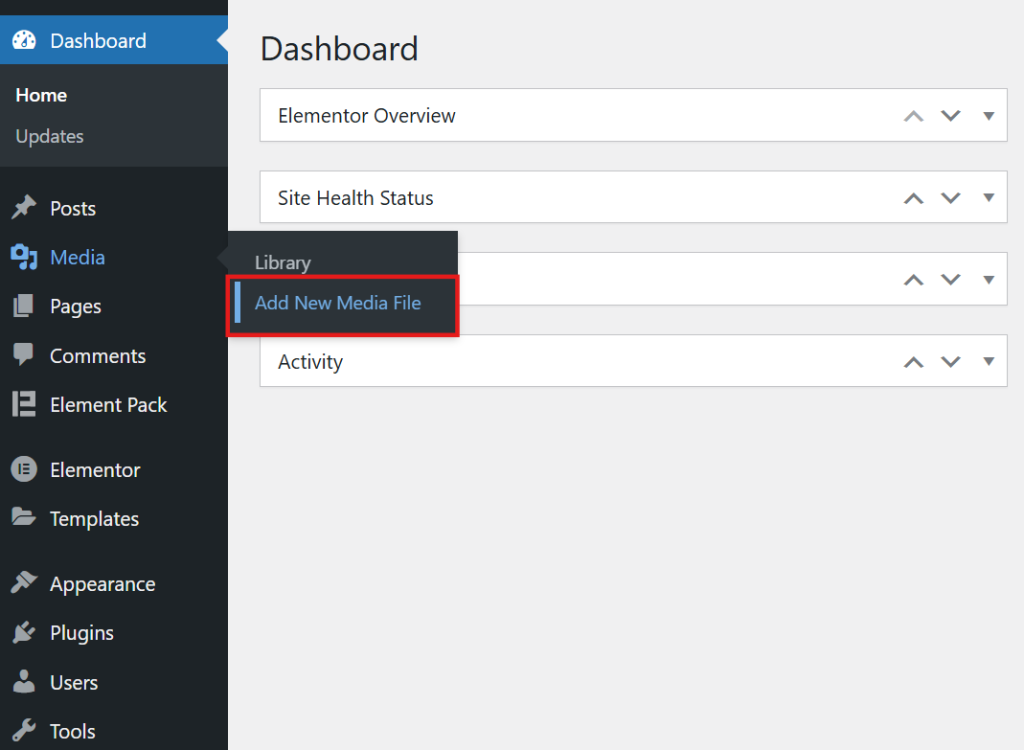
- Optimize images before uploading to improve site speed (recommended size: under 200 KB).

- Use descriptive file names (e.g., “wordpress-website-templates.jpg”) to help with SEO.
Best Practices for Content Creation
- Use Clear Headings: Break up content with headings (H1, H2, H3) to improve readability.
- Write for Your Audience: Keep the language simple, especially since you’re targeting beginners.
- Optimize for SEO: Use relevant keywords like “how to build website” naturally within your content.
- Regular Updates: Fresh content keeps your website relevant to both users and search engines.
Step 8: Optimizing Your Website for Performance
A fast, secure website offers a better user experience and helps improve search engine rankings. Optimization is essential, whether you’re looking to create a website for free or investing in premium tools.
Improving Website Speed
Website speed impacts both user satisfaction and SEO. Studies show that 53% of mobile users abandon a site if it takes more than 3 seconds to load.
Tips to Improve Speed:
- Choose a Fast Hosting Provider: A good host significantly impacts performance.
- Optimize Images: Compress images using tools like TinyPNG before uploading or you can use Sigma Media Manager to optimize your uploaded images..
- Use Caching Plugins: Plugins like WP Super Cache store static versions of your site, reducing load times.
- Minimize Plugins: Only install necessary plugins to avoid slowing down your site.
Element Pack is optimized for speed, so adding advanced design features won’t compromise performance.
Making Your Website Mobile-Friendly
With over 63% of global web traffic coming from mobile devices, responsive design is critical. WordPress themes and WordPress website templates from Element Pack are mobile-optimized by default, but you should still:
- Test Responsiveness: Use the mobile preview option in Elementor.
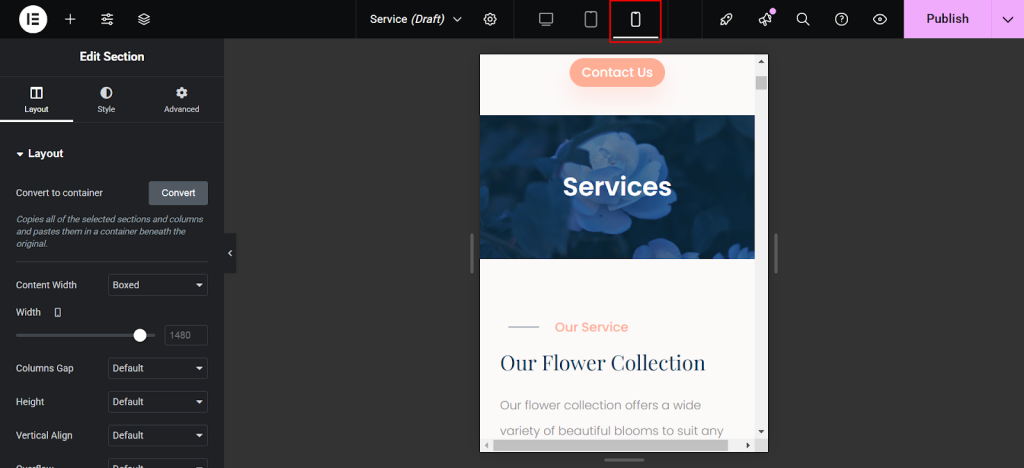
- Adjust Fonts and Spacing: Ensure text is readable on smaller screens.
- Optimize Buttons: Make sure buttons are large enough for easy tapping.
Search Engine Optimization (SEO) Basics
SEO helps your website rank higher on Google, driving organic traffic.
- On-Page SEO: Use keywords like “WordPress website design” in headings, meta descriptions, and image alt texts.
- Technical SEO: Ensure fast loading times, mobile-friendliness, and proper site structure.
- Content Strategy: Regularly publish high-quality, relevant content.
Recommended Plugins:
- Yoast SEO: Helps with keyword optimization and readability analysis.
- Element Pack Widgets: Add FAQ schemas and breadcrumbs to improve SEO.
Ensuring Website Security
Security is essential to protect your website from threats.
- Use Strong Passwords: Secure your admin accounts with complex passwords.
- Install Security Plugins: Wordfence offers firewall protection and malware scanning.
- Keep Everything Updated: Regularly update WordPress, themes, and plugins to patch vulnerabilities.
A secure, optimized website improves trust with visitors and reduces the risk of downtime or data breaches.
Step 9: Launching Your WordPress Website
After designing, adding content, and optimizing your site, it’s time to go live. Launching a website involves final checks to ensure everything is ready for visitors.
Pre-Launch Checklist
Before you officially launch your website, review the following:
- Proofread Content: Check for spelling, grammar, and formatting issues.
- Test All Links: Ensure all internal and external links work correctly.
- Cross-Browser Compatibility: Test your site on browsers like Chrome, Firefox, and Safari.
- Mobile Responsiveness: Confirm that your design looks great on smartphones and tablets.
- Page Speed Test: Use tools like Google PageSpeed Insights to identify performance issues.
- SEO Review: Double-check metadata, headings, and keyword usage (e.g., “how to build WordPress website”).
- Backup Your Site: Use a plugin like UpdraftPlus to create a backup before launch.
Going Live
Once the pre-launch checklist is complete:
- Remove Coming Soon Mode: If you used a maintenance plugin, deactivate it.
- Submit to Search Engines: Use Google Search Console to submit your sitemap, helping Google index your site faster.
- Announce Your Launch: Share the news on social media, email newsletters, or with your network.
Post-Launch Considerations
Launching is just the beginning. After your website goes live:
- Monitor Website Performance: Use Google Analytics to track traffic and user behavior.
- Check for Errors: Regularly inspect for broken links, slow pages, or security warnings.
- Gather Feedback: Ask friends, colleagues, or early visitors for feedback on usability and design.
How Much Does It Cost to Create a Website?
One of the most common questions from small business owners is how much it actually costs to build a website. The answer depends on how much you do yourself and what tools you choose. Here is a realistic breakdown for 2026.
Domain Name
A standard .com domain costs between $10 and $20 per year at most major registrars. Premium or keyword-rich domains can cost significantly more, but for most small businesses, a straightforward branded domain in this range is perfectly sufficient.
Many hosting plans include the first year’s domain for free.
Web Hosting
Shared hosting plans start as low as $2 to $10 per month and are more than adequate for most new business sites.
Managed WordPress hosting, which handles technical maintenance for you, typically runs $7 to $30 per month. Cloud hosting plans for higher-traffic sites start at around $8 to $30 per month depending on resources.
Theme and Plugin Costs
WordPress itself is free.
Premium themes generally cost between $30 and $200 as a one-time purchase.
Most essential plugins have free tiers that are sufficient for basic needs, though premium versions of SEO, performance, and form plugins can add $50 to $300 per year in total.
Optional Development Costs
If you want professional help with setup, customization, or specific features, freelance WordPress developers charge between $50 and $150 per hour.
A simple five-page business site built by a freelancer typically falls in the $1,500 to $8,000 range, depending on complexity and the developer’s experience.
Budget vs. Premium Setup Comparison
A budget DIY setup, domain + shared hosting + free theme + free plugins, can get you online for as little as $50 to $150 per year.
A mid-range setup with premium theme, a few paid plugins, and managed hosting runs roughly $300 to $800 per year.
A professionally designed site with custom development ranges from $3,000 to $15,000+ as a one-time cost, plus ongoing hosting and maintenance.
Best Tools to Create a Website in 2026
Choosing the right combination of tools makes the entire website-building process significantly smoother. Here is what the current landscape looks like.
WordPress
WordPress remains the most recommended platform for building a business website. It is free, open-source, endlessly customizable, and supported by the largest ecosystem of themes and plugins available anywhere. Its Gutenberg block editor has matured significantly in recent years, making it accessible to beginners while still powerful enough for advanced developers.
According to BdThemes’ analysis of Gutenberg builders, over 60% of new WordPress themes now rely on full-site editing via Gutenberg, marking a clear shift in how modern sites are built.
ZoloBlocks
For anyone building with WordPress and Gutenberg, ZoloBlocks is worth serious consideration.
It is a Gutenberg block plugin developed by BdThemes that brings 65+ advanced blocks, 300+ design patterns, and 100+ ready-made page templates to your editor. What sets it apart is its performance-first architecture: the plugin loads 0KB on pages where its blocks are not used, meaning it does not slow your site down.
The ZoloBlocks library includes complete page designs across business, portfolio, and ecommerce categories, all importable with a single click. Pricing starts at $49 per year for personal use, $69 for businesses with up to 10 sites, and $149 for agencies managing up to 1,000 sites.
Some of the most useful individual blocks for business sites include the Business Hours block for service businesses, the Google Map block for local presence, the Counter block for displaying impressive metrics, the Testimonials block for social proof, and the Pricing Table block for service packages. For content-heavy pages, advanced accordion blocks and tabs keep complex information organized and accessible.
Website Builders as Alternatives
For businesses that want the absolute simplest possible path to a website, hosted website builders like Wix, Squarespace, and Webflow are valid options. They handle hosting, security, and maintenance automatically, which reduces the technical overhead.
The trade-off is less flexibility, higher monthly costs over time, and generally weaker SEO capability compared to a well-optimized WordPress site.
Additional BdThemes Tools
BdThemes offers a broad suite of plugins that can enhance different aspects of a business website. For sites using Elementor as a page builder, Element Pack Pro provides 285+ widgets and thousands of templates.
For blogs and content sites, Ultimate Post Kit delivers advanced blogging layouts. For ecommerce stores built on WooCommerce, Ultimate Store Kit adds powerful product display and store management tools.
For managing media assets across a site, the Sigma Media Manager keeps your WordPress media library organized with folders, filters, and drag-and-drop functionality. And for sites that need accessible, inclusive experiences, One Accessibility makes WCAG 2.1, ADA, and Section 508 compliance straightforward without requiring custom development.
Final Thoughts
Building a business website in 2026 is genuinely accessible to anyone willing to invest a few hours of focused effort. The combination of WordPress, a capable theme, and a block plugin like ZoloBlocks puts professional-grade design tools within reach of any business owner, regardless of technical background.
The biggest mistake most beginners make is waiting until everything is perfect. Start with the core pages, get the site live, and then continue improving it over time.
Focus on usability and simplicity first. Make it easy for visitors to understand what you do and how to contact you. Then, as your business grows, your website can grow with it, adding new features, more content, and deeper integrations as the need arises.
Your online presence is one of the most valuable long-term investments you can make in your business. The sooner you start, the sooner it starts working for you.
Frequently Asked Questions
How can I make a website for free?
You can create a basic website for free using platforms like WordPress.com (free tier), Wix, or Weebly, all of which offer free plans with subdomain branding (e.g., yourbusiness.wordpress.com). For a more professional setup, you will need to pay for a domain name (around $10 to $20 per year) and hosting.
Do I need coding skills to build a website?
No, you do not. Modern platforms like WordPress, combined with visual editors and block plugins, handle all the technical side for you. Tools like ZoloBlocks let you build complex, beautiful layouts by clicking and customizing, with no code required.
What is the best platform to create a website?
For most small businesses, WordPress is the best choice because of its flexibility, scalability, SEO advantages, and enormous plugin ecosystem. Website builders like Wix and Squarespace are good for very simple sites or users who want zero technical involvement.
How much does it cost to create a website?
A DIY WordPress website can cost as little as $50 to $150 per year for domain and hosting, with free themes and plugins. A mid-range setup with premium tools runs $300 to $800 per year. A professionally built site ranges from $3,000 to $15,000+ as a one-time project cost, plus ongoing hosting and maintenance.
Can I create a website using WordPress?
Yes, WordPress is one of the most popular and capable platforms for building any type of business website. You will need a domain name, web hosting, and then a one-click WordPress installation from your host’s dashboard. From there, you choose a theme, install your preferred plugins, and build your pages using the block editor.
How do I make my website SEO-friendly?
Start by installing an SEO plugin like Yoast SEO or Rank Math. Then focus on the basics: write clear page titles and meta descriptions, use proper heading structure (H1, H2, H3), include keywords naturally in your content, optimize image alt text, ensure your site loads quickly, and build internal links between related pages. Google Search Console is a free tool that helps you monitor your site’s search performance and identify areas for improvement.