Want to customize your WordPress site with a header and footer, but not sure how? Your header and footer are key for branding and navigation. The good news? You can easily add them without any coding.
In this quick guide, we’ll show you step-by-step how to add header and footer in WordPress.
Let’s get started!
What Is Header In A Website?
In a website, the Header is the top section of a webpage. It mainly holds elements such as the website’s logo, navigation menu, search bar, contact information, and sometimes social media icons or other relevant links.
The header is mostly used to provide users with easy access to important navigation elements and pages. It serves as a sort of roadmap for users, helping them quickly find what they’re looking for and understand where they are within the site’s structure.
How To Add Header With Gutenberg?
Adding a header using only Gutenberg, the modern WordPress editor, is a straightforward process. It allows flexible customization without the need for additional plugins or coding. Here are the steps to add a header using Gutenberg.
Step 01. Access Gutenberg Editor
To begin, log in to your WordPress dashboard and navigate to the page or post where you want to add the header. To add a header to a new page click on “Add New Page” on top. To add a header to an existing page, click on “Edit” to enter the Gutenberg editor interface.
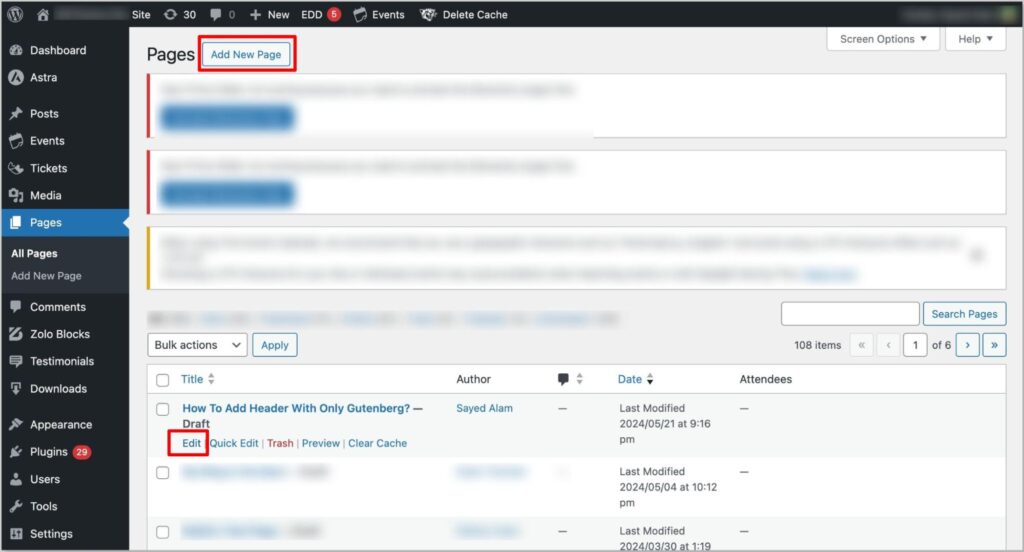
Step 02. Create a New Block
Once inside the Gutenberg editor, position your cursor at the beginning of the page or post content where you want the header to appear. Click on the “+” icon to add a new block.

Step 03. Select Header Block
In the block inserter menu, search for “Header” or scroll through the available block options until you find different header blocks. Click on any of them to insert the header block into your page.
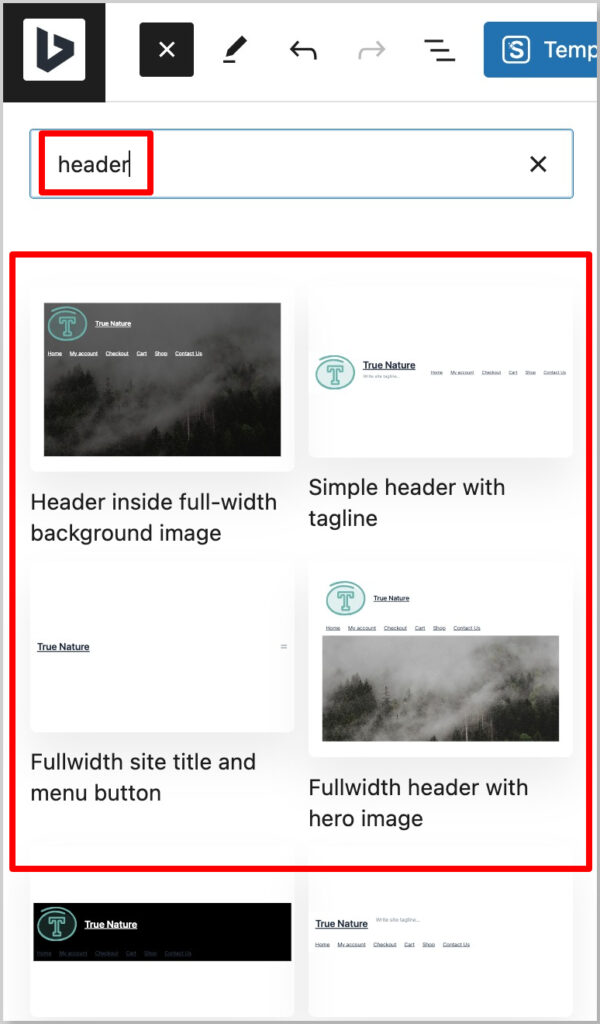
Step 04. Customize Header Content
Once the header block is added, you can customize its content according to your preferences. This may include adding text, images, buttons, or other elements to create the desired header design. Use the block settings and formatting options to adjust the appearance and layout of the header content.
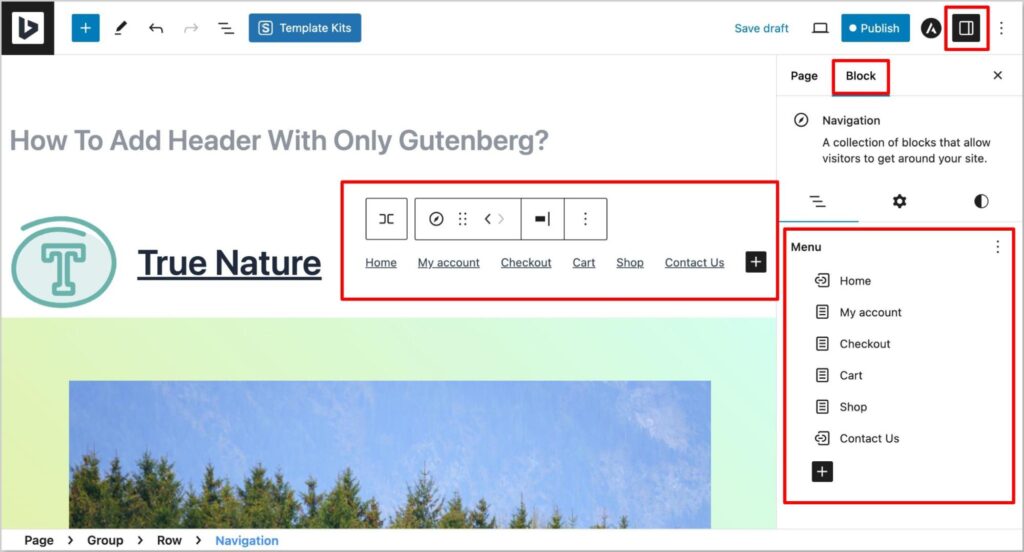
Step 05. Preview and Publish
After customizing the header content and settings, preview the page or post to see how the header appears in context. Make any necessary adjustments to ensure it looks as desired. Once satisfied, click on the “Publish” or “Update” button to save your changes and make the header live on your website.
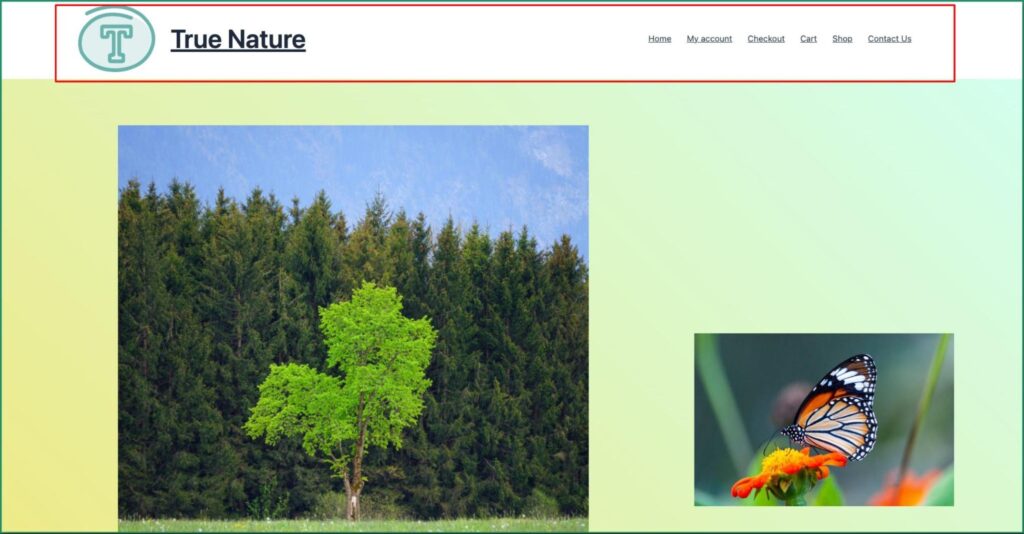
What Is Footer In A Website?
A footer in a website is the section located at the bottom of a webpage. It typically contains important information such as copyright notices, contact details, links to privacy policies, terms of service, and other legal information.
Additionally, footers often include links to various sections of the website, such as the homepage, about page, or frequently asked questions. In essence, the footer serves as a navigational aid and a repository for essential site-wide information. This enhances user experience and ensures compliance with legal requirements.
How To Add Footer With Gutenberg?
Here’s a step-by-step guide on how to add a footer to your WordPress website using the Gutenberg (Block Editor):
Step 01. Login To WordPress Dashboard
Login to your WordPress admin area. Navigate to yourwebsite.com/wp-admin and enter your login credentials.
Step 02. Access Gutenberg Editor
Go to “Add New Page” on top to add a footer to a new page. To add a footer to the existing page, click on “Edit” to enter the Gutenberg editor interface.
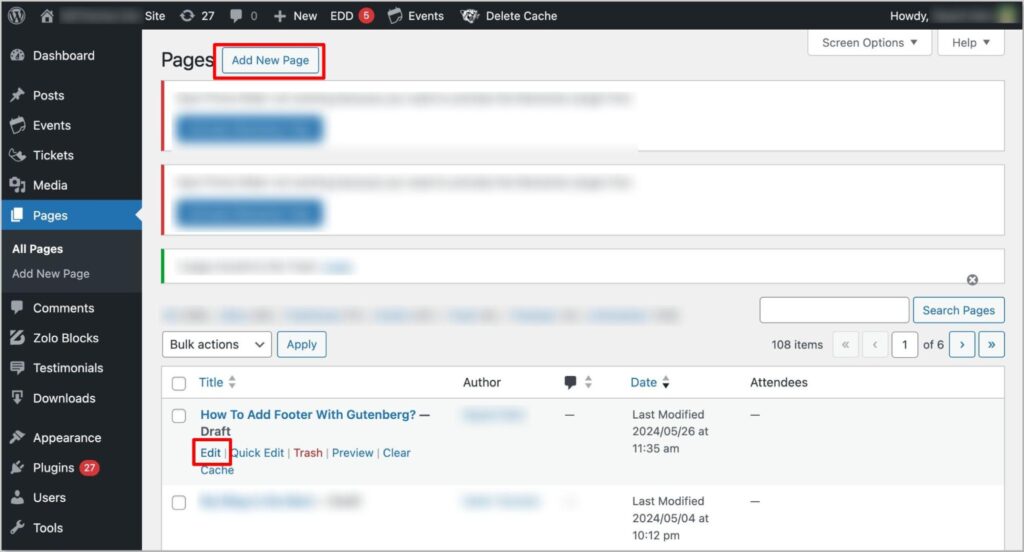
Step 03. Select Footer Block
In the block inserter menu, search for “Footer” or scroll through the available block options until you find different footer blocks. Click on any of it to insert the footer block into your page.
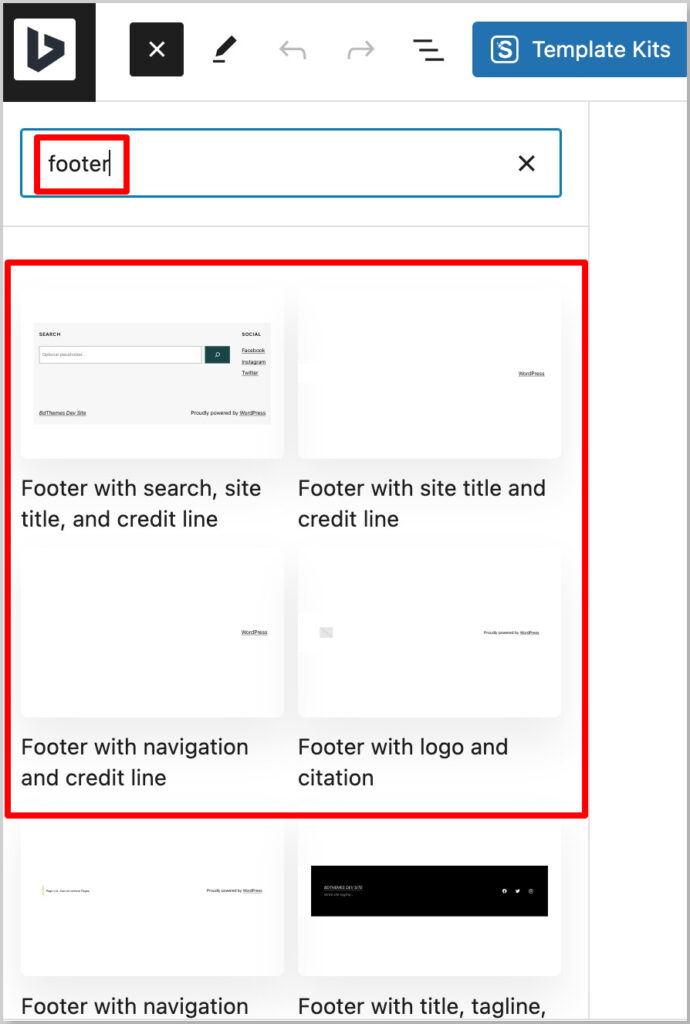
Step 04. Customize Footer Content
Once the footer block is added, you can customize its content according to your preferences. This may include adding Home, Contact, Blog, Search, etc. other elements to create the desired footer design.
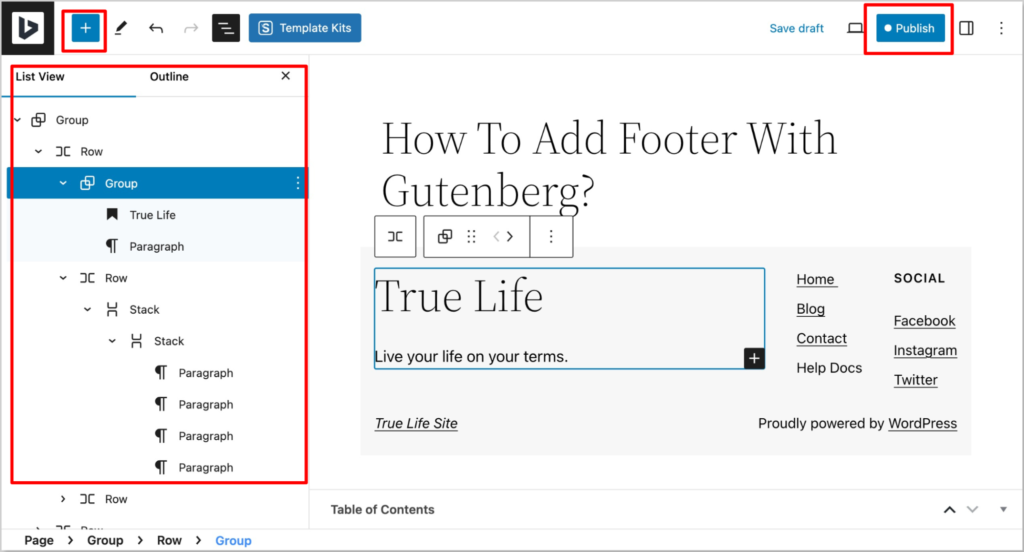
Step 05. Save and Publish
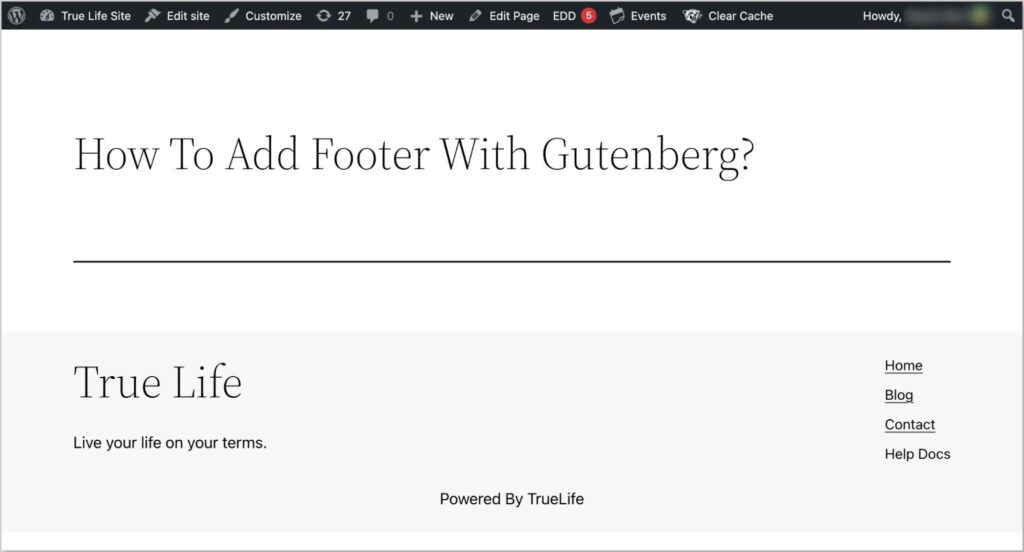
Once you are satisfied with the footer design, click on “Publish” or “Update” to save your changes.
How To Add A Heading With ZoloBlocks?
If you want to design your website with a stylish, different, and uncommon heading, you can install the ZoloBlocks plugin. To be clear, ZoloBlocks will style up your website dynamically with less hassle. The heading is not the header of the website. It is the first bold text you see on any website.

Step 01. Install and Activate ZoloBlocks Plugin
To begin, you need to install and activate the ZoloBlocks plugin on your WordPress website. Navigate to the “Plugins” section in your WordPress dashboard, click on “Add New”, then search for “ZoloBlocks”. Once you find the plugin, click on “Install Now”, and Activate it. You can get ZoloBlocks from here too. For more details, you can check ZoloBlocks – A Revolutionary Plugin For Gutenberg.
Step 02. Add Heading
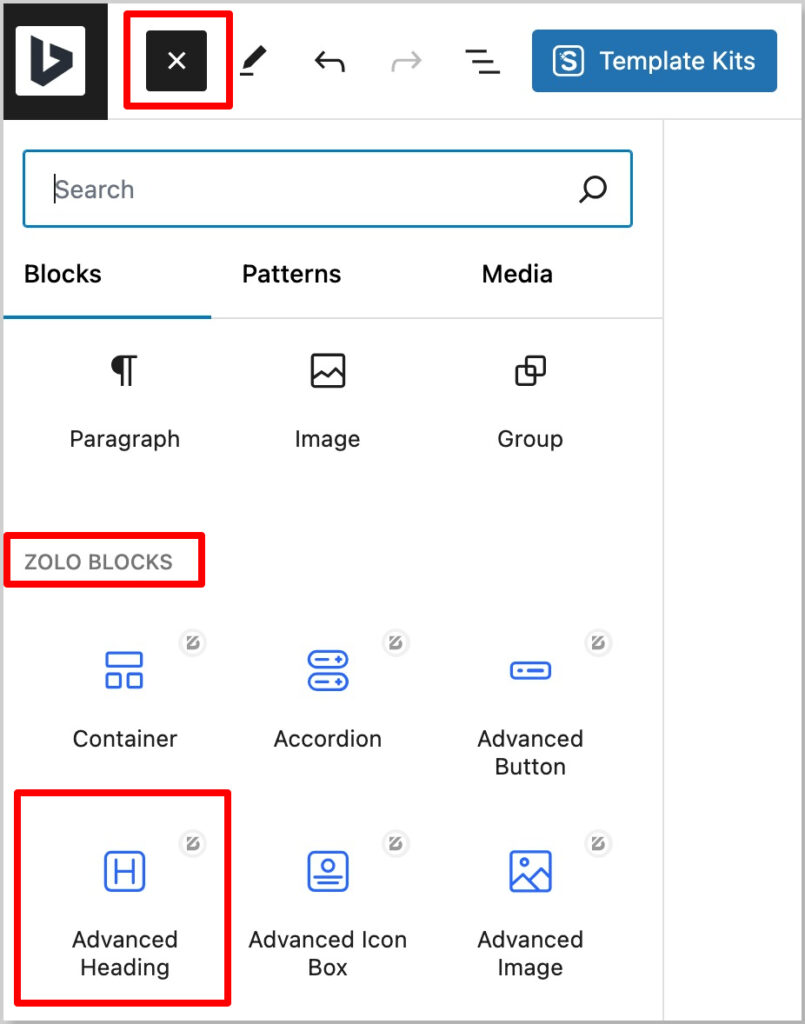
Once your installation is complete and you activate ZoloBlocks, it will appear in your WordPress Editor. Now add Advanced Heading under the ZoloBlocks section.
Step 03. Customize Heading
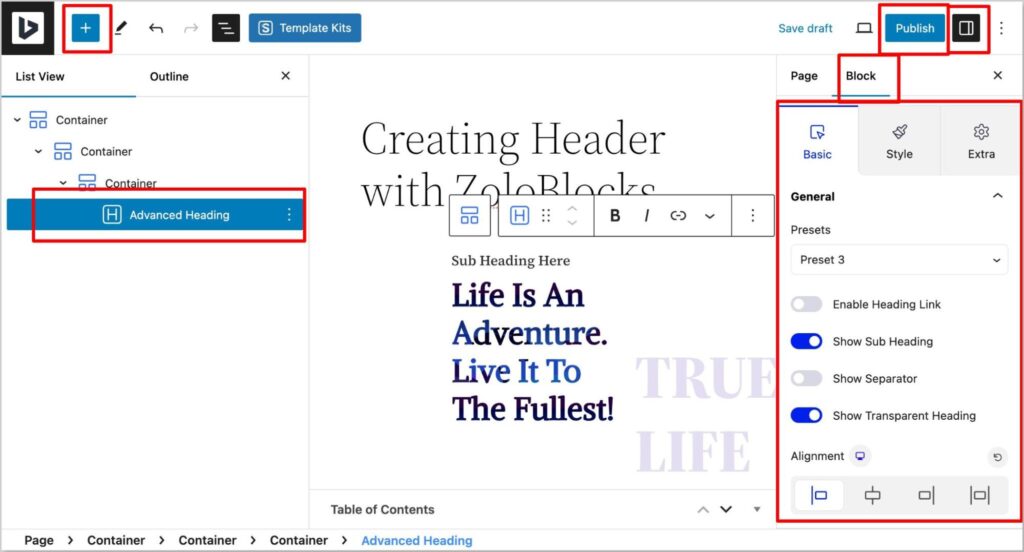
After adding the Advanced Heading block, it’s time to customize. Design as you wish. In the top right corner, you will find the option to edit the block. You can use the presets as they are or change and customize them in your own way.
Step 04. Publish
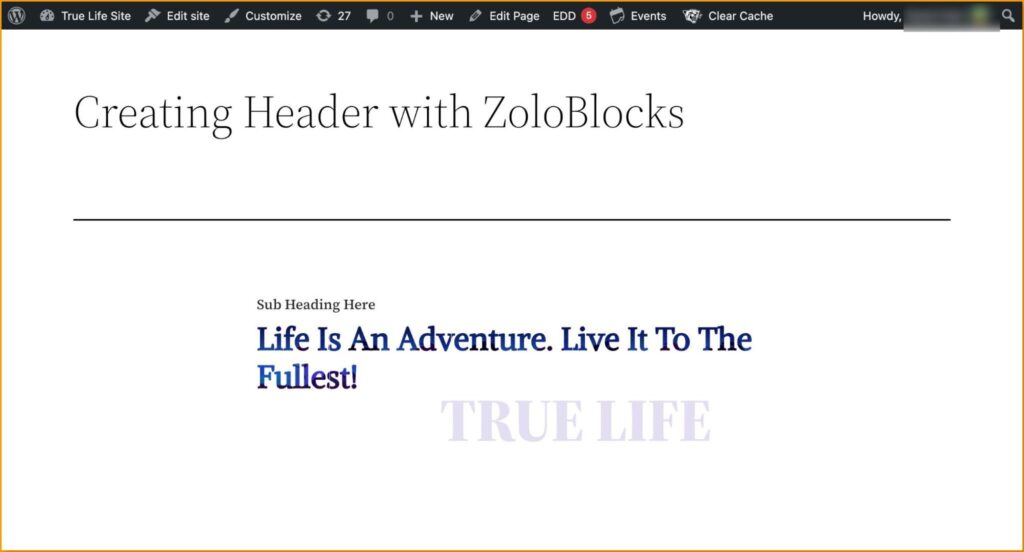
Once you are happy with the design, Save as draft or Publish it.
Final Thought
Now that everything is revealed, you know every bit of how to add Header and Footer in Gutenberg WordPress. If you have multiple pages, then we suggest you add or change the header and footer from the themes sections. This will globally change the header and footer of every page. So you don’t have to change or customize every single page.
But you have only a single landing page, our suggestion is to follow the steps we showed you.
And to create a highly responsive website from the Gutenberg dashboard, ZoloBlocks is unbeatable. With presets, and designing suggestions, ZoloBlock can guide you to design your website in the best way.
Wanna bet?


