A simple blog layout can make your website look outdated and difficult to explore. When visitors cannot easily find posts or enjoy the reading experience, they often leave your site quickly. Poor blog design can also affect engagement, page views and overall website performance.
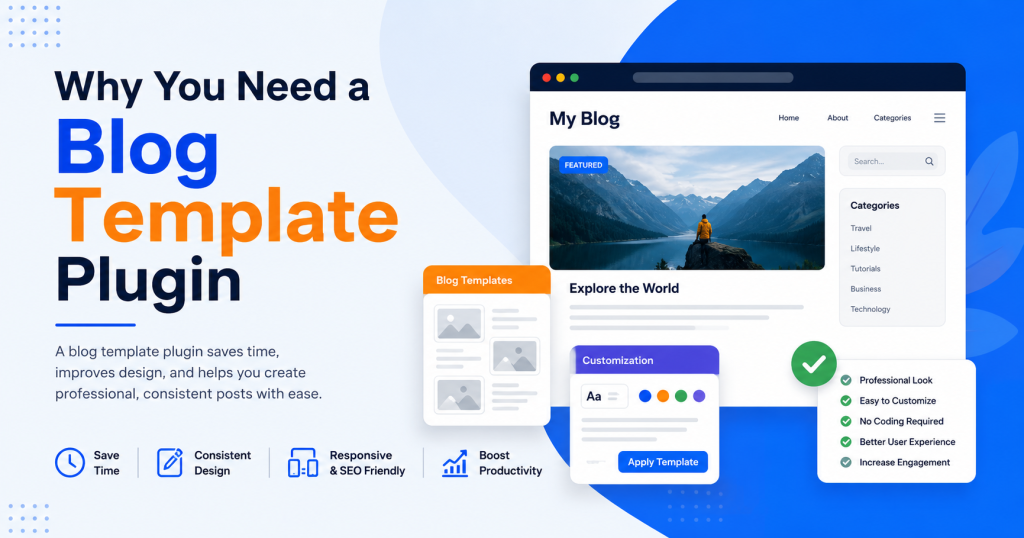
This is where a WP blog template plugin becomes very useful. It helps you create professional blog pages without coding and gives you full control over your layout, post design and archive pages. You can build custom blog grids, category sections, sliders and dynamic templates that improve both design and user experience.
In this guide, you will learn how to design beautiful blog pages using a WP blog template plugin. We will cover template builders, blog widgets, archive layouts, category filtering and customization options to help you create a modern and user-friendly blog website.
What Is a WP Blog Template Plugin?
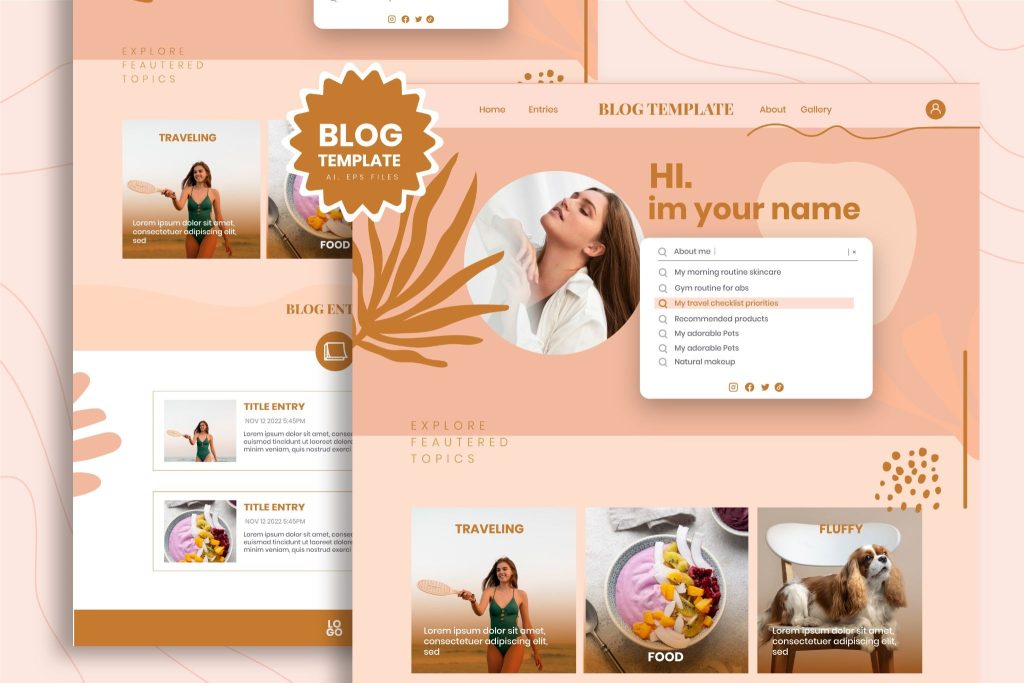
A WP Blog Template plugin is a WordPress plugin that provides pre-designed, customizable templates specifically for your blog listing pages, single post pages and archive pages. Instead of your blog looking like a plain list of posts (the WordPress default), these plugins let you display your posts in beautiful grids, masonry layouts, carousels, magazine styles and more, all without touching a single line of code.
Think of it as a drag-and-drop design tool specifically built for your blog section.
What Can a Blog Template Plugin Do?
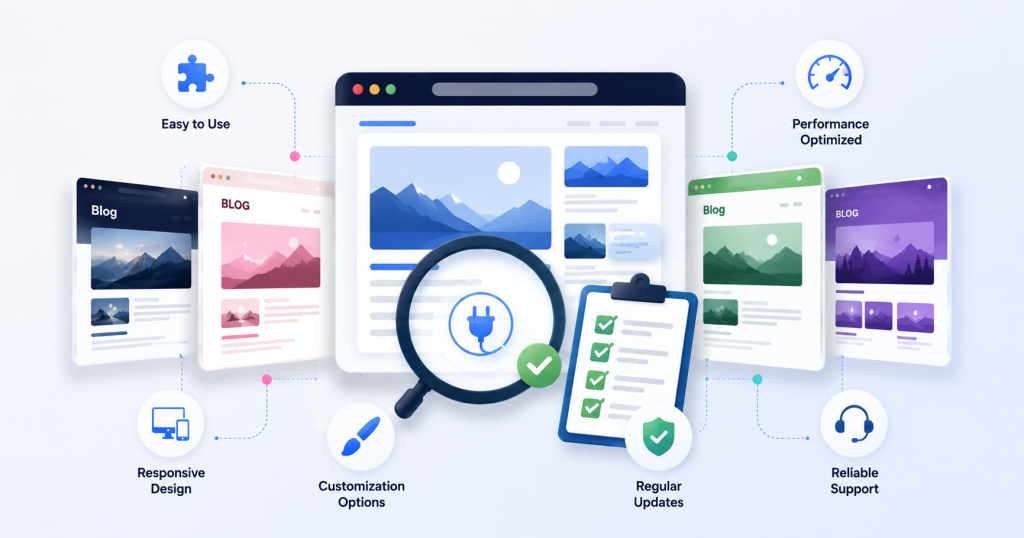
A blog template plugin gives you full control over how your blog posts look and work on your website. It helps you create a more professional, user-friendly and attractive blog layout without coding.
- Display blog posts in grid, list, masonry, or carousel layouts
- Add custom postcards with thumbnails, excerpts, author info, categories and dates
- Filter posts by category, tag, or custom taxonomy
- Add pagination or infinite scroll
- Create different layouts for different categories
- Style everything, fonts, colors, spacing, borders, to match your brand
- Make your blog fully responsive on all devices
Why You Need a Blog Template Plugin
You might be wondering: “My theme already shows my blog posts, so why do I need a plugin?”
Great question. Here’s why the default WordPress blog display falls short:
1. The Default Blog Layout Is Boring
Out of the box, WordPress displays blog posts in a simple chronological list, title, featured image, excerpt, date. That’s it. There’s very little visual hierarchy, no category filtering and zero wow factor. In 2025, users expect more.
2. Theme Customization Is Limited
While many themes offer some blog layout options, they’re usually limited to two or three choices. You’re locked into whatever the theme developer decided. A dedicated blog template plugin breaks those walls down completely.
3. No Coding Required
Building a custom blog layout from scratch requires knowledge of PHP, HTML, CSS and WordPress template hierarchy. A blog template plugin abstracts all of that into a visual interface anyone can use.
4. Faster Design Iteration
Want to try a magazine layout? Switch in one click. Prefer a minimal list? Change it instantly. Blog template plugins let you experiment without commitment.
5. Better User Experience Leads to Better SEO
A well-designed blog page keeps visitors engaged longer, reduces bounce rate and encourages them to read more posts, all signals that Google uses to determine your site’s quality. Good design directly impacts your search rankings.
How to Choose the Right Blog Template Plugin
There are several blog template plugins available in the WordPress ecosystem. When evaluating your options, here are the criteria worth considering:
1. Compatibility with Your Page Builder
If you’re using Elementor, look for a plugin that integrates natively with it. If you’re on the Gutenberg block editor, look for a plugin built as Gutenberg blocks. Mismatched tools create friction in your workflow.
2. Number and Variety of Layouts
A plugin with only two or three layout options will feel limiting quickly. Look for one that offers a wide range of styles, from clean minimal grids to bold magazine layouts, so you have flexibility as your site evolves.
3. Query and Filtering Controls
The ability to control which posts appear, by category, tag, author, date and let visitors filter them is a significant UX upgrade. Make sure the plugin supports this.
4. Design Customization Depth
Some plugins give you basic color and font controls. Others let you style every single element of a postcard independently. The more control, the better, especially if you have a specific brand aesthetic to maintain.
5. Performance
More features can mean more code. Look for a plugin that loads assets conditionally, only what’s needed for the widgets you actually use, rather than loading everything on every page.
6. Active Development and Support
A plugin that’s regularly updated and has responsive support is far safer to rely on long-term than one that hasn’t been touched in years.
One plugin that checks all these boxes is Ultimate Post Kit, an Elementor-based plugin with over 50 post layout widgets, deep query controls, AJAX filtering and granular styling options. We’ll use it as our working example throughout this guide, but the general steps apply to most comparable plugins.
Getting Started: Installation and Setup
The process of getting a blog template plugin up and running follows a familiar pattern regardless of which one you choose.
Installing the Plugin
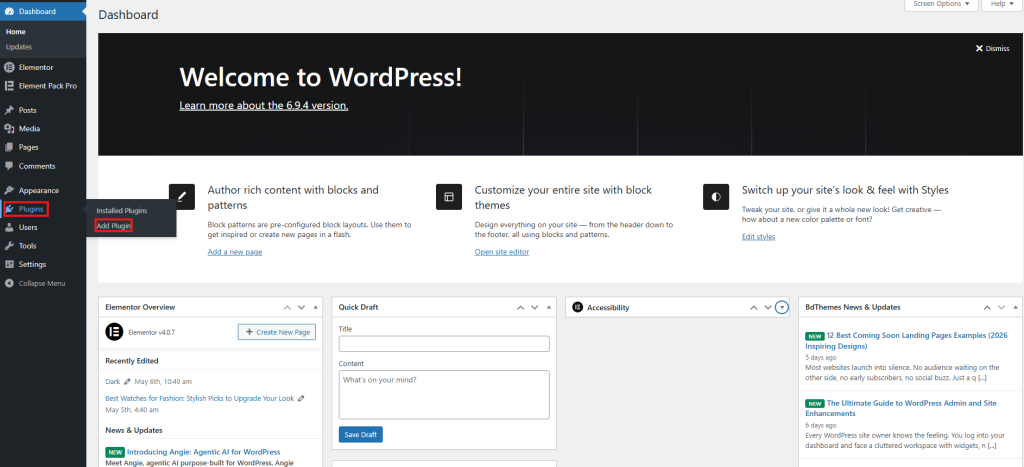
- Go to your WordPress dashboard
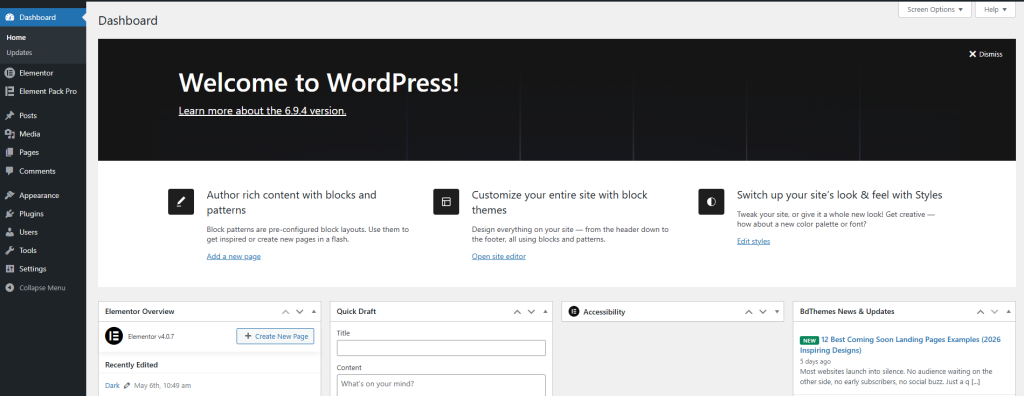
- Navigate to Plugins → Add Plugin.
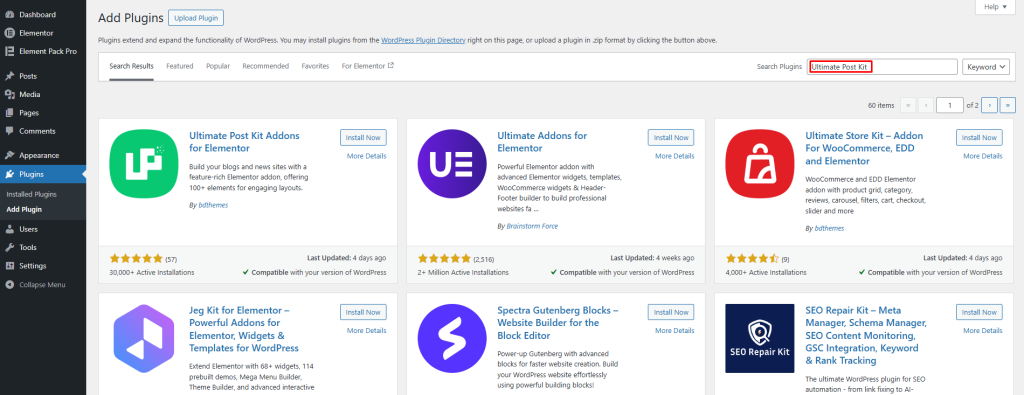
- Search for your chosen plugin, in our case, Ultimate Post Kit.
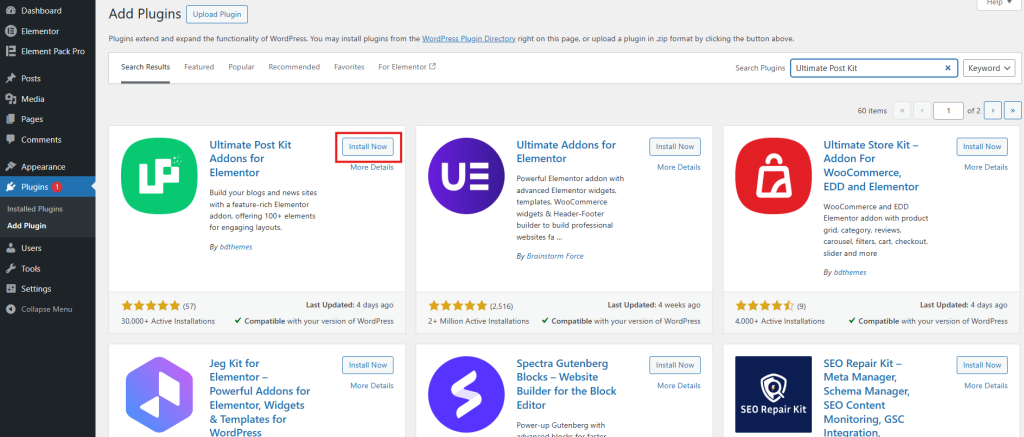
- Click Install Now.
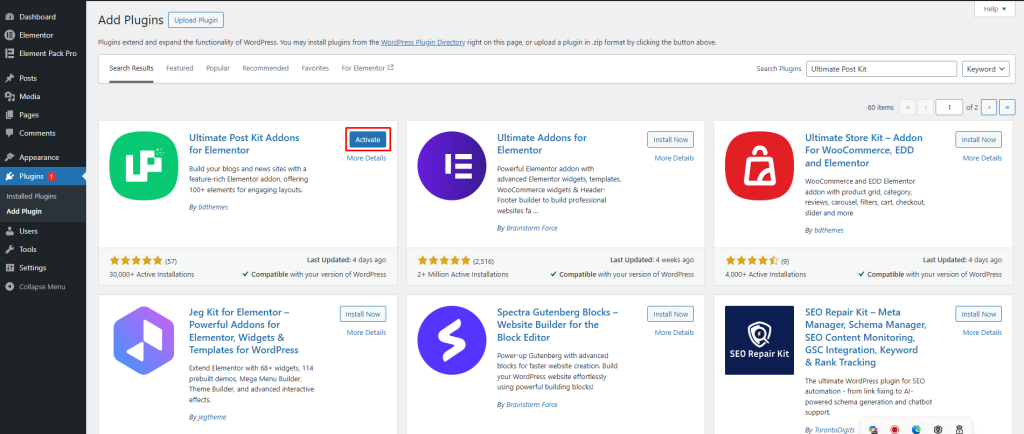
- Then Activate.
Note: If the plugin requires Elementor (as Ultimate Post Kit does), make sure Elementor is already installed and active before proceeding.
Your plugin is now successfully installed and activated on your WordPress website.
You can also upgrade to the “Ultimate Post Kit” Pro version to unlock more advanced features and customize your blog layouts easily.
First, visit the official Ultimate Post Kit website.
Choose a plan that fits your needs, whether for a single website or multiple websites.
All plans include premium widgets, regular updates and dedicated customer support.
After completing your purchase, you will receive:
- A license key
- A ZIP file of the plugin
You will need these to install and activate the plugin on your WordPress website.
If you need help installing and activating the plugin, you can watch this video.
Initial Configuration
Most blog template plugins have a settings panel where you can configure global defaults and, importantly, enable or disable individual widgets or features. This is worth paying attention to.
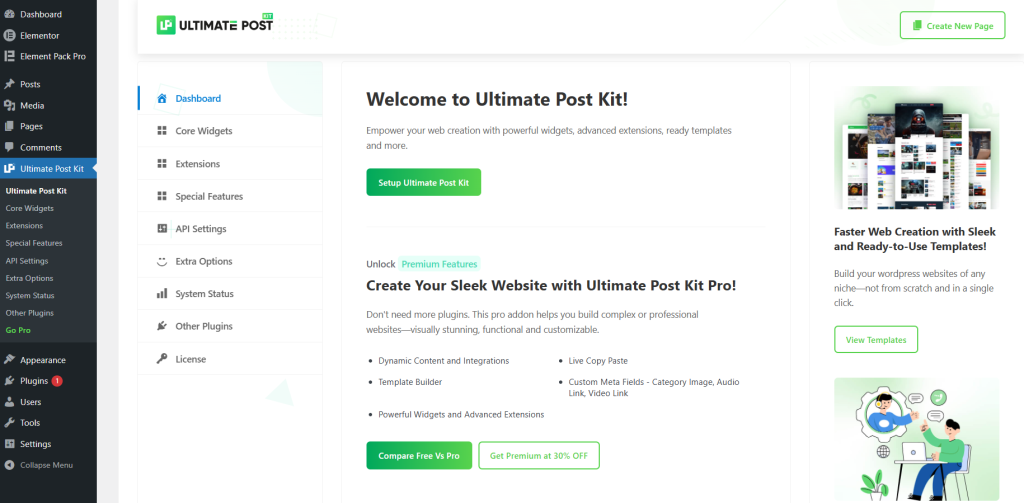
For Ultimate Post Kit:
- Go to the Ultimate Post Kit in your dashboard with all plugin options and widgets. From here, you can manage Core Widgets, Extensions, Special Features, API Settings and more.

- You’ll see a list of all available widgets. Enable only the ones you plan to use. Save your settings
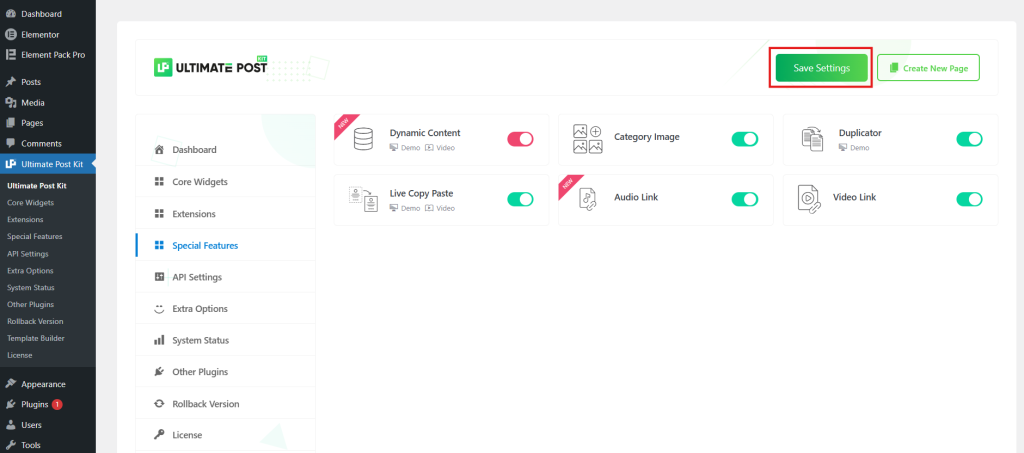
This selective activation approach keeps your site lightweight; only the CSS and JavaScript for the widgets you actually use will load on your pages.
Designing Your Blog Page: Step by Step
Now that the plugin is installed and configured, you can start building your blog page using the Template Builder. It helps you easily create:
- Single blog page templates
- Archive and blog listing pages
- Dynamic blog layouts
- Custom blog page designs
Create a Single Page Template
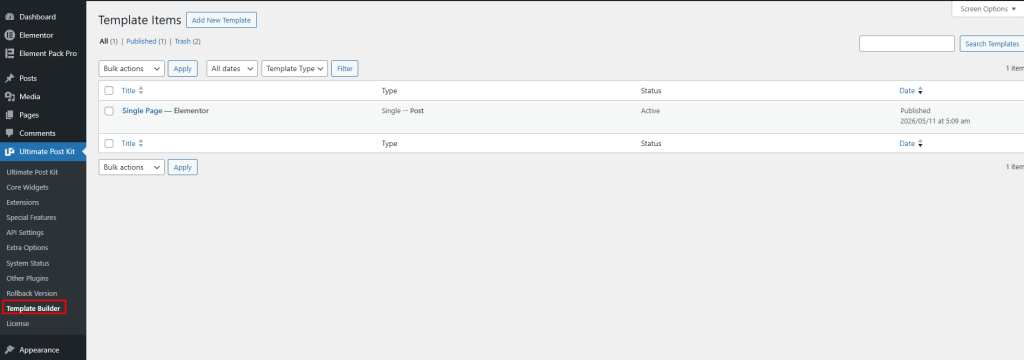
Go to Ultimate Post Kit → Template Builder from your WordPress dashboard.
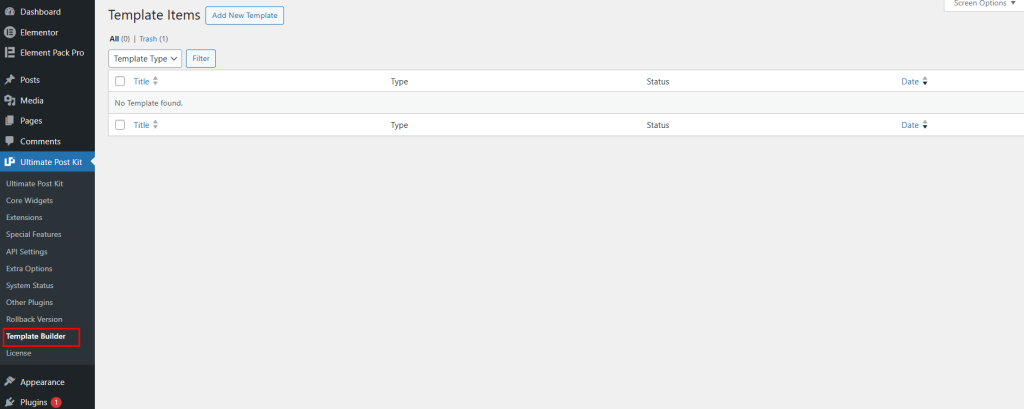
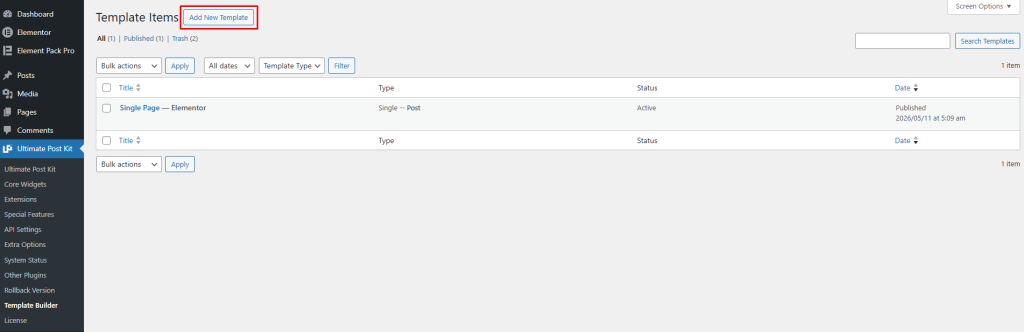
Click on the Template Builder tab, then click the Add New Template button to create a new template.
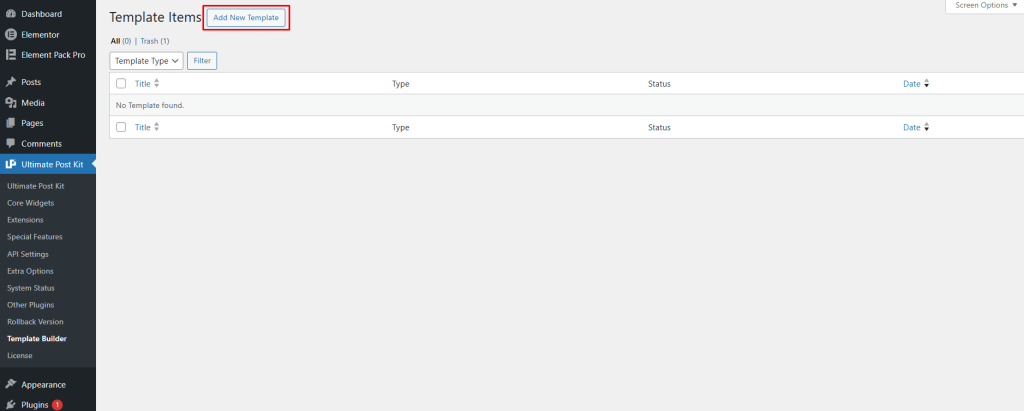
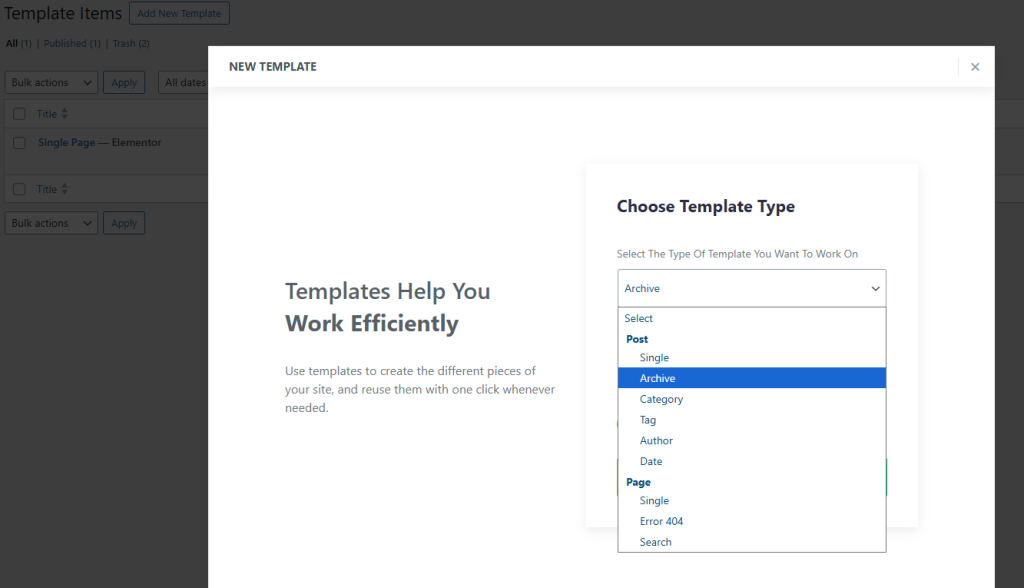
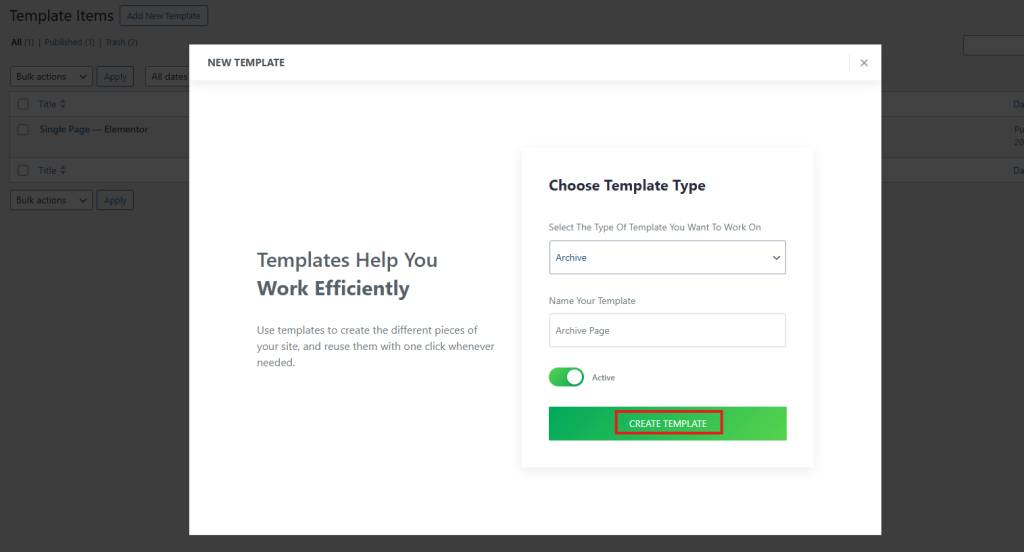
After clicking the button, a pop-up window will appear where you can choose the type of template you want to create.
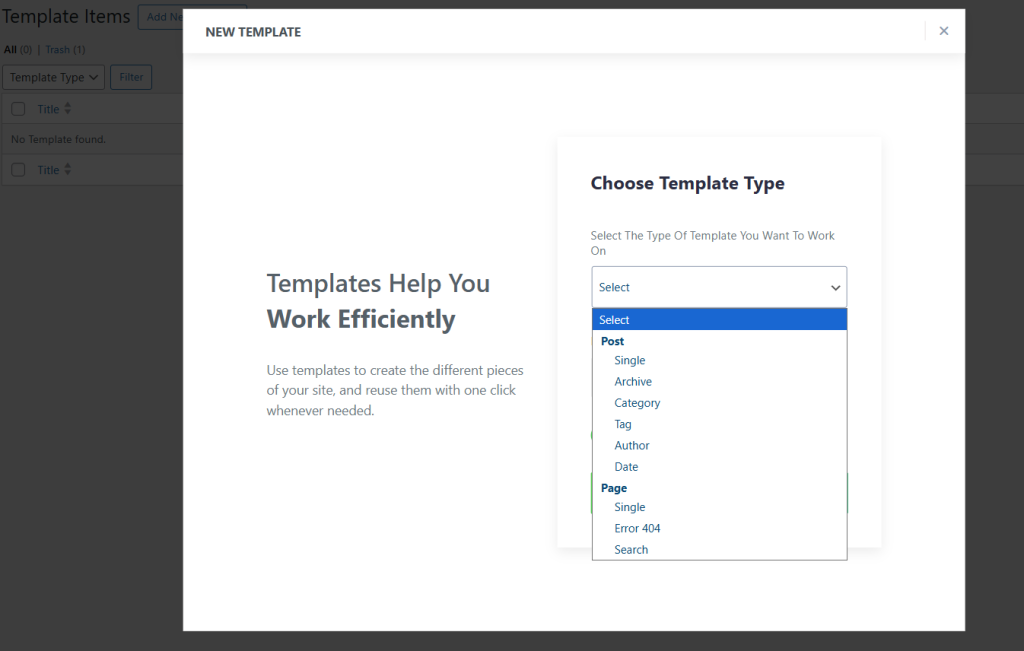
First, choose the template type. You can select either a post or a page. To create a single page template, select Single from the list. Next, enter a name for your template and set the status to Active.
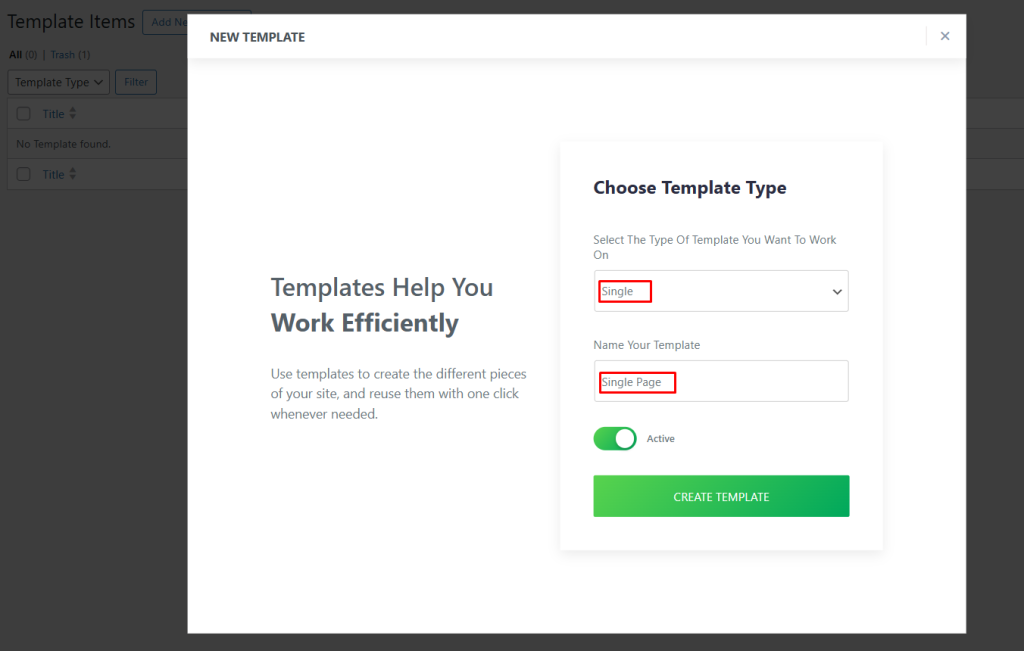
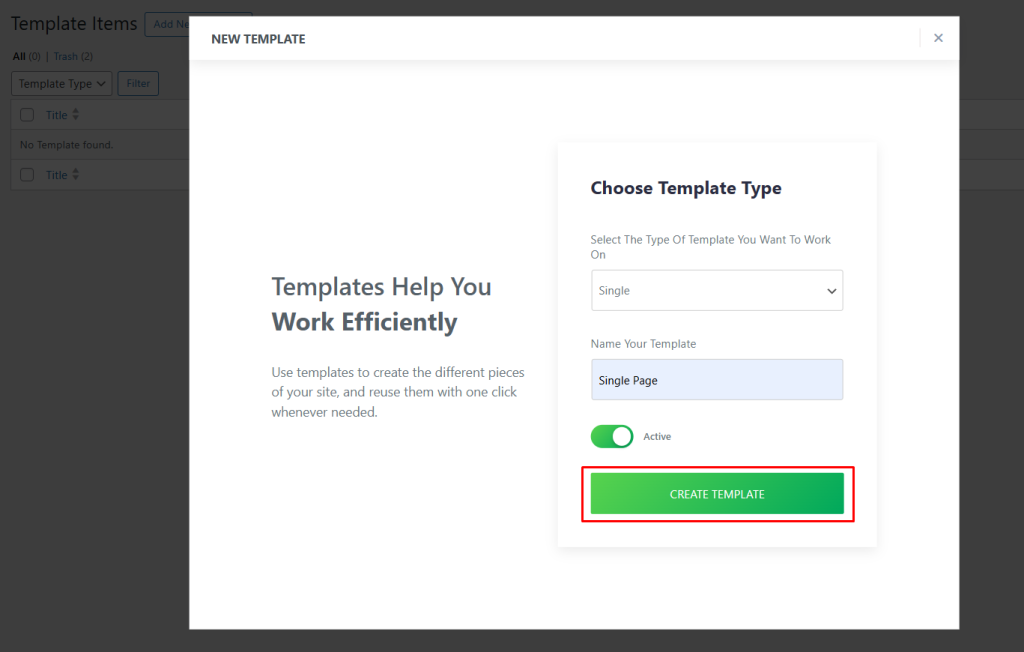
Then click the Create Template button to add your new template.
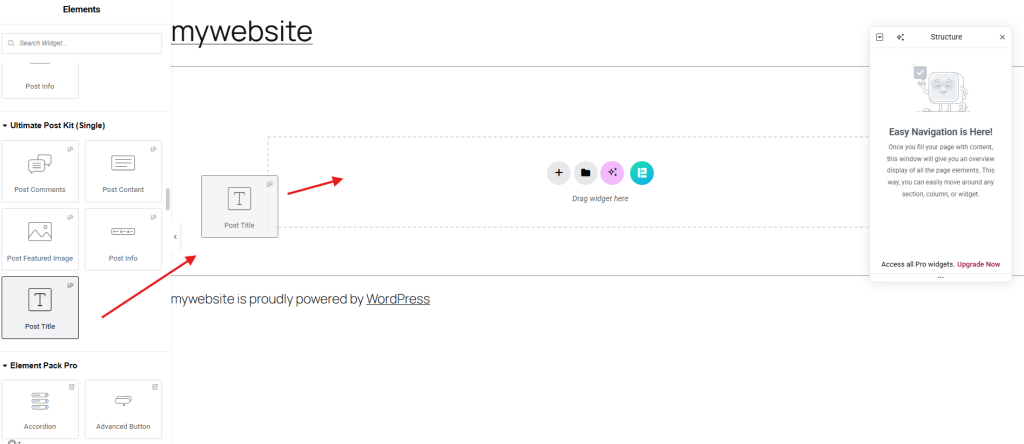
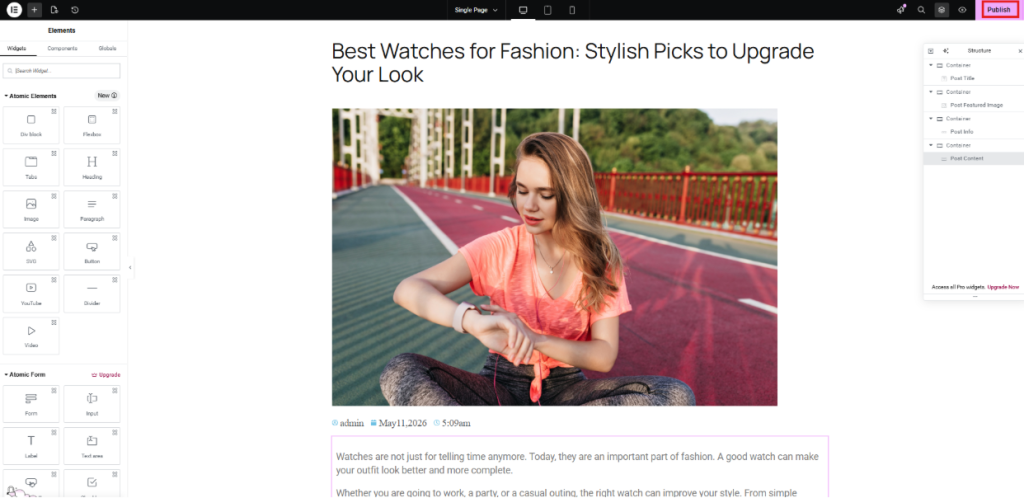
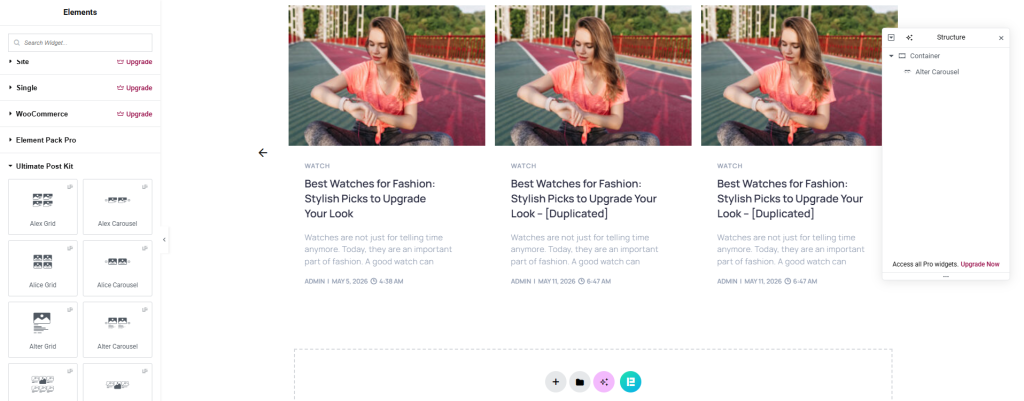
After clicking the button, you will be taken to the editor page where you can start designing your single-page template. To create your single-page template, you can use widgets like Post Featured Image, Post Info, Post Title and Post Content. These widgets help you display blog post information properly on the page.
You can also use additional widgets to improve your page layout and create a more attractive and user-friendly blog design.
Simply drag and drop the widgets into the editor area to build your single blog page layout.
For example, you can drag the Post Title widget into the section where you want to display your blog title.
In the same way, you can drag the Post Featured Image, Post Info, Post Title and Post Content widgets into any section where you want to display them.
Create an Archive Page
Go to Ultimate Post Kit → Template Builder from your WordPress dashboard.
Open the Template Builder tab, then click the Add New Template button to create a new archive template.
Next, select Archive from the template type options.
After that, enter your template name and choose the template status as Active or Inactive. If you select Active, the archive template will automatically work on your website.
Then click the Create Template button.
You will now be taken to the editor page, where you can start designing your archive page layout.
You can also use single-page widgets here. In addition, grid, carousel and list widgets support archive layouts and can automatically display posts using the current query.
Now you can design your archive page the way you want and customize the layout to match your website style.
Display the Archive Page
Before displaying the archive page, make sure you have already created an archive template.
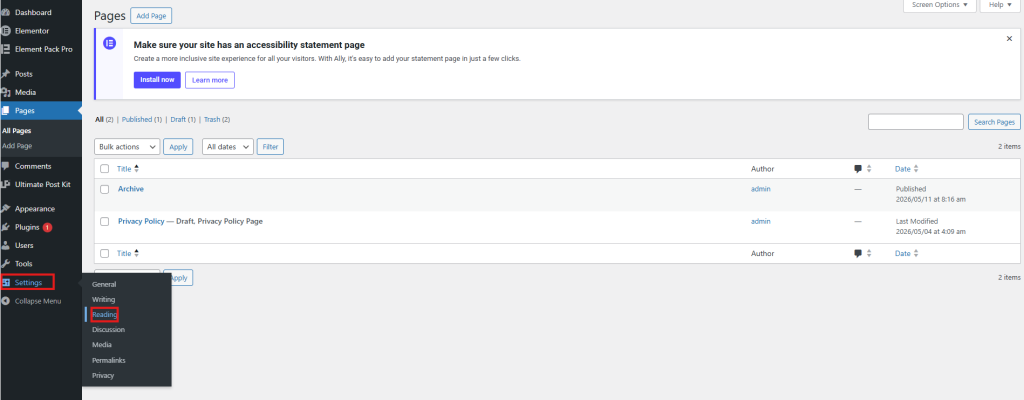
Go to Pages → All Pages
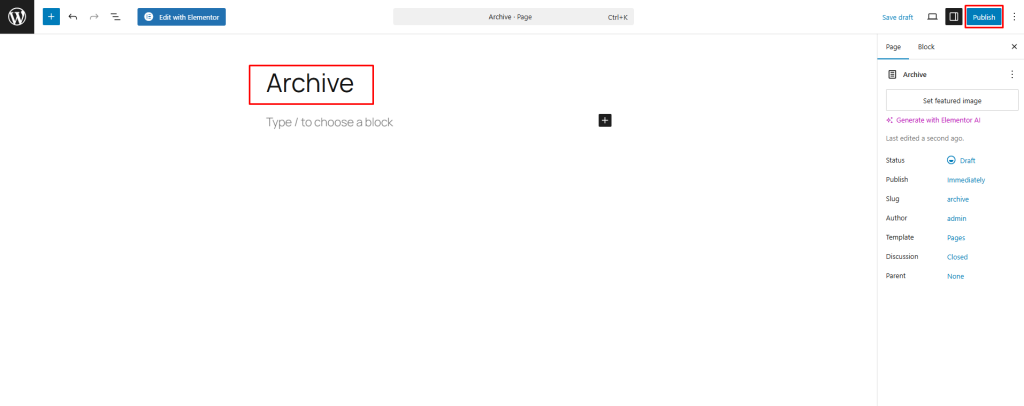
Click the Add Page button to create a new page.
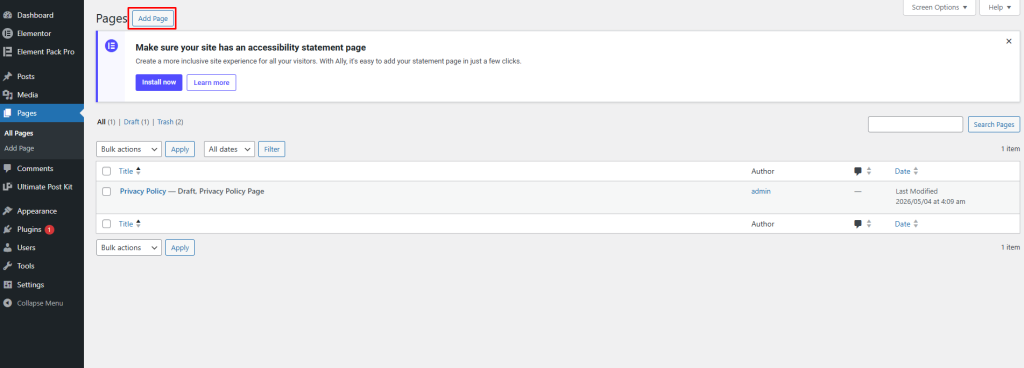
Next, enter “Archive” as the page name and click the Publish button.
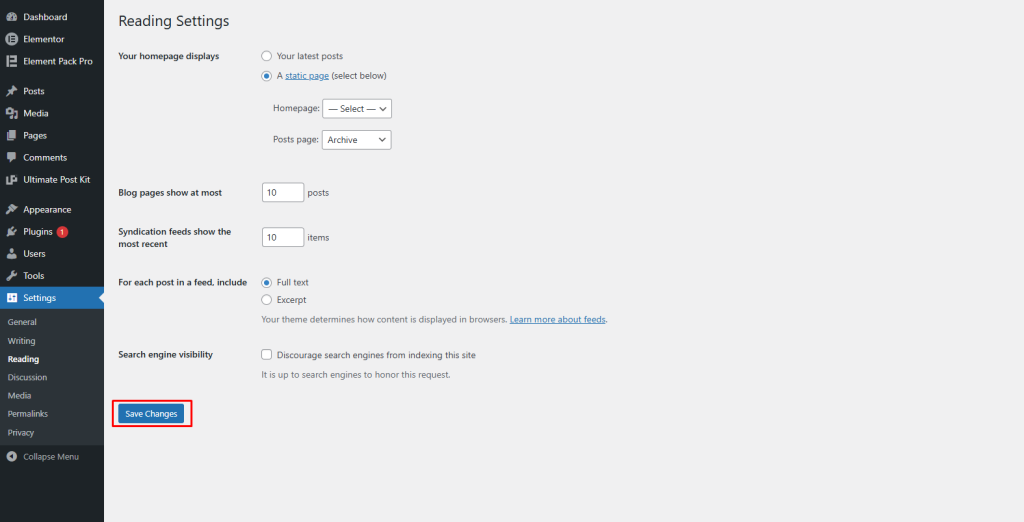
Set the Archive Page
Now go to Settings → Reading.
Under Your homepage displays, select A static page.
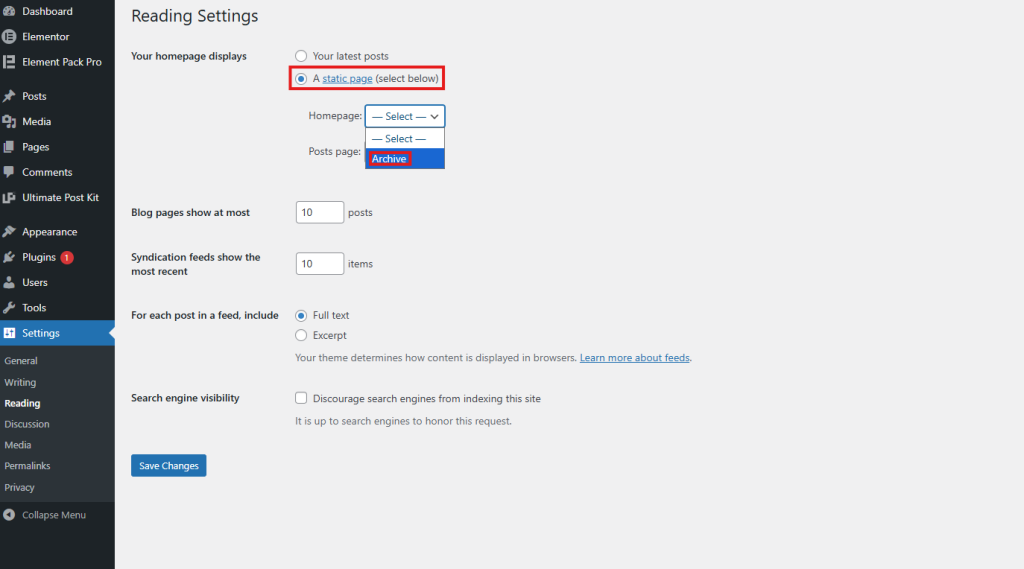
Then choose the Archive page as the Posts page.
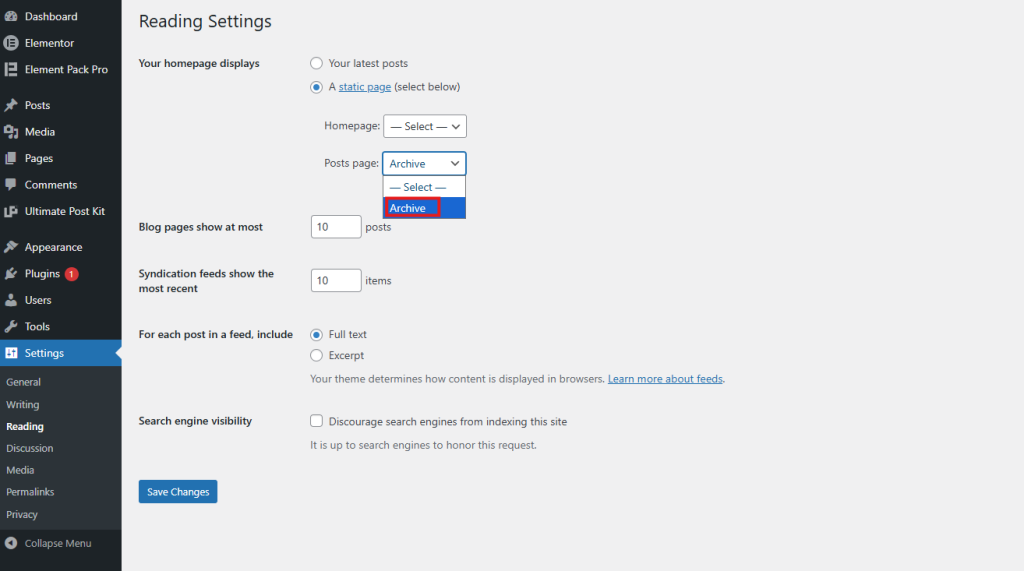
Now click the Save Changes button.
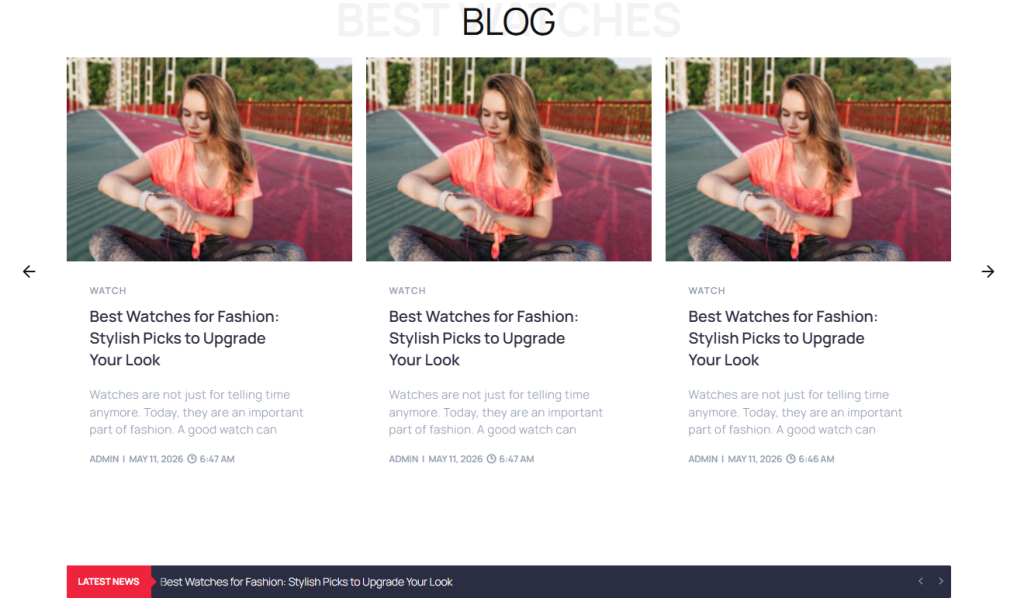
Final Archive Page Layout
Your archive page is now ready and will display your blog posts using the custom archive template design you created.
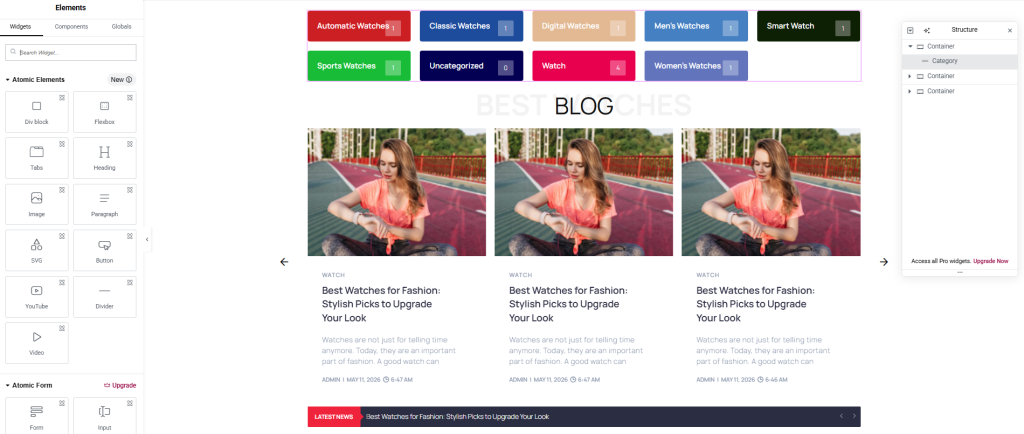
Adding Categories to Your Blog Page
To display watch categories on your blog page, simply drag and drop the Category, Category Carousel, or Tag Cloud widget into your layout section.
These widgets help visitors quickly browse different watch categories.
You can also customize the category styles, colors, spacing, typography and hover effects from the widget settings to match your blog design.
Measuring Whether Your Design Is Working
Once your redesigned blog page is live, track these metrics to understand whether the design improvements are making a difference:
- Bounce Rate: Are people leaving immediately or exploring further?
- Pages Per Session: Are visitors reading more than one post per visit?
- Average Session Duration: Are they spending more time on your site?
- Scroll Depth: Are they scrolling all the way through the blog page?
- Click-Through Rate on Postcards: Are the cards compelling enough to click?
Use Google Analytics 4 or a simpler plugin like MonsterInsights to monitor these numbers. Improvements after a redesign are a strong signal that the work is paying off.
FAQs About WP Blog Template Plugins
1. What is a WP blog template plugin?
A WP blog template plugin is a WordPress plugin that helps you create custom blog page designs without coding. It allows you to build blog grids, archive pages, sliders, carousels, and single post templates using a visual editor. These plugins make blog pages look more modern and user-friendly.
2. Why should I use a WP blog template plugin?
A WP blog template plugin gives you full control over your blog layout and design. Instead of using the default WordPress blog style, you can create attractive and professional blog pages that improve user experience, increase engagement, and make content easier to explore.
3. Can I design blog pages without coding?
Yes, most WP blog template plugins include drag-and-drop builders that allow you to design blog pages visually. You can add widgets, change layouts, customize colors, and manage spacing without writing HTML, CSS, or PHP code.
4. Does a WP blog template plugin work with Elementor?
Yes, many WP blog template plugins are designed to work with Elementor. Plugins like Ultimate Post Kit provide Elementor widgets and template builders for creating custom blog layouts easily.
5. Can I create archive pages using a blog template plugin?
Yes, you can create custom archive pages, blog listing pages, category pages, and tag pages using the Template Builder feature. This helps you display blog posts in a more organized and professional layout.
6. What types of blog layouts can I create?
You can create many types of blog layouts, including grid layouts, list layouts, masonry layouts, sliders, carousels, and magazine-style designs. Some plugins also allow you to create dynamic blog pages with category filtering and AJAX loading features.
7. Can I add category filters to my blog page?
Yes, most modern WP blog template plugins support category filtering. Visitors can click category buttons to quickly view posts from specific categories without reloading the page. This improves navigation and user experience.
8. Will a blog template plugin slow down my website?
A lightweight and optimized plugin usually has very little impact on website speed. Many plugins allow you to activate only the widgets you need, which helps reduce unnecessary CSS and JavaScript loading.
9. Is a WP blog template plugin mobile responsive?
Yes, most WP blog template plugins are fully responsive. Your blog pages will automatically adjust to different screen sizes, including desktops, tablets, and mobile devices.
10. Which is the best WP blog template plugin for Elementor?
Ultimate Post Kit is one of the most popular WP blog template plugins for Elementor users. It offers multiple blog widgets, archive page builders, category filters, sliders, and customization options for creating professional blog layouts.
Final Thoughts
Designing a professional blog page becomes much easier when you use a WP blog template plugin. Instead of depending on basic layouts, you can create custom blog pages that match your website’s style and improve the reading experience for visitors.
With the right template builder, you can design single post templates, archive pages, category sections and dynamic blog layouts without writing code. Features like category filtering, post grids, sliders and responsive design help make your blog more engaging and easier to navigate.
A well-designed blog page not only improves website appearance but also helps increase user engagement and content visibility. Take time to test different layouts and customization options to create a blog design that works best for your audience.