WordPress has evolved significantly over the years, and one of its biggest changes came with the introduction of the WordPress Block Editor, commonly known as Gutenberg.
Released in WordPress 5.0 in December 2018, Gutenberg replaced the Classic Editor, which had been the default for over a decade. The transition completely redefined how users create content in WordPress.
Why Did Gutenberg Replace the Classic Editor?
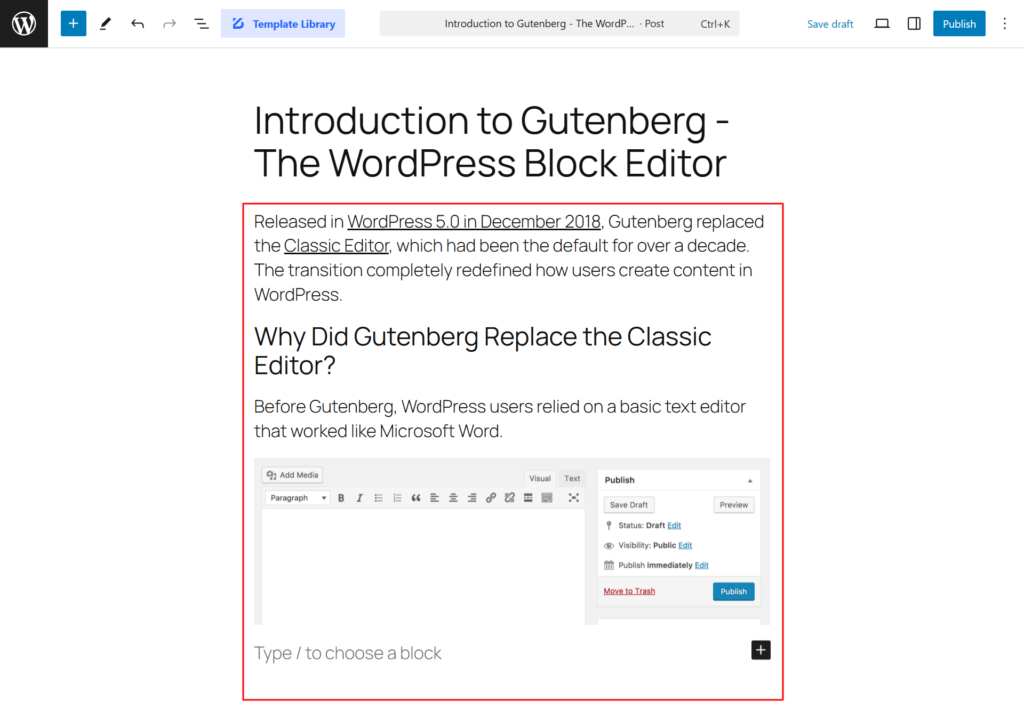
Before Gutenberg, WordPress users relied on a basic text editor that worked like Microsoft Word.
While simple, it had many limitations! Users needed plugins for things like creating columns, adding buttons, or designing layouts.
구텐베르크 changed this by introducing a block-based editing system, where every piece of content (text, images, videos, buttons, etc.) is a separate block that can be arranged and customized independently.
With the rise of drag-and-drop page builders like Elementor and Divi, WordPress needed a modern, flexible, and easy-to-use editor that could compete. The WordPress Block Editor now powers over 65% of WordPress sites and continues to improve with each update.
Key Benefits of Using Gutenberg WordPress Editor
- User-Friendly & Visual Editing – No coding required; you can see changes in real-time.
- Faster Website Performance – Unlike traditional page builders, Gutenberg loads fewer scripts, improving page speed.
- Mobile-Responsive Design – The editor adapts to different screen sizes effortlessly.
- Built-in Block Library – WordPress offers pre-designed blocks for text, images, embeds, and layouts.
- Full-Site Editing (FSE) Support – Gutenberg is evolving to control entire website layouts, not just posts and pages.
Getting Started with Gutenberg (WordPress Block Editor)
Now that we understand why the WordPress Block Editor was introduced, let’s go step by step on how to access it and start using it.
How to Access Gutenberg in WordPress?
By default, Gutenberg is the standard editor in WordPress. If you have a new WordPress installation (WordPress 5.0 or later), it is enabled automatically. To access it:
- 다음으로 이동 WordPress Dashboard > Posts > Add New 또는 Pages > Add New
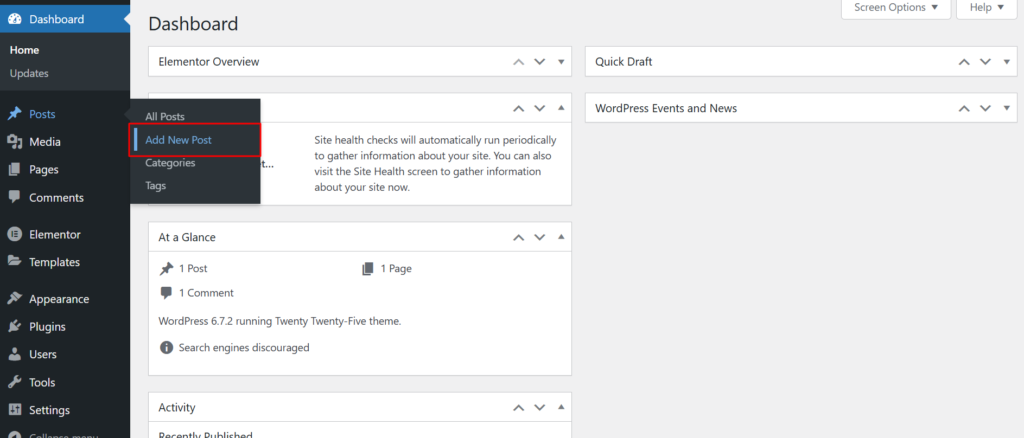
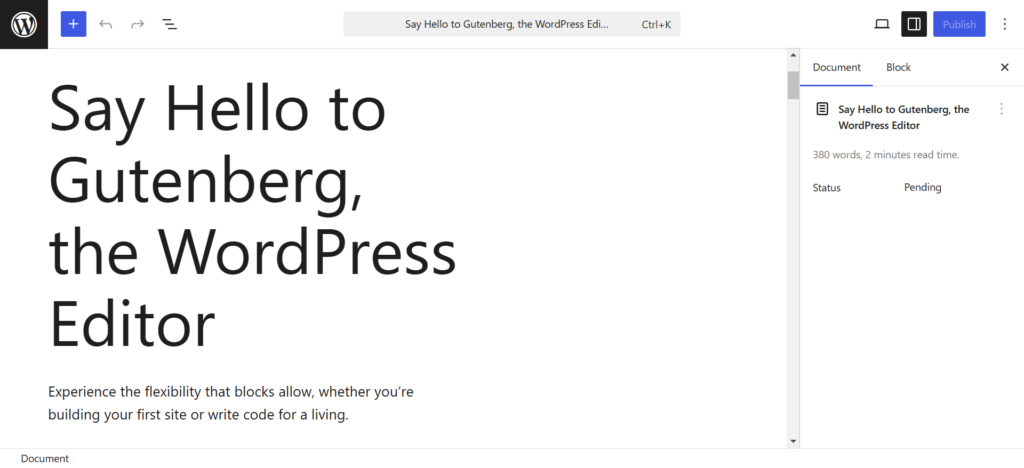
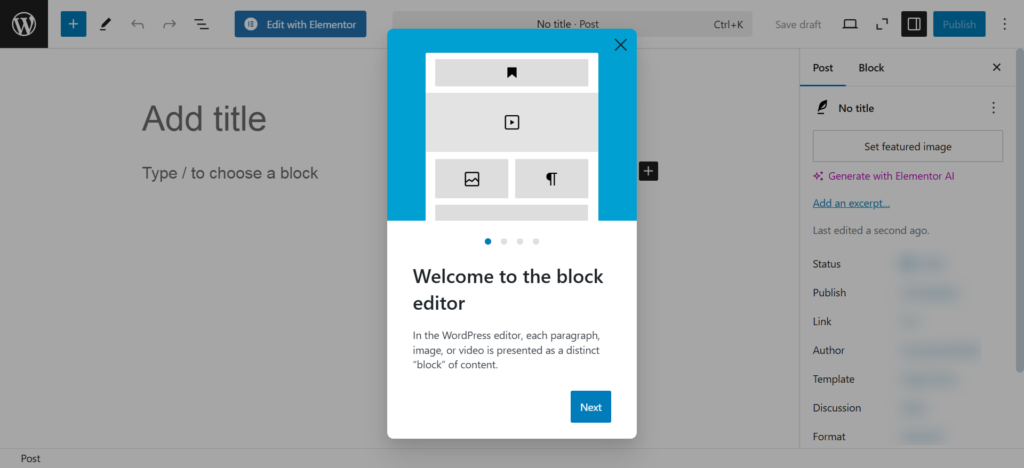
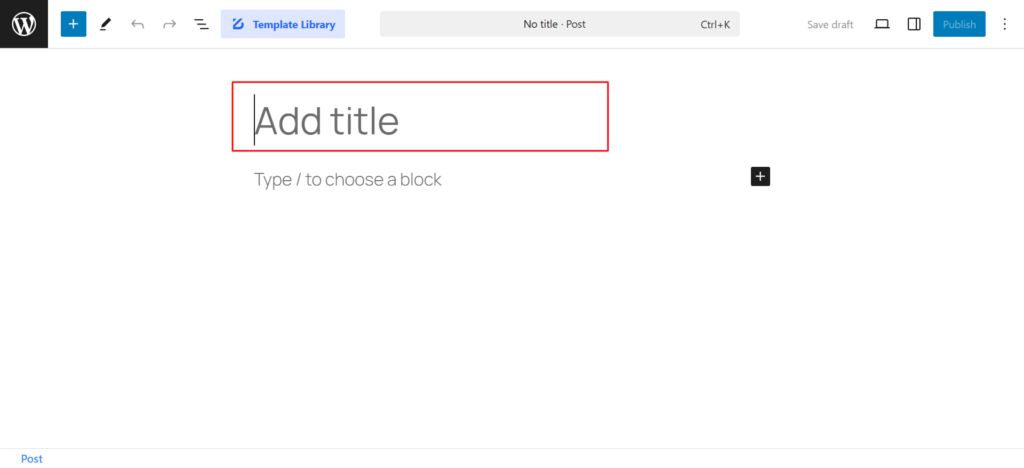
- The Gutenberg editor will open, displaying an empty canvas with a placeholder for the post title and the first block.
What If Gutenberg Is Not Available?
If you are still using the Classic Editor, you can enable Gutenberg by:
- Checking WordPress Version – Make sure your site runs WordPress 5.0 or later.
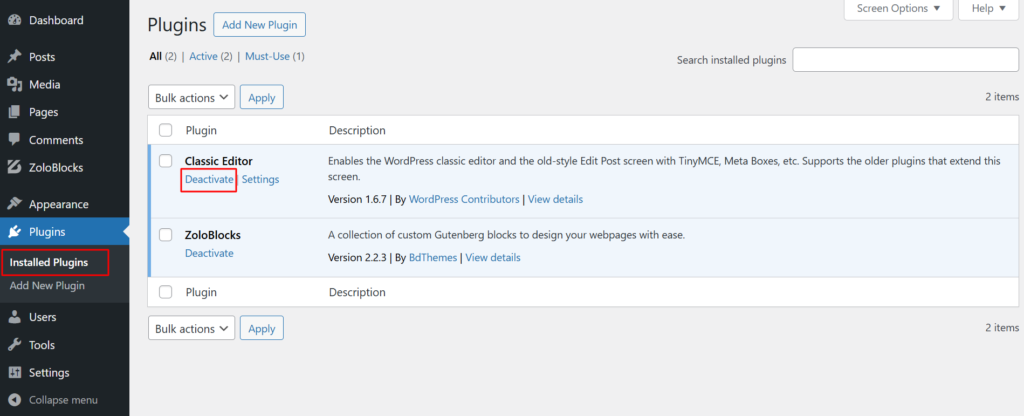
- Disabling the Classic Editor Plugin – If installed, go to Plugins > Installed Plugins, locate Classic Editor, and deactivate it.
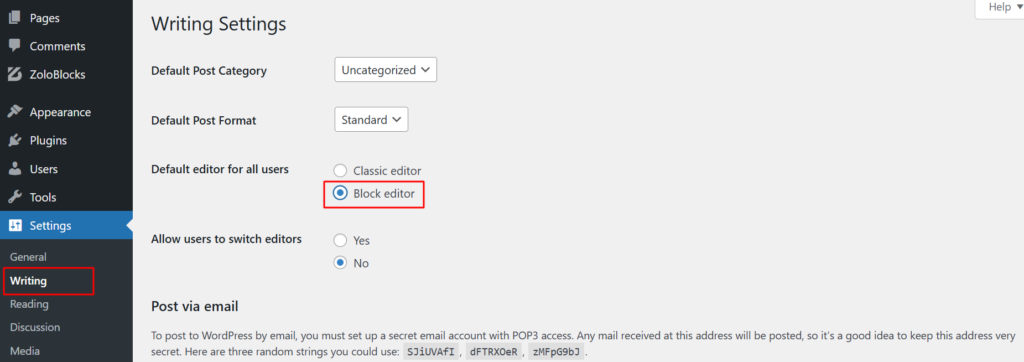
- Manually Enabling Gutenberg – Go to Settings > Writing and choose Block Editor as the default editor and Save Changes.
Gutenberg vs. Classic Editor – What’s the Difference?
| 기능 | Classic Editor | Gutenberg (Block Editor) |
| Interface | Basic text editor, similar to MS Word | Modern block-based system |
| Content Layout | No built-in layout options | Flexible layouts with blocks |
| Media Embeds | Manual shortcode use | One-click media embedding |
| Customization | Requires HTML/CSS | No coding needed |
| 성능 | Relies on shortcodes & plugins | Faster and lightweight |
The Gutenberg WordPress editor is a completely new way to design and manage content.
How to Use Gutenberg If You’re Switching from the Classic Editor?
If you’re used to the Classic Editor, switching to the Gutenberg WordPress editor might initially feel overwhelming, but it’s actually easy to learn.
Basic Steps to Use Gutenberg WordPress Editor:
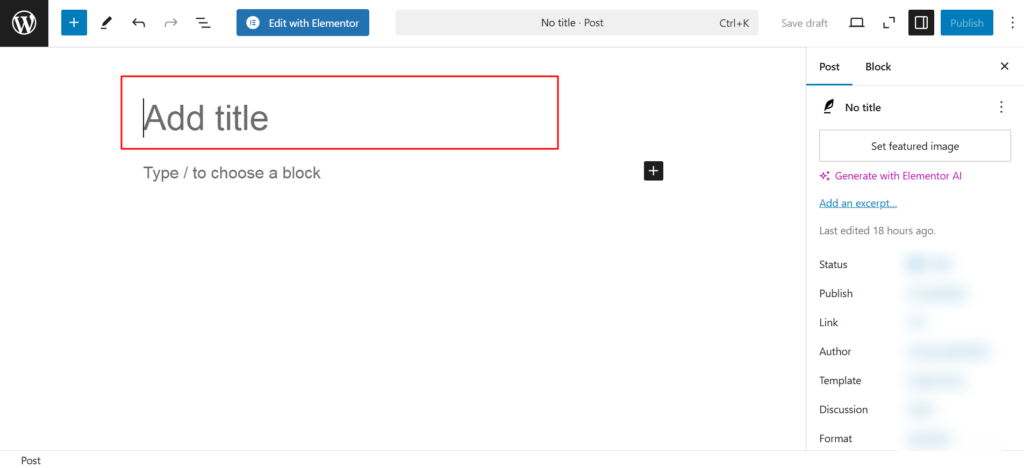
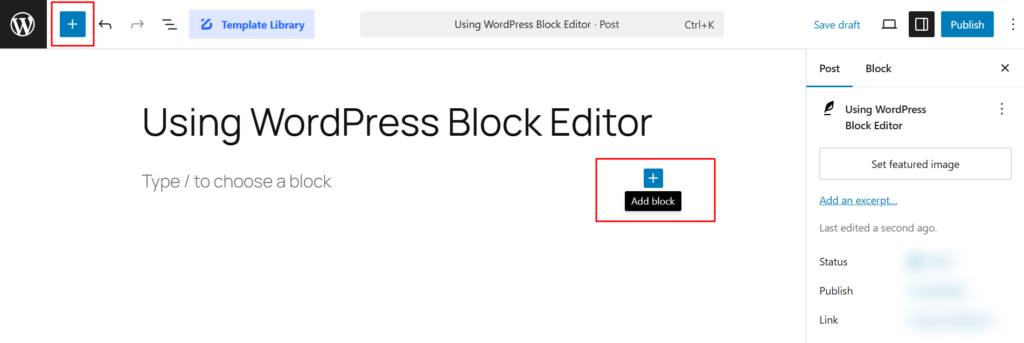
- Start with a Title – Click on “Add Title” to name your post or page.
- Add Blocks for Content – Click the “+” button to insert text, images, or any other block.
- Customize Blocks – Adjust settings like fonts, colors, and spacing in the right-hand panel.
- Rearrange Blocks – Drag and drop blocks to change the layout.
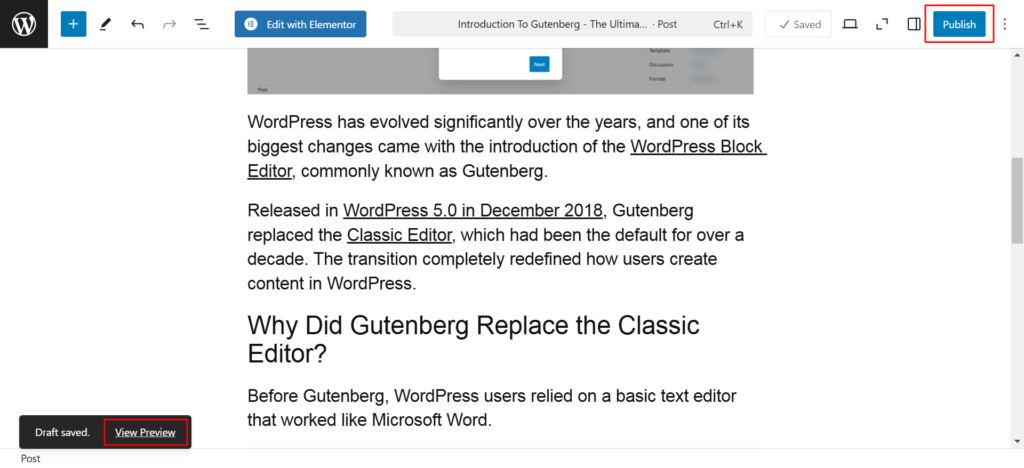
- Preview and Publish – Click Preview to check the design and 게시 to make it live.
Now that you know how to use the WordPress Block Editor, let’s explore its interface and core features in detail.
Understanding the Gutenberg Interface
The WordPress Block Editor (Gutenberg) introduced a modern, block-based editing system that simplifies content creation.
Unlike the Classic Editor, which relied on a single text area, Gutenberg allows users to build pages with individual content blocks.
Let’s take a deep dive into the Gutenberg editing screen and its key components to help you master its interface.
Overview of the Gutenberg Editing Screen
When you open the WordPress Block Editor, you’ll notice a clean and distraction-free layout designed to enhance usability. Below is a breakdown of its key components:
A. 제목 필드
- 글 또는 페이지 제목을 입력하는 편집기의 첫 번째 섹션입니다.
- SEO 최적화를 위해 자동으로 제목(H1)으로 변환합니다.
- 특수 문자, 이모티콘 및 서식을 지원합니다.
B. 콘텐츠 영역(블록 기반 시스템)
- 블록을 사용하여 콘텐츠를 만드는 기본 작업 공간입니다.
- 각 단락, 이미지, 동영상 또는 버튼은 쉽게 재배치할 수 있는 개별 블록으로 취급됩니다.
- 모듈식 접근 방식을 사용하여 코딩 없이 페이지를 쉽게 구성할 수 있습니다.
워드프레스 통계에 따르면 80% 이상의 사용자가 유연성 때문에 구텐베르크의 블록 기반 편집 기능을 기존 클래식 편집기보다 선호한다고 합니다.
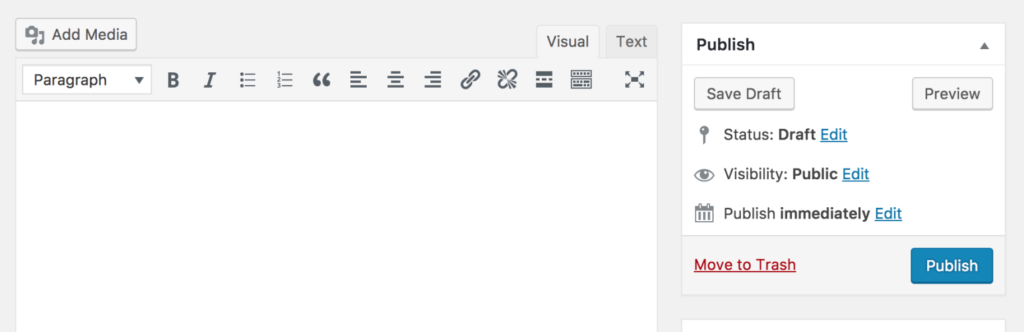
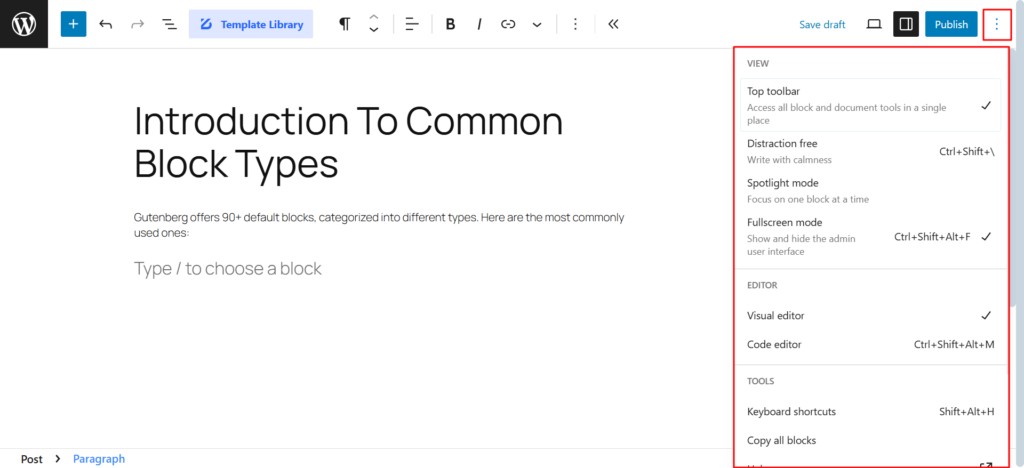
C. 상단 도구 모음 - 빠른 편집 작업
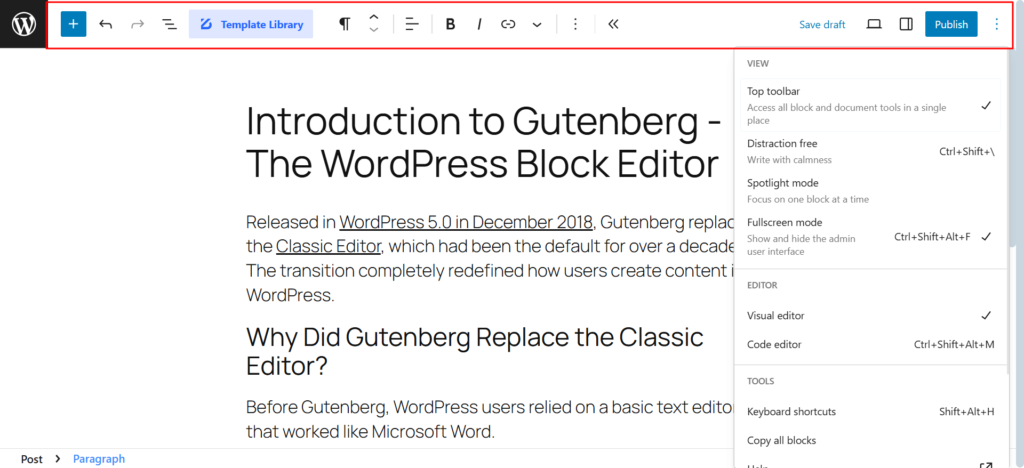
상단 도구 모음은 편집기 상단에 위치하며 필수 버튼이 포함되어 있습니다:
- 실행 취소/다시 실행: 변경 사항을 되돌리거나 다시 실행할 수 있습니다.
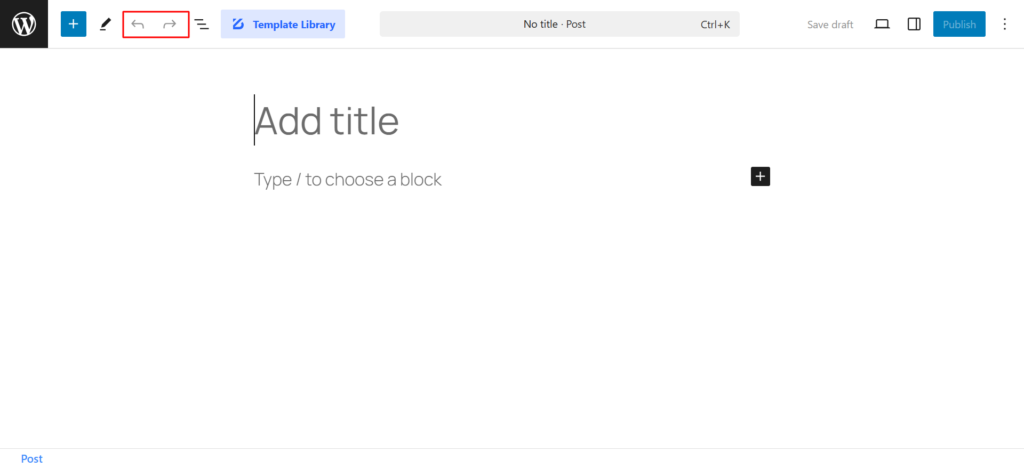
- 초안 저장: 게시하지 않고 작업을 저장합니다.

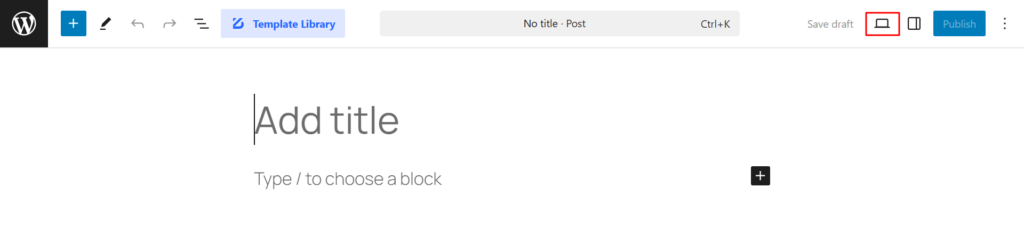
- 미리 보기: 게시하기 전에 콘텐츠가 어떻게 표시되는지 확인할 수 있습니다.
- 게시: 글/페이지를 마무리하고 게시물을 게시합니다.

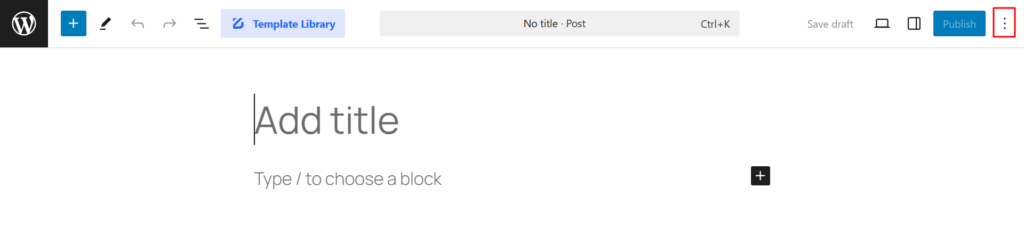
- 추가 옵션: 편집 환경을 사용자 지정하기 위한 추가 설정을 제공합니다.
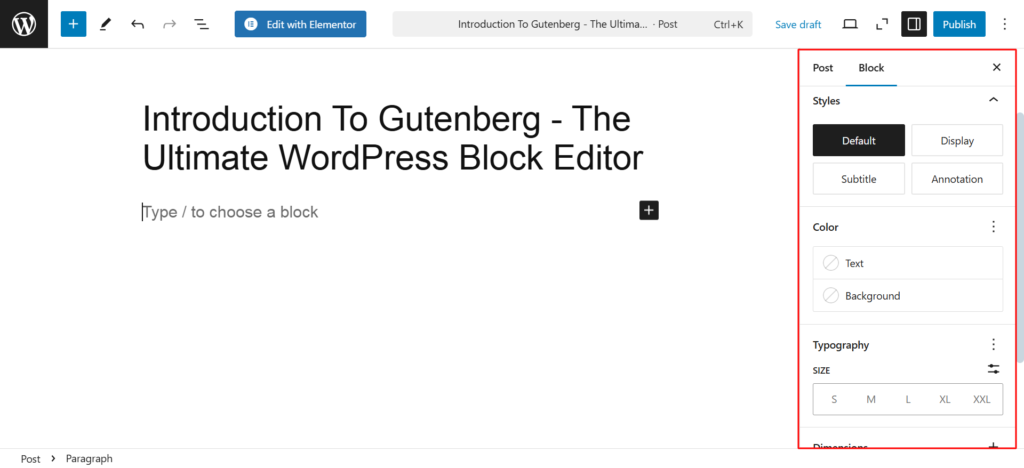
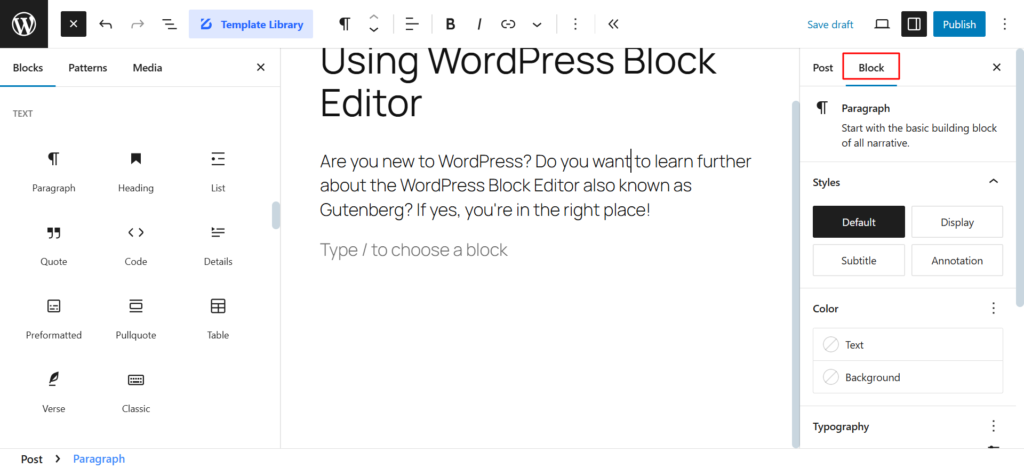
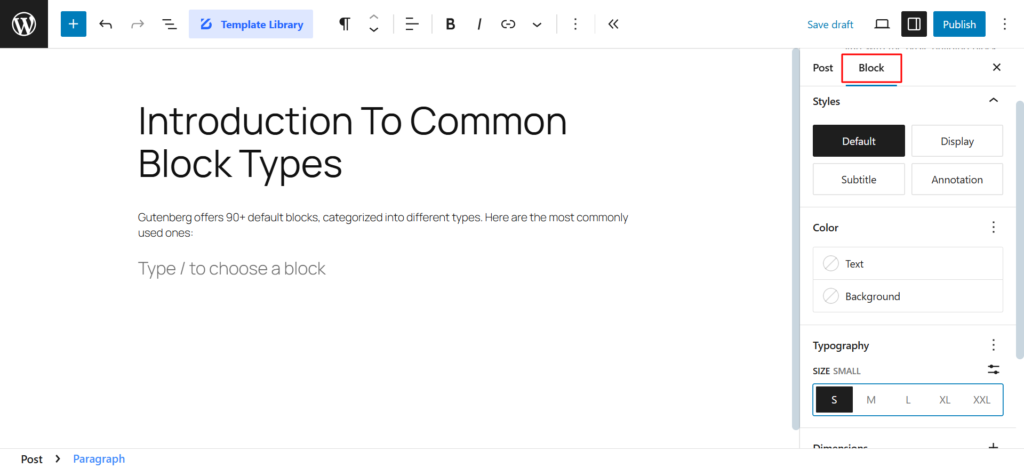
D. 설정 패널(블록 및 문서 설정)
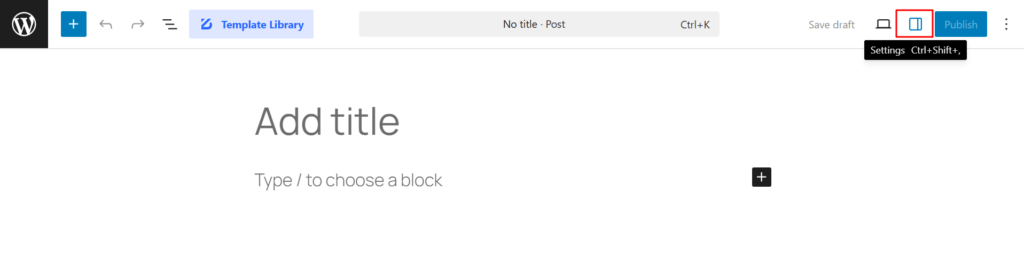
오른쪽에 위치한 이 패널에는 두 개의 탭이 있습니다:
- 문서 설정:
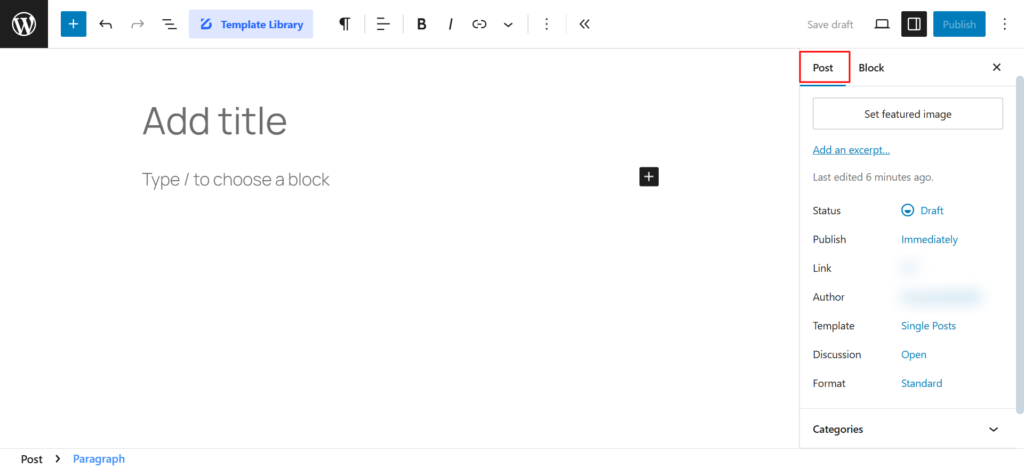
- 공개 여부(공개, 비공개 또는 비밀번호로 보호)를 설정합니다.
- 카테고리와 태그를 선택합니다.
- 추천 이미지를 업로드합니다.
- 게시물 속성을 사용자 지정합니다.
- 차단 설정:
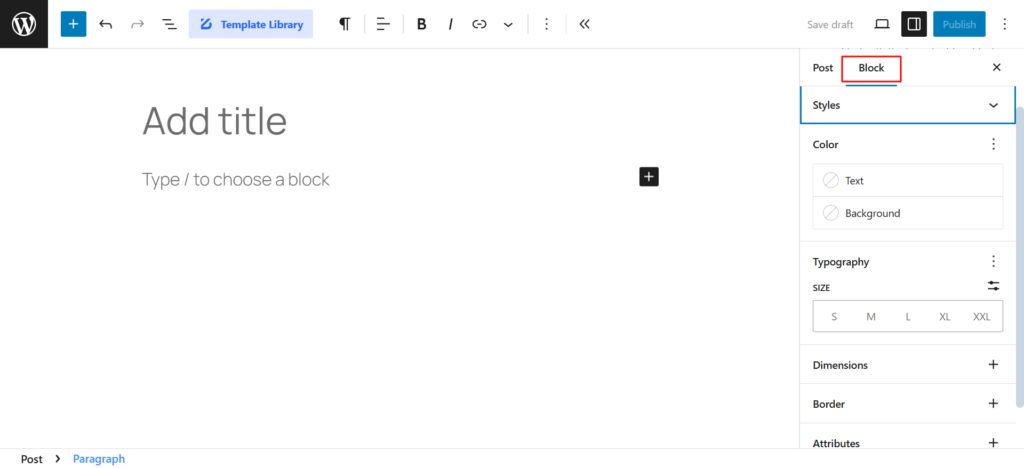
- 개별 블록의 타이포그래피, 색상, 패딩 및 여백을 수정합니다.
- 애니메이션 및 사용자 정의 CSS(테마에서 지원하는 경우)를 추가합니다.
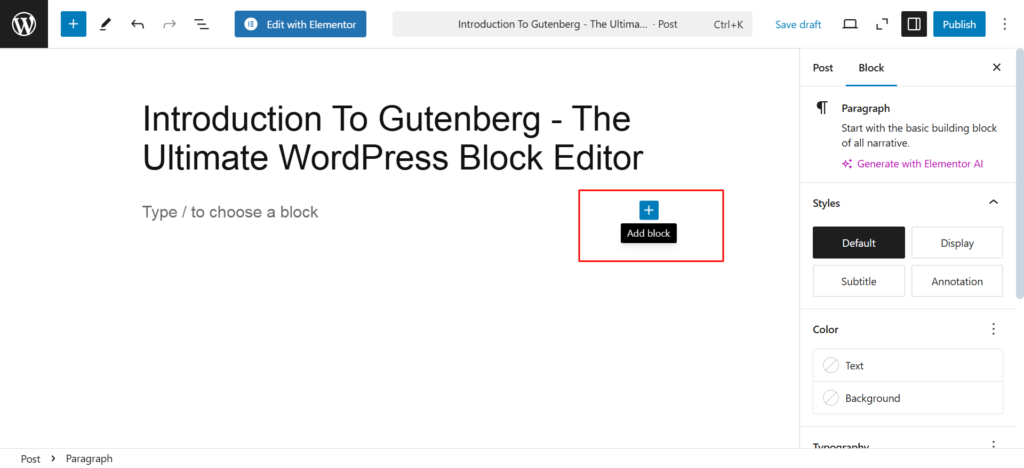
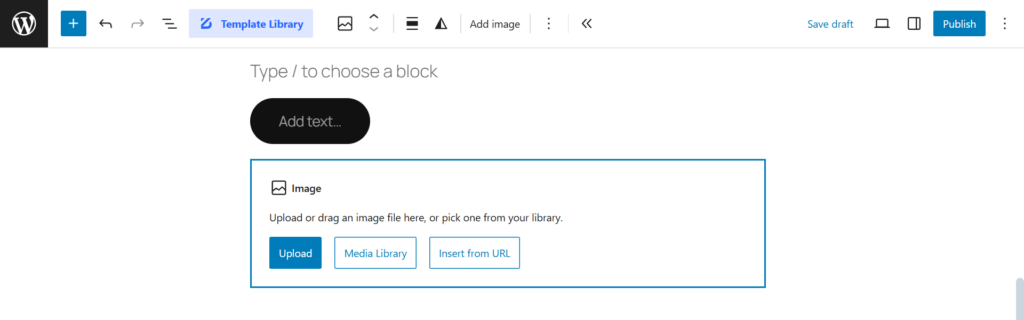
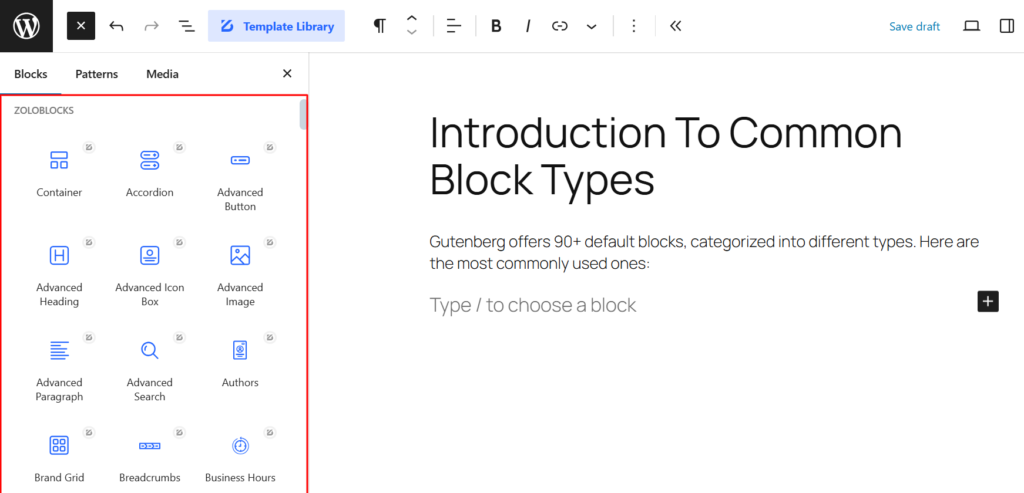
E. 블록 삽입기(+ 버튼) - 새 블록 추가하기
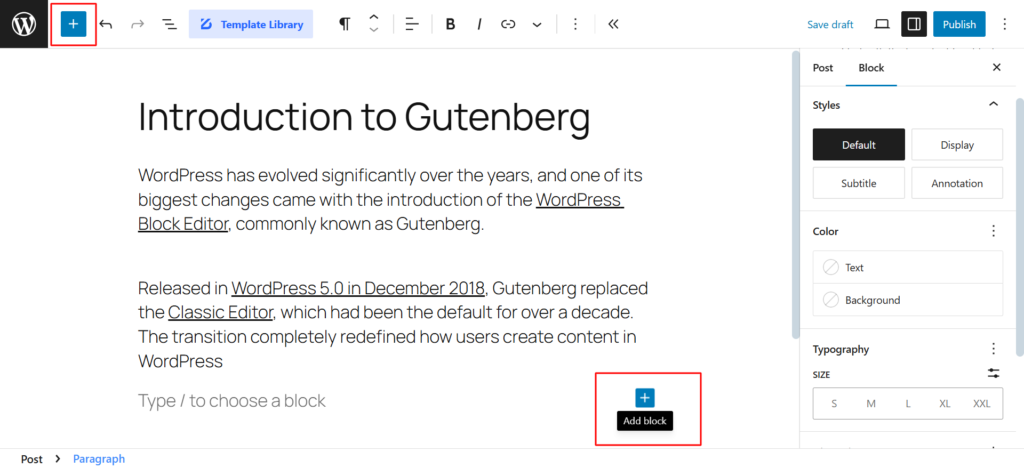
- '+' 버튼(왼쪽 상단 또는 인라인)을 클릭하여 새 블록을 추가합니다.
- 검색창을 사용하여 특정 블록을 빠르게 찾을 수 있습니다.
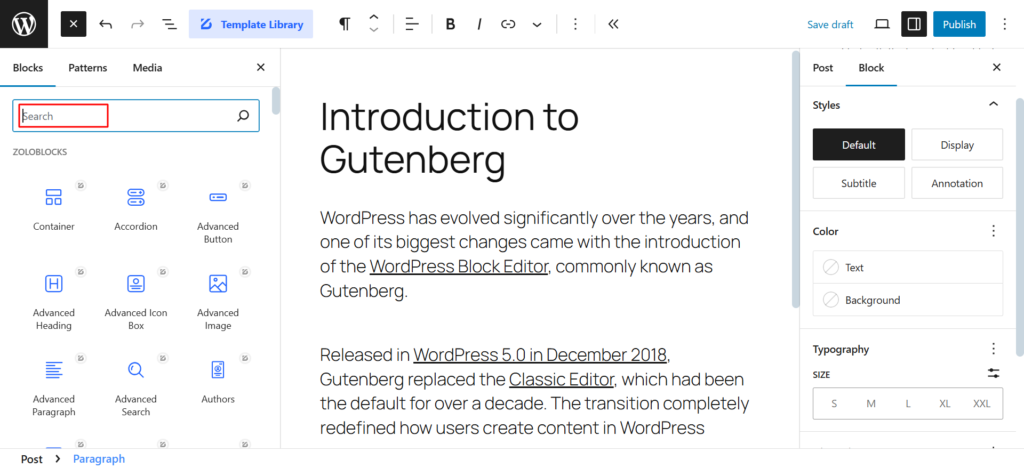
- 블록을 콘텐츠 영역으로 직접 끌어다 놓습니다.
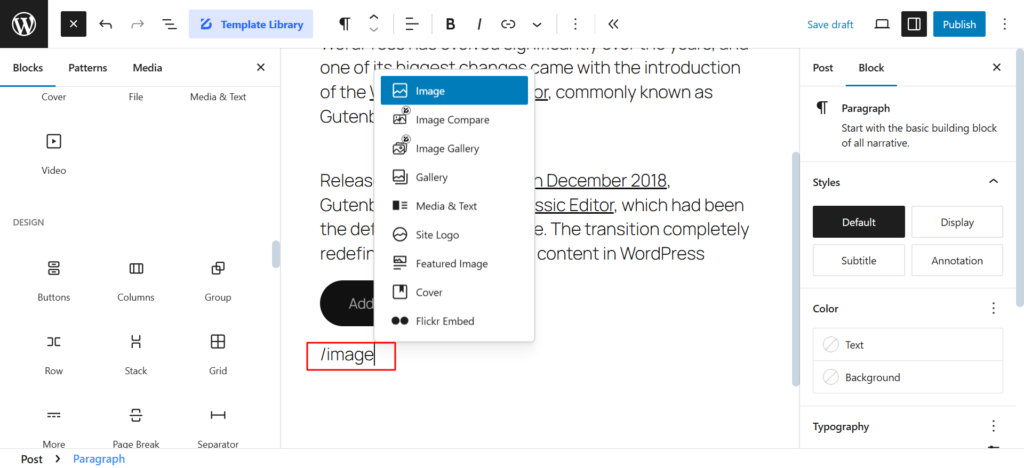
"+" 버튼을 클릭하는 대신 "/" 뒤에 블록 이름(예: /이미지)을 입력하면 블록을 즉시 삽입할 수 있습니다.
블록으로 작업하기
구텐베르크 기능의 핵심은 블록입니다. 이러한 독립적인 콘텐츠 요소를 통해 사용자는 동적 레이아웃을 손쉽게 만들 수 있습니다.
블록이란 무엇이며 어떻게 작동하나요?
각 콘텐츠(텍스트, 이미지, 동영상, 버튼)는 별도의 블록입니다. 블록은 이동, 복제, 스타일 지정 및 재사용이 가능합니다. 기본 서식을 지정하기 위해 단축 코드나 사용자 지정 HTML을 사용할 필요가 없습니다.
블록 추가, 편집, 복제 및 삭제 방법
이제 워드프레스 블록에 대한 기본적인 이해를 마쳤으니 블록을 추가, 편집, 복제, 삭제하여 콘텐츠를 손쉽게 사용자 정의하는 방법에 대해 자세히 알아보겠습니다.
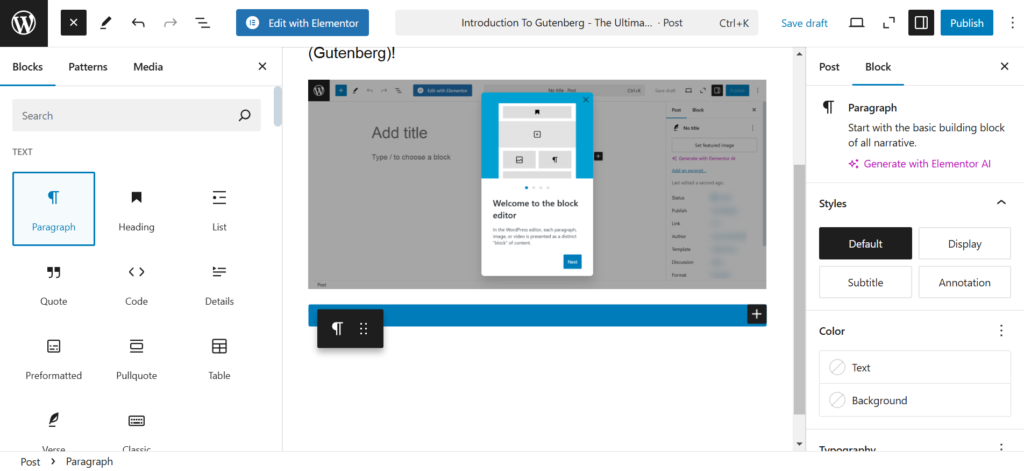
블록 추가
- 툴바 또는 콘텐츠 영역 내부에서 '+' 버튼을 클릭합니다.
- 원하는 블록(예: 문단, 이미지, 제목)을 선택합니다.

- 콘텐츠를 입력하거나 미디어 파일을 업로드합니다.
블록 편집
- 블록 내부를 클릭하여 텍스트, 이미지 또는 설정을 편집합니다.
- 블록 툴바(블록 위에 표시됨)를 사용하여 빠르게 서식을 지정할 수 있습니다.
블록 복제
- Click on a block, then select “Duplicate” from the More Options menu (three dots).
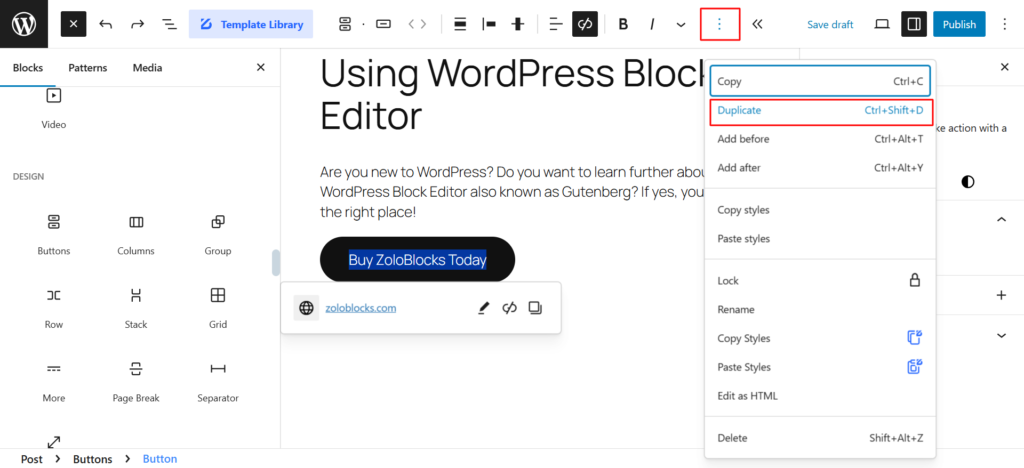
- Useful for repeating similar content (e.g., call-to-action buttons).
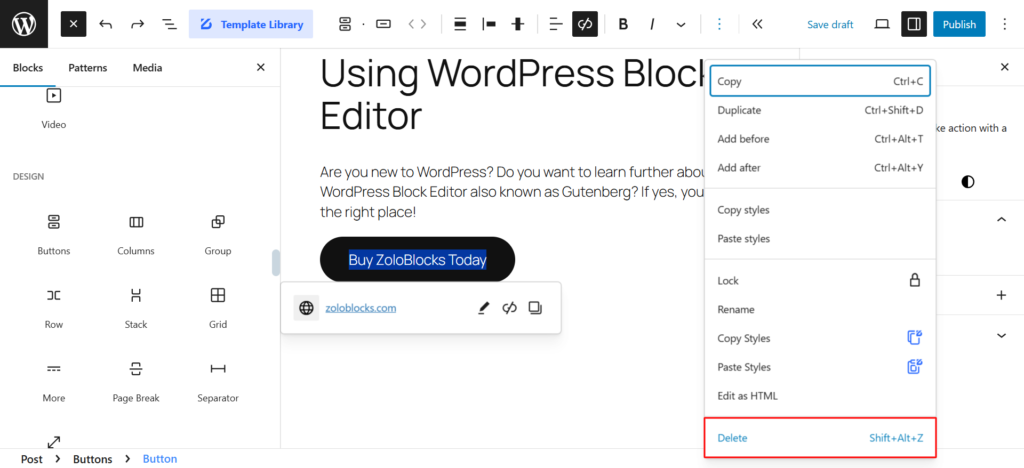
Deleting Blocks
- Click on a block and press Delete/Backspace or use the Remove Block option.
Common Block Types in Gutenberg
Gutenberg offers 90+ default blocks, categorized into different types. Here are the most commonly used ones:
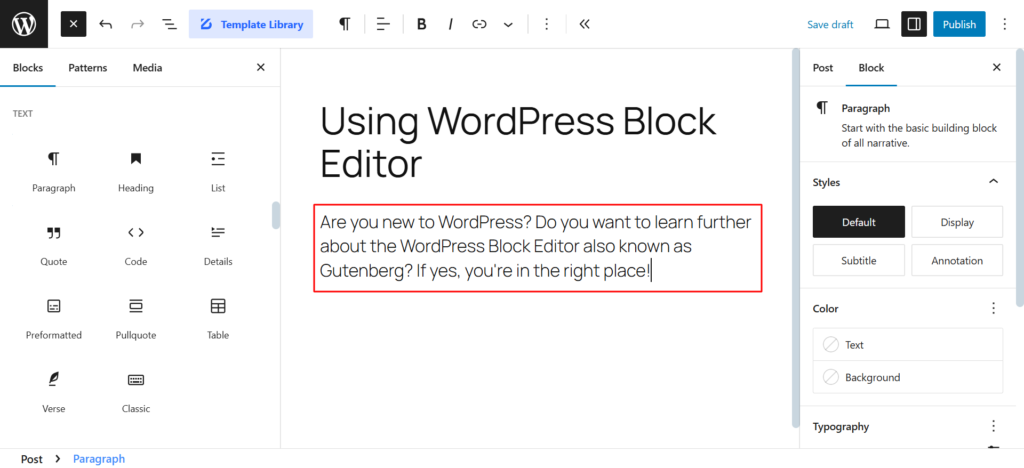
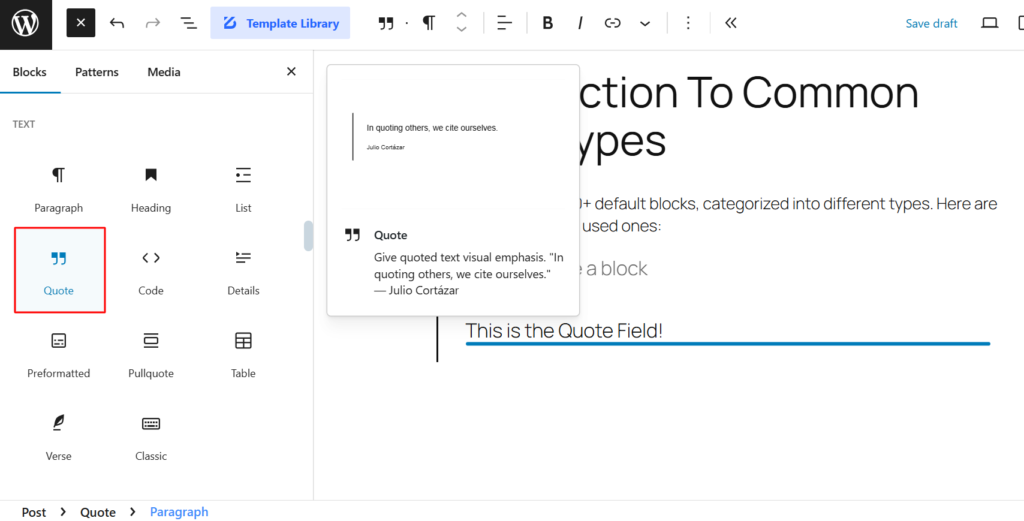
A. Text Blocks (For Writing & Formatting)
- Paragraph: The default block for adding text.

- Heading: Allows you to structure content with H1–H6 headings.
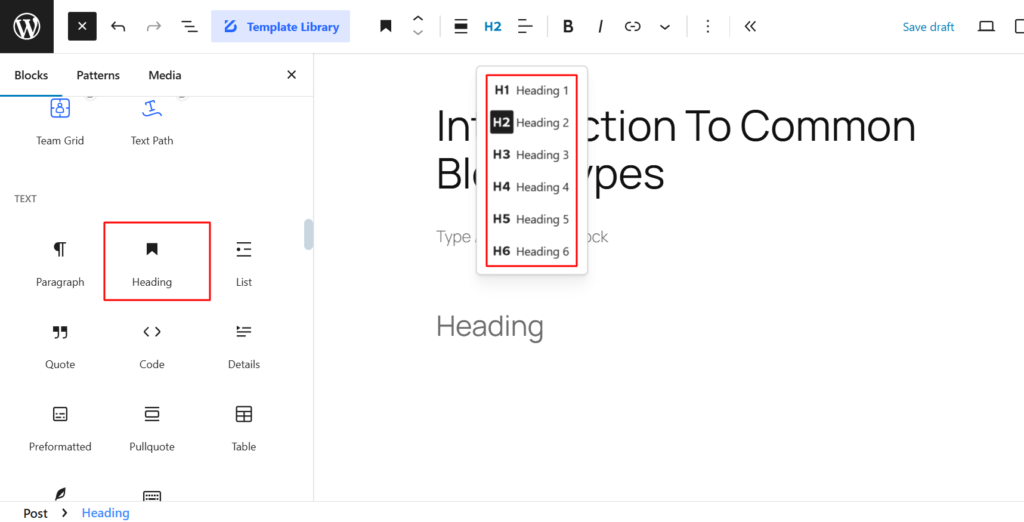
- List: Creates bullet points or numbered lists for better readability.
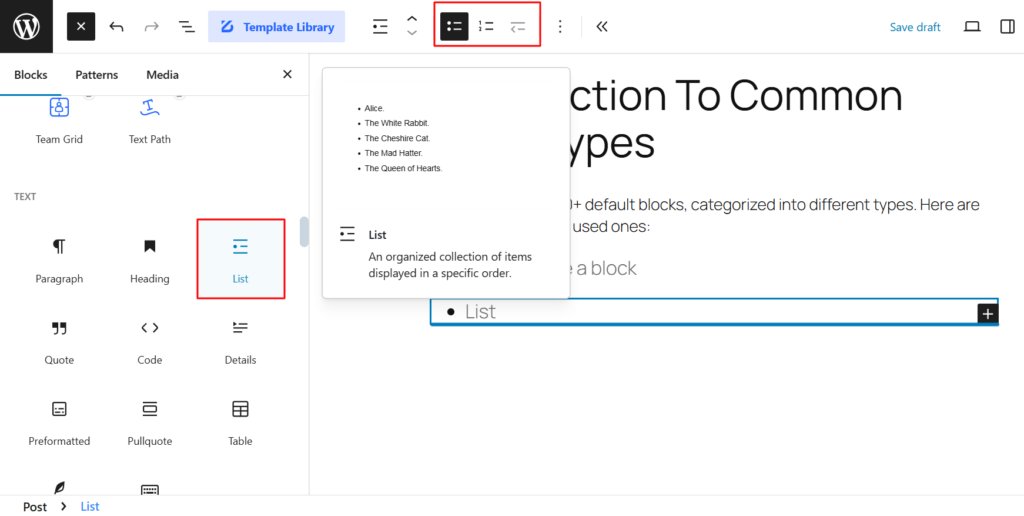
- Quote: Highlights text as a pull-quote for emphasis.
B. Media Blocks (For Images, Videos, & Galleries)
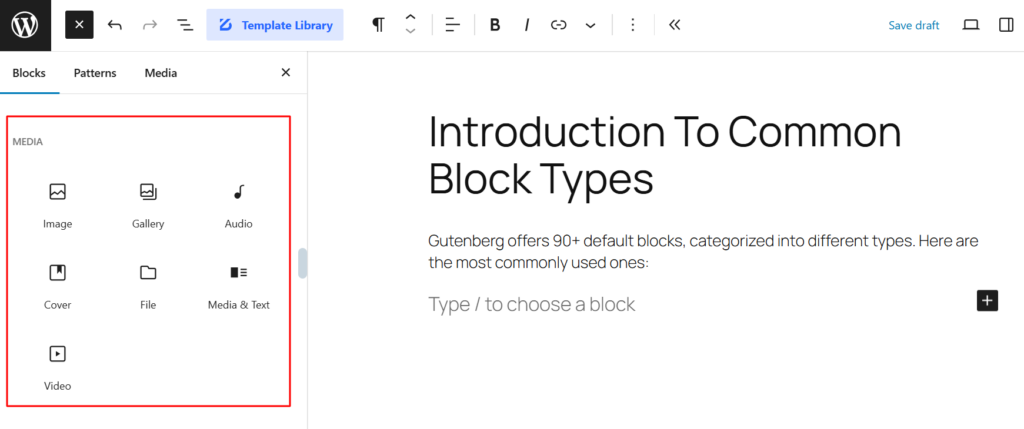
- Image: Upload images or select from the media library.
- Video: Embed videos from YouTube, Vimeo, or upload your own.
- Gallery: Display multiple images in a grid or carousel format.
- Audio: Add an MP3 file or embed a podcast.
According to a WPBeginner study, articles with images get 94% more views than those without visuals!
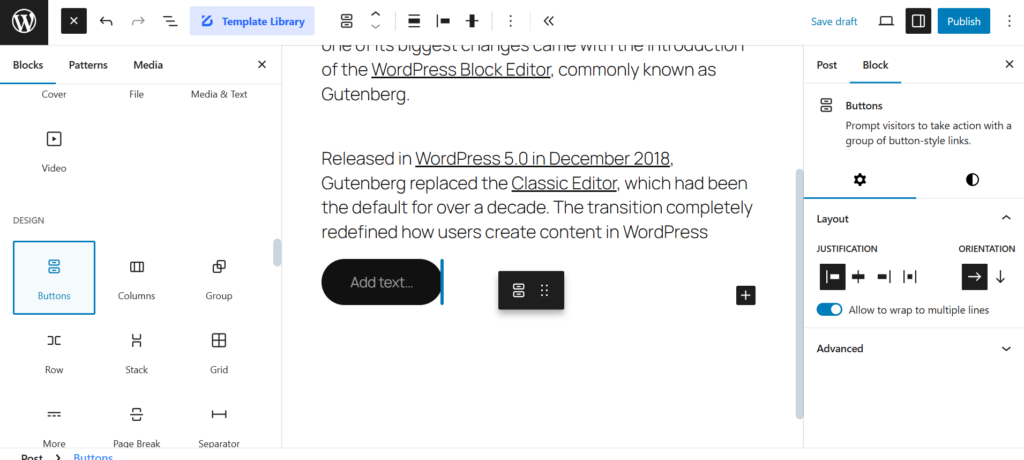
C. Layout Blocks (For Page Design & Structure)
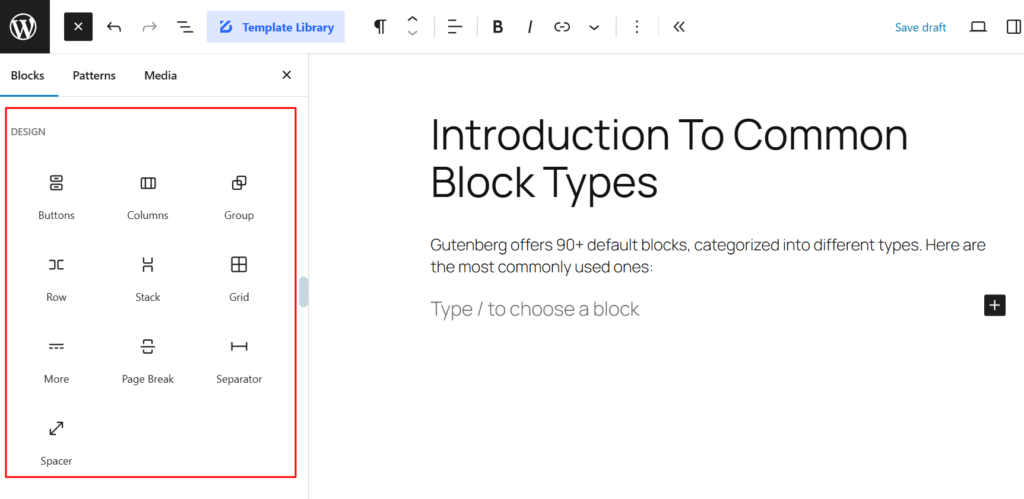
- Columns: Create multi-column layouts for better design.
- Buttons: Add interactive buttons for call-to-actions.
- Spacer: Add white space between blocks for better readability.
- Separator: Insert a horizontal line to divide sections.
Use the ZoloBlocks 플러그인 to unlock advanced layout blocks with animations, gradients, and custom effects.
D. Embed Blocks (For External Content & Social Media)

- YouTube: Embed a video with a single click.
- Twitter: Display tweets directly inside your post.
- Instagram: Showcase Instagram posts without plugins.
Customizing Blocks for Better Design
Gutenberg allows extensive block customization to enhance the look and feel of your content.
A. Adjusting Typography, Colors & Alignment
- Change font size, weight, and letter spacing in the Block Settings panel.
- Customize text and background colors for better contrast.
- Align text left, center, or right for readability.
B. Using the Block Toolbar vs. Settings Sidebar
- The Block Toolbar provides quick formatting options like bold, italic, alignment.
- The Settings Sidebar offers advanced styling, including margins, padding, and custom CSS.
C. Understanding Reusable Blocks & Block Patterns
Reusable Blocks (For Frequently Used Content)
- Save any block for repeated use across multiple posts/pages.
- Example: Author bios, Call-to-action buttons, Affiliate disclaimers.
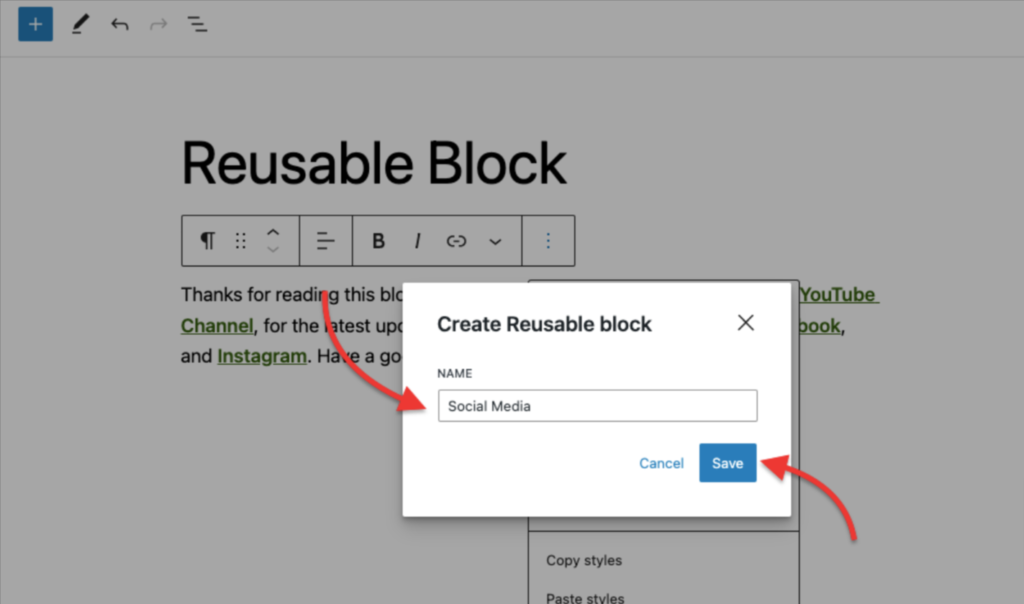
How to create a reusable block:
- Select a block and click “More Options” (Three dots).
- Choose “Add to Reusable Blocks” and give it a name.
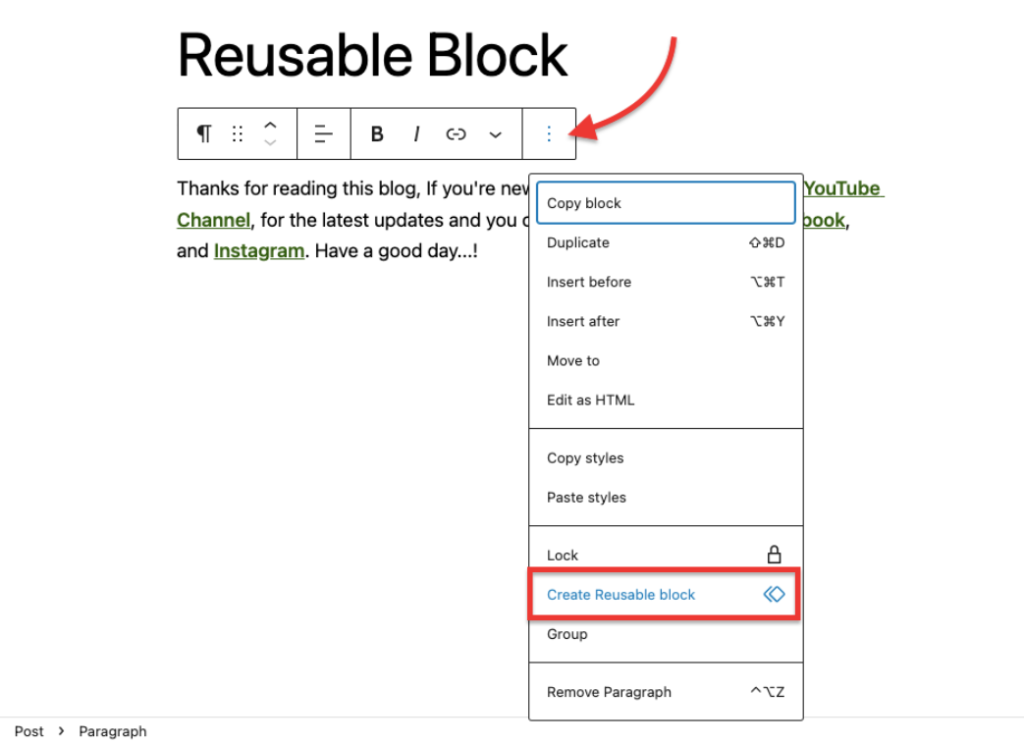
- Insert it in future posts without recreating it.
Block Patterns (Pre-Designed Layouts)
- Block Patterns are ready-made design sections that speed up page building.
- WordPress provides built-in patterns, and plugins like ZoloBlocks offer premium ones.
Use Block Patterns to create hero sections, testimonials, and pricing tables instantly!
Managing Content with Gutenberg
A. Moving & Rearranging Blocks
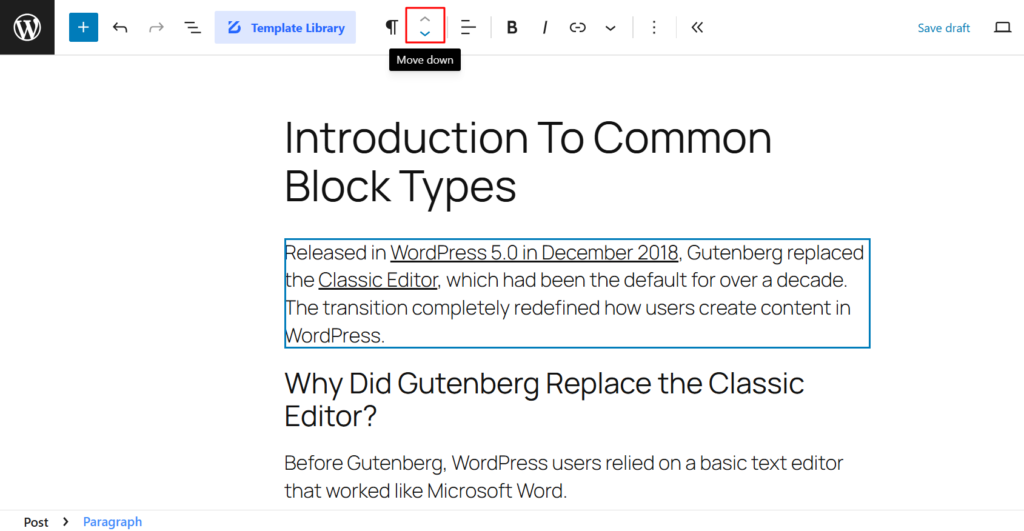
- Use drag-and-drop to reposition blocks.
- Click the Up/Down arrows to shift blocks one position at a time.
B. Grouping Blocks for Better Organization
- Select multiple blocks and choose “Group” to manage them together.
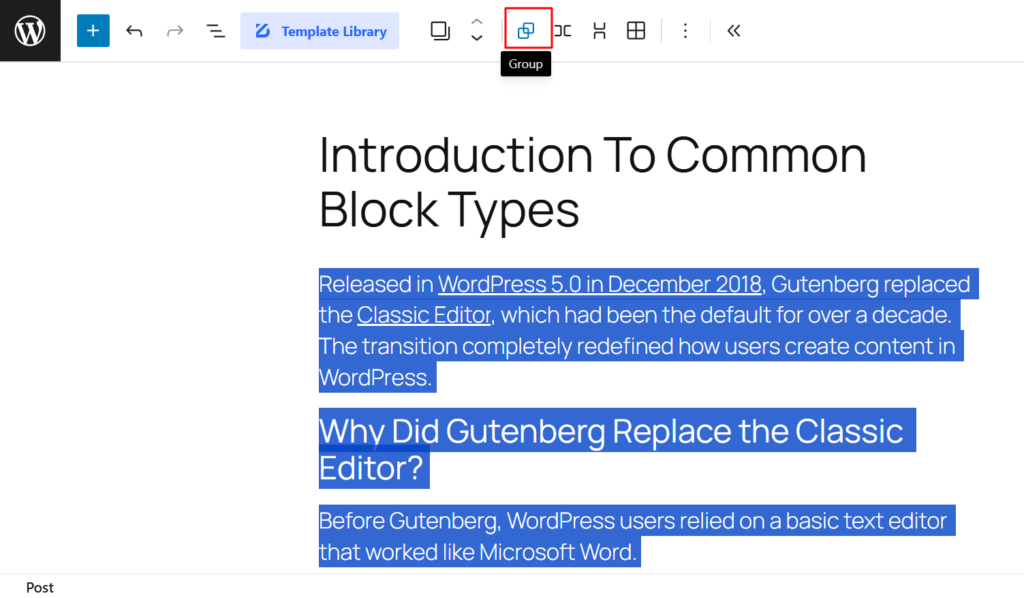
- Apply global styling to grouped blocks for consistency.
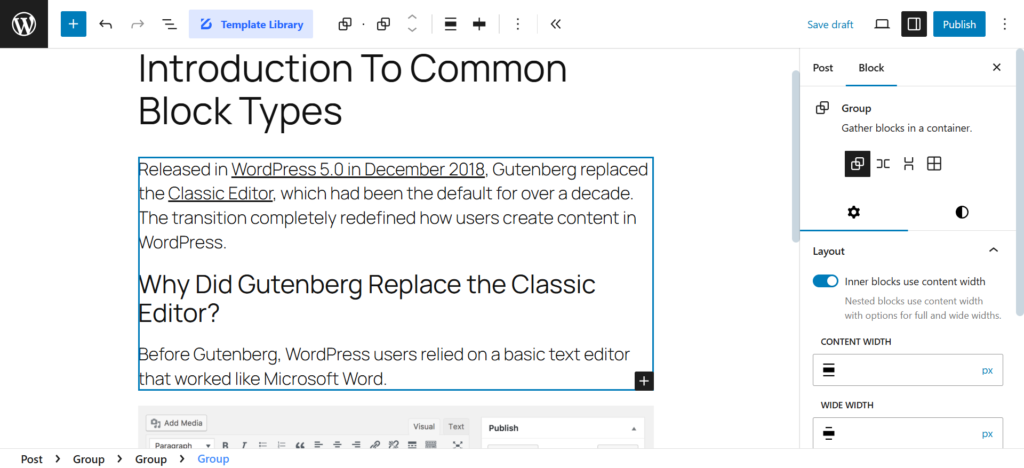
C. Using Full-Width & Wide-Width Options
- Some themes (like Astra, GeneratePress, Rooten) support full-width and wide-width blocks.
- Full-width layouts make images and sections span edge-to-edge for modern designs
10 Advanced Tips to Master Gutenberg Block Editor
Gutenberg is already a powerful tool, but mastering its advanced features can significantly enhance your content creation process.
Below are 10 expert tips to help you make the most of the WordPress Block Editor.
Tip #1: Enable Full-Site Editing (FSE) in Supported Themes
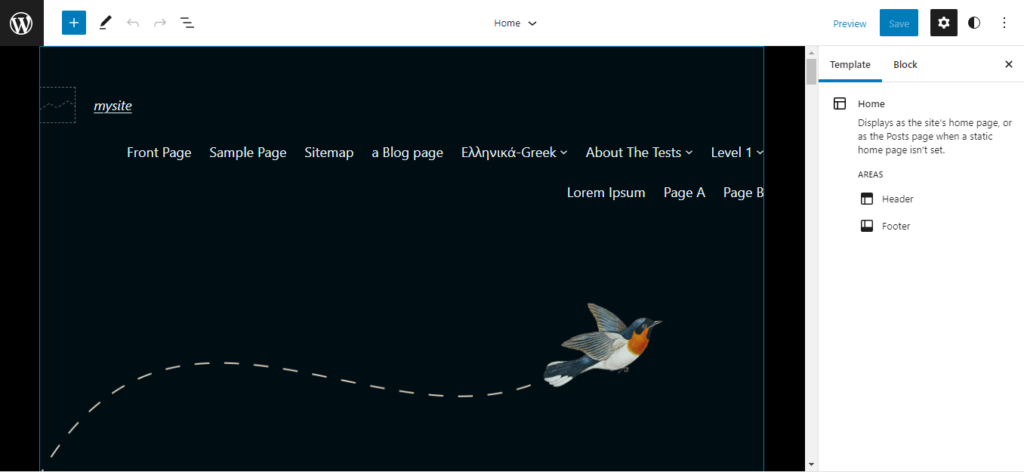
Full-Site Editing (FSE) is a revolutionary feature in WordPress that allows you to edit your entire website from within the Gutenberg editor, including the header, footer, and other structural components.
With FSE-enabled themes, you can create and customize your entire website layout, not just the content area, making the editing experience more consistent.
How FSE Changes WordPress Customization
- Centralized editing experience: FSE allows you to design every part of your site in one place, including global design elements like site headers, footers, and navigation menus.
- Enhanced control: FSE gives you complete control over your theme’s templates and style without needing to touch any code.
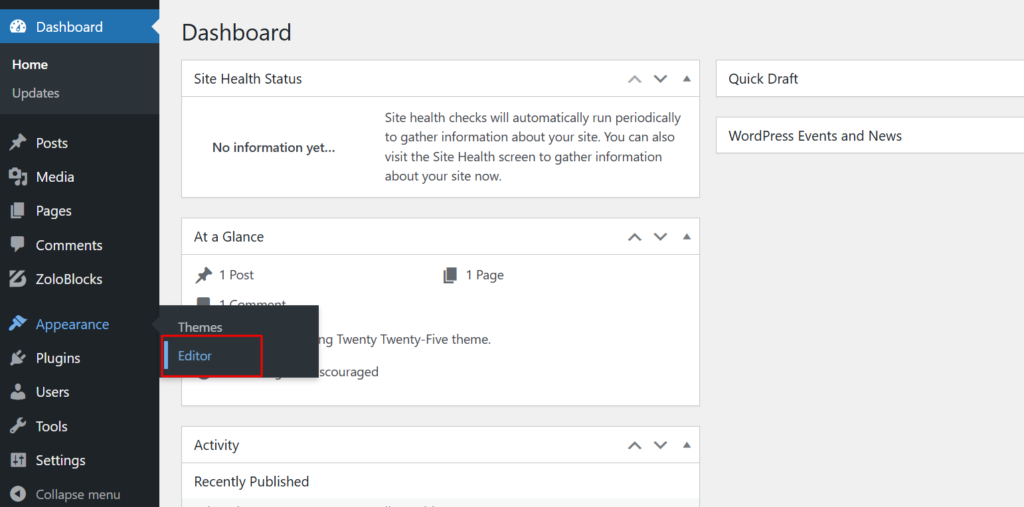
To enable FSE, ensure that you are using a compatible theme (such as the default WordPress themes like Twenty Twenty-Two) and activate it through Appearance > Editor.
Tip #2: Use Keyboard Shortcuts for Faster Editing
Keyboard shortcuts can dramatically speed up your workflow in the Gutenberg editor. Below are some essential shortcuts that will improve your productivity:
- / (Slash): Quickly add any block by typing its name after pressing the slash.
- Ctrl + Z (Cmd + Z on Mac): Undo your last action.
- Ctrl + Y (Cmd + Y on Mac): Redo your last undone action.
- Ctrl + Shift + D (Cmd + Shift + D on Mac): Duplicate the selected block.
- Alt + Shift + T: Add a new Table block.
- Ctrl + Shift + C (Cmd + Shift + C on Mac): Copy a block.
These shortcuts allow you to stay within the editor and make changes quickly, minimizing the need for excessive mouse movements.
Tip #3: Create and Save Reusable Blocks
Reusable blocks are an excellent way to create and store content elements that you use frequently. For example, if you use the same call-to-action button or affiliate links on multiple pages, saving them as reusable blocks can save time and effort.
How to Create, Edit, and Use Reusable Blocks Efficiently
- Create a block, such as a button, and add the desired content or styling.
- Click the three dots in the block’s toolbar and select “Add to Reusable Blocks.”

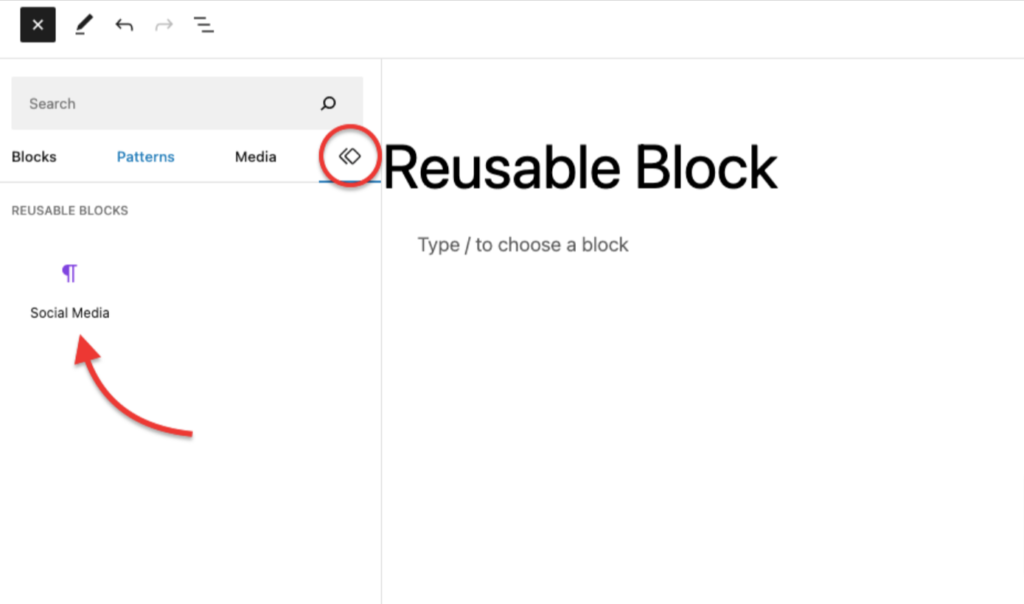
- Name the block, and it will be available in your block inserter under Reusable.
- To use it again, simply insert the block from the reusable section, and edit as needed.
Reusable blocks are perfect for site-wide elements like banners, testimonials, or disclaimers.
Tip #4: Explore Block Patterns for Faster Page Building
Block patterns are pre-designed layouts that can be inserted with a single click. They are an efficient way to build complex pages quickly, without manually adding and arranging individual blocks.
ZoloBlocks also offers premium block patterns that help you create professional designs in minutes.
How to Insert and Customize Block Patterns
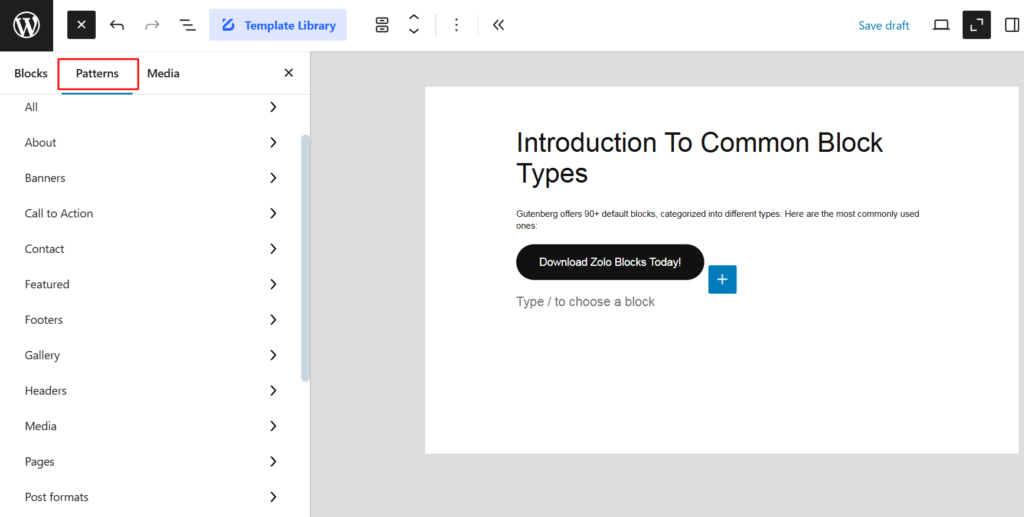
- Open the block inserter and click on the Patterns tab.
- Browse through the available patterns, such as hero sections, pricing tables, or testimonials.
- Select a pattern, and it will be inserted into your content area.
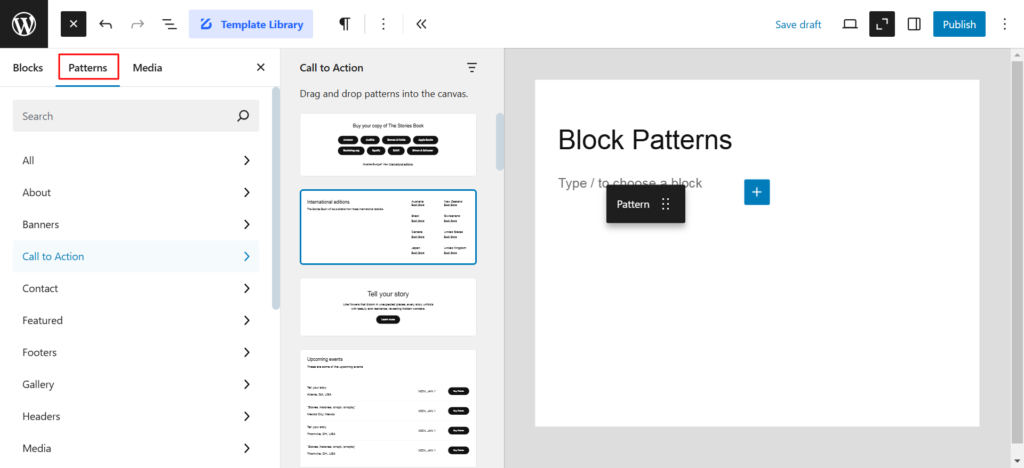
- Customize the pattern to match your design by editing text, images, and colors.
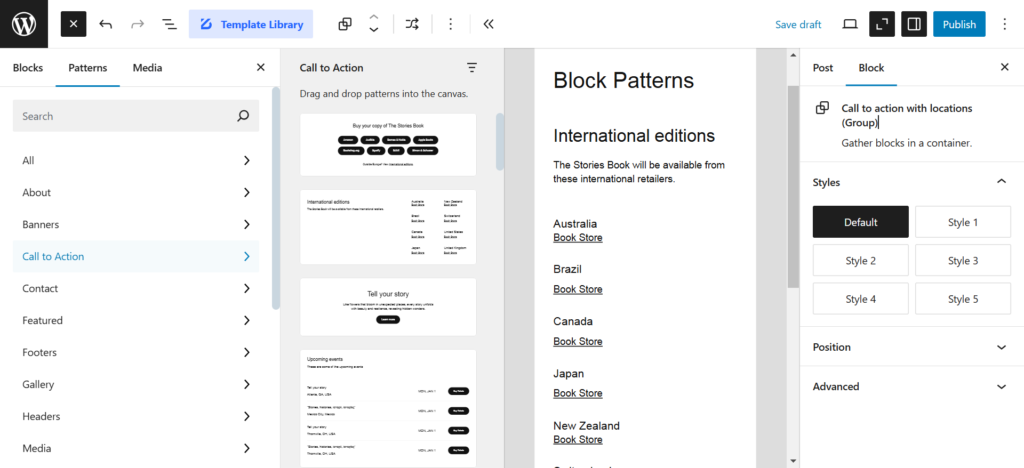
Block patterns can significantly reduce the time it takes to build a page from scratch, especially for pages with repetitive layouts.
Tip #5: Customize Gutenberg’s UI with Preferences
Gutenberg allows you to tweak the editor’s user interface (UI) for greater efficiency. You can change settings related to how blocks behave, how the editor displays, and the overall user experience.
How to Tweak the Editor Experience for Efficiency
- Disable or enable the block toolbar for a cleaner workspace.
- Show or hide the block settings panel based on your needs.
- Choose between a simple or advanced view for block options.
- Set default fonts and colors to match your site’s branding.
By customizing Gutenberg’s UI, you can streamline your workflow and make content creation even more efficient.
Tip #6: Improve Layouts with Columns and Nested Blocks
Creating complex layouts can be challenging, but Gutenberg offers powerful tools like columns and nested blocks to make this process much easier.
How to Create Grid-Based Layouts
To create grid-based layouts in Gutenberg:
- Use the Columns block to divide your content into two or more columns. You can choose between different column layouts (e.g., 50/50, 70/30, etc.).
- For more complex designs, you can nest blocks inside columns. Simply add a block inside the column, like a text block or an image block, to structure your layout further.
- You can also add Spacer blocks or Group blocks to manage alignment and positioning.
Columns are especially useful for creating multi-column text layouts, image galleries, or complex page designs, all while maintaining the simplicity and flexibility of the Gutenberg editor.
Tip #7: Optimize for Mobile with Responsive Settings
With mobile-first design becoming increasingly important, Gutenberg offers tools that allow you to preview and adjust your content for mobile devices.
How to Preview and Adjust Designs for Different Screen Sizes
- Preview Mode: Gutenberg provides an in-editor Preview Mode where you can switch between desktop, tablet, and mobile views to see how your page will look on different devices.
- Responsive Blocks: Some blocks, including ZoloBlocks, offer responsive settings to ensure content scales correctly on smaller screens. You can adjust block sizes, font sizes, and alignment specifically for mobile views.
- Hide/Show Blocks: ZoloBlocks also provides options to hide or show blocks based on device type, ensuring a clean and optimized mobile experience.
By using these responsive settings, you can ensure your website is mobile-friendly and provides a seamless browsing experience for users on all devices.
Tip #8: Speed Up Content Creation with Templates
Gutenberg’s template feature allows you to create and reuse page layouts, saving time and ensuring consistency across your website.
How to Create and Reuse Page Templates in Gutenberg
- Create your desired page layout, complete with all blocks and settings.
- Save this layout as a template. In the Gutenberg editor, you can click on the three dots in the top-right corner and select Save as Template.
- Once saved, you can access this template for future use by navigating to Template options when creating a new post or page.
This feature is particularly useful for creating consistent layouts across multiple pages or posts, such as landing pages, product pages, or service descriptions.
Tip #9: Optimize Site Performance with Gutenberg
One of the main advantages of using Gutenberg is its lightweight structure. Unlike traditional page builders, Gutenberg doesn’t load heavy scripts or resources, which can slow down your site.
Why Gutenberg is Lightweight Compared to Page Builders
- Native Integration: Since Gutenberg is built into WordPress, it is highly optimized and integrates seamlessly with the WordPress core.
- Minimal Load: Gutenberg adds only the necessary scripts for the blocks used, making it more efficient than page builders that load additional libraries and heavy CSS files.
Avoiding Unnecessary Blocks and Scripts for Speed
To further optimize performance, you can:
- Limit the use of unnecessary blocks and scripts. Only use the blocks you need to avoid bloat.
- Use lazy loading for media blocks (such as images and videos), which delays loading until the user scrolls to that section.
- Disable unused features in Gutenberg and plugins to keep the site fast and responsive.
This optimization can improve your site’s page load time and user experience, positively impacting SEO and conversion rates.
Tip #10: Keep Up with Gutenberg Updates & New Features
Gutenberg is continuously evolving, with regular updates introducing new features and enhancements. Staying up-to-date with these updates ensures that you are using the latest tools available for building websites.
How Gutenberg is Evolving (Latest Updates and Roadmap)
- The Full-Site Editing (FSE) initiative is one of the key areas of development, aiming to make the entire site customizable through the Gutenberg editor.
- New block patterns and design flexibility features are constantly being added.
- Upcoming features include improved performance, better accessibility, and more block options.
By keeping an eye on the official WordPress release notes, you can take full advantage of new capabilities and stay ahead of the curve.
결론
With its constant improvements and features like Full-Site Editing and a wide variety of customization options, Gutenberg has become a powerful tool for all types of users, from beginners to advanced developers.
When you pair with ZoloBlocks, you can take Gutenberg’s capabilities to the next level. ZoloBlocks enhances your design flexibility, allowing you to add advanced elements, animations, and pre built templates, and also provides essential tools for more sophisticated website designs.
We encourage you to explore all the features of Gutenberg and ZoloBlocks, experiment with block patterns, keyboard shortcuts, and advanced tips to create websites that stand out.
The more you practice, the better you’ll get at leveraging these powerful tools for a better website-building experience.