Want to make your website more engaging? Adding a progress bar can help. Progress bars visually display data, making information easy to understand at a glance. They enhance the user experience by providing clear visual indicators of progress or statistics.
In this guide, we’ll show you how to add a progress bar in WordPress Gutenberg editor.
Steps to Add a Progress Bar in WordPress for Gutenberg
We’ll use the ZoloBlocks plugin (developed by BDThemes) to add a progress bar. ZoloBlocks is one of the best WordPress plugins to effortlessly customize your website. It offers 30+ pre-made customizable UI blocks that you can use on your website to make it feature-rich.
So, first things first, you need to install ZoloBlocks. Here’s how:
- Log in to your WordPress dashboard.
- Navigate to Plugins > Add New Plugin.
- Search for “ZoloBlocks.”
- Install and activate the plugin.
With ZoloBlocks installed, you’re ready to see how to add a progress bar in WordPress websites. You can check out all the blocks offered by ZoloBlocks to get an idea of what you can accomplish with them.
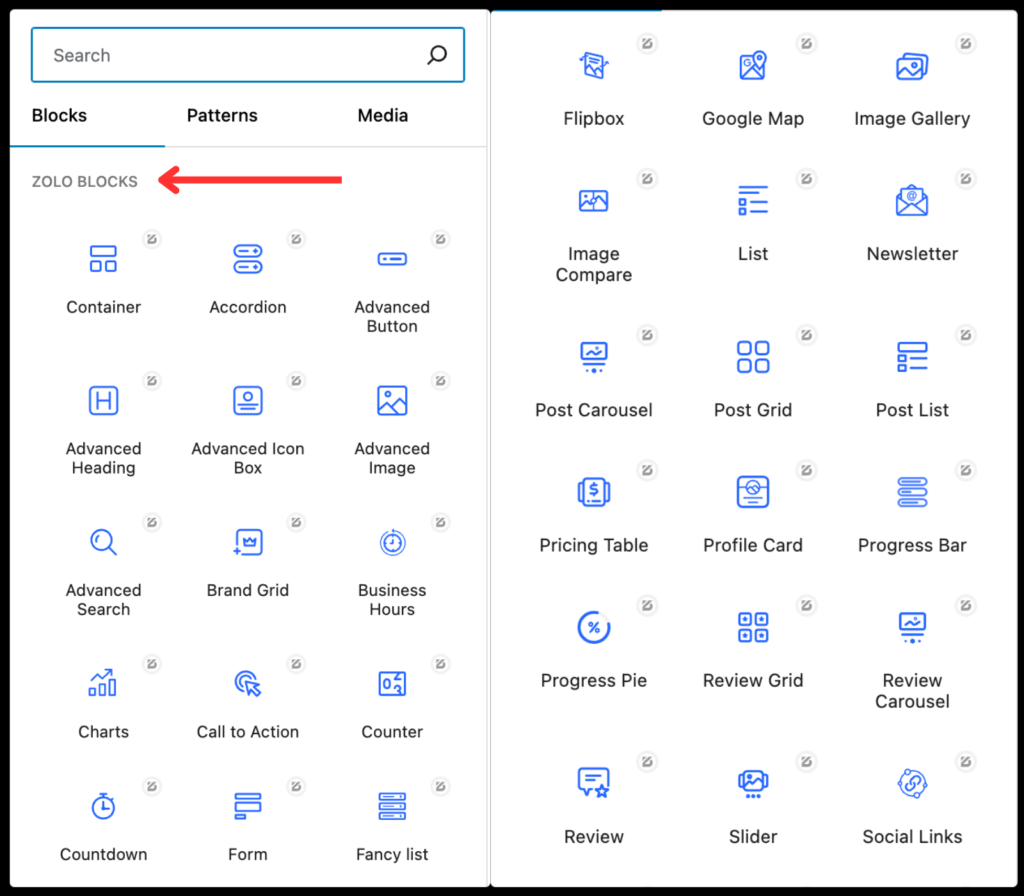
Now, let’s show you the steps to add a progress bar in WordPress Gutenberg.
Step 1: Open the Webpage in the Gutenberg Editor
Visit your WordPress dashboard and find the page or post where you want to add the progress bar. If you want to create a new page, then do that and proceed to the Gutenberg editor.
Once you’re inside the editor, scroll down to the section where you want to add and display the progress bar.
Step 2: Adding the Progress Bar
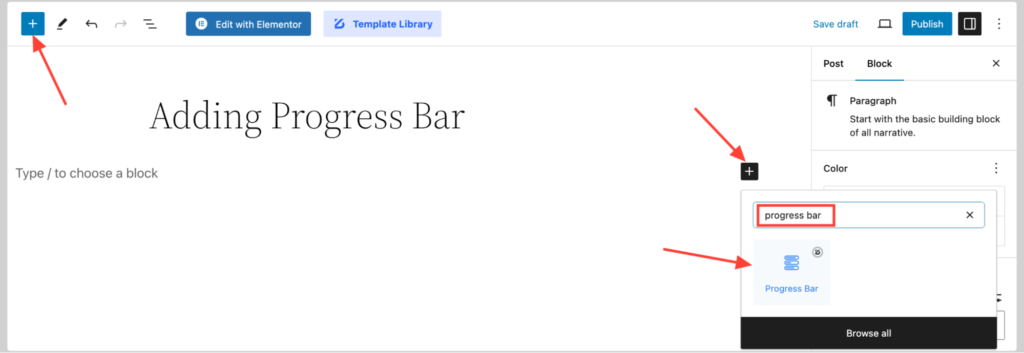
Once you decide where to add the progress bar, click the Add New Block button (+). In the search box, type “Progress Bar,” and you’ll see the progress bar block from ZoloBlocks. Click on the Progress Bar block to add it to your page.
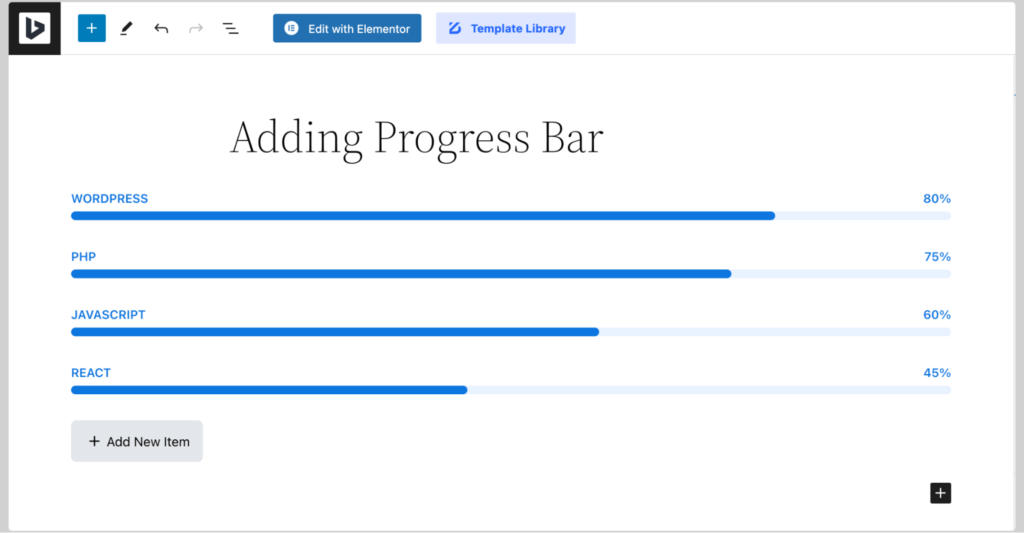
That’s it! The progress bar block has been added to your page. Initially, it’ll look something like this.
You’ll get different preset designs for the layout of the progress bar. So you can go through them to find the one that looks best for you.
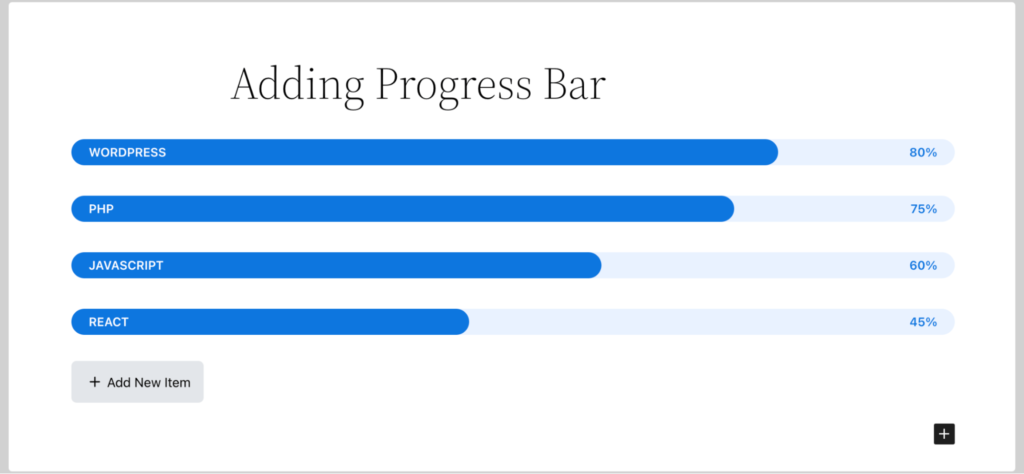
You can further customize this block to match your preference.
Step 3: Customizing the Progress Bar
Customizing your progress bar is simple and intuitive.
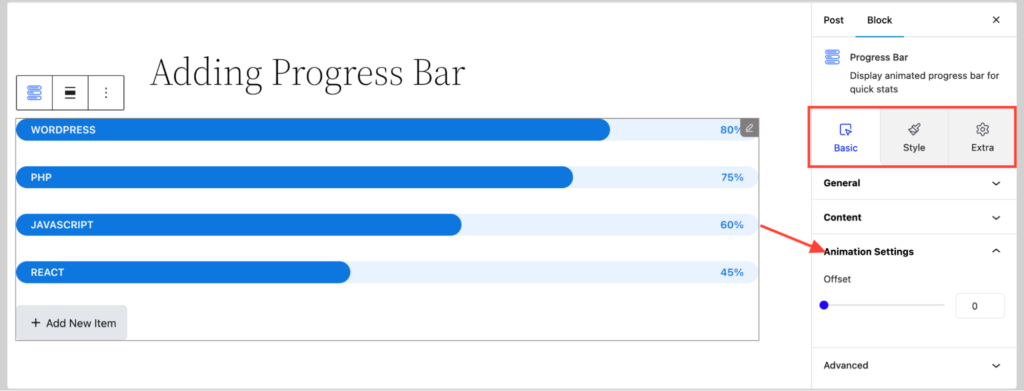
Follow these steps to make it compatible with your brand:
- Adjust Colors: Click on the progress bar block to open the settings panel. Here, you can change the bar color to match your site’s theme.
- Set Percentage Value: Enter the percentage value you want to display. This shows how much progress has been made.
- Add Labels: Provide context by adding labels or descriptions. This helps users understand what the progress bar represents.
- Choose Style and Layout: Customize the style and layout options to make the progress bar look exactly how you want.
The main focus when customizing these elements should be to ensure the progress bar fits seamlessly with your site’s design.
Bonus: Advanced Customization Tips
Want to take your progress bar to the next level? Here are some advanced customization tips:
- Custom CSS: Add custom CSS to style the progress bar further. This is perfect for achieving a unique look.
- Animations: Incorporate animations to make the progress bar dynamic and engaging. For example, you can make the bar fill up gradually as users scroll down the page.
- Multiple Progress Bars: Add multiple progress bars to a single page to display different data sets. This is useful for showing various project milestones or statistics.
- Conditional Visibility: Set up conditional visibility rules. This means the progress bar will only be visible based on certain user interactions or conditions.
These advanced options help you create a more interactive and visually appealing progress bar.
Benefits of Using a Progress Bar on Your WordPress Website
Progress bars offer a multitude of advantages for your website, significantly enhancing user experience and engagement. Here’s a closer look at the benefits:
- Enhance Visual Appeal: Progress bars add a dynamic visual element to your site, making it more attractive and engaging. They break up text-heavy content and provide a splash of color and movement, which can capture and hold visitors’ attention.
- Improve User Understanding: Progress bars are intuitive tools that help visitors quickly grasp the status of ongoing tasks or projects. Whether it’s tracking the completion of a user onboarding process or showing the progress of a fundraising campaign, progress bars communicate complex information in a straightforward, visual manner.
- Increase Engagement: Progress bars can keep users engaged by providing real-time feedback. For example, if users see that they are 80% through a survey, they are more likely to complete it. This sense of progress encourages users to interact more with your site.
- Provide Clear Indicators: Progress bars offer clear, visual indicators of progress or data points. This can be particularly useful in displaying metrics such as project completion percentages, user achievements, or the status of an application process.
- Motivate Users: Seeing visual progress can be highly motivating. Whether it’s a fitness tracker showing workout progress or an educational site displaying learning milestones, progress bars can encourage users to continue working towards their goals.
- Professionalism: Using progress bars can give your website a polished, professional look. It shows that you are attentive to detail and committed to providing a high-quality user experience.
- Versatility: Progress bars can be used in various contexts, from project management dashboards to e-commerce websites showing order processing stages. Their versatility makes them a valuable addition to almost any site.
Best Practices for Using Progress Bars
To maximize the effectiveness of progress bars on your website, follow these best practices:
Strategic Placement
Place progress bars in areas where they will be most effective. Common locations include the header, sidebar, or within key content sections. Ensure they are prominently visible to visitors without overwhelming the page layout.
Consistent Design
Maintain a consistent design for your progress bars that align with your website’s overall theme and branding. This includes matching colors, fonts, and styles. Consistency helps create a cohesive user experience and reinforces your brand identity.
Clear Labels
Always include labels or descriptions with your progress bars. This context helps users understand what the progress bar represents. For example, a progress bar labeled “Project Completion” is much more informative than one without any label.
Realistic Values
Ensure the percentage values displayed by your progress bars are accurate and realistic. Misleading users with exaggerated progress can damage trust and credibility. Regularly update the progress bars to reflect the latest data.
Interactive Elements
Consider adding interactive elements to your progress bars, such as tooltips or clickable segments that provide additional information. This interactivity can enhance user engagement and make the data more accessible.
Use Multiple Progress Bars
If you have several data points or metrics to display, use multiple progress bars. This can be particularly useful on dashboards or performance tracking pages, where users need to see various pieces of information at a glance.
Accessibility
Ensure that your progress bars are accessible to all users, including those with disabilities. Use contrasting colors for visibility, provide text alternatives, and ensure that the progress bar can be navigated using a keyboard.
Responsive Design
Make sure your progress bars are responsive and display correctly on all devices, including desktops, tablets, and smartphones. Test them on different screen sizes to ensure a seamless user experience.
Regular Testing and Optimization
Continuously test your progress bars to ensure they work as intended across different browsers and devices. Use analytics tools to track how users interact with the progress bars and make adjustments based on user feedback and behavior.
Contextual Relevance
Ensure the use of progress bars is contextually relevant to the content of the page. For instance, using a progress bar to track donation goals in a fundraising campaign is highly relevant and adds value to the user’s experience.
Testing and Optimizing Your Progress Bar
After adding and customizing your progress bar, it’s essential to test and optimize it:
- Device Compatibility: Ensure the progress bar displays correctly on various devices, including desktops, tablets, and smartphones.
- Browser Compatibility: Test the progress bar on different browsers to ensure it works seamlessly across all platforms.
- Track Interactions: Use analytics tools to monitor how users interact with the progress bar. This data can provide insights into user behavior and help you make necessary adjustments.
- Regular Updates: Keep the progress data up to date. Regularly updating the progress bar ensures users have accurate information, maintaining their trust and engagement.
Conclusion
Now that you know how to add a progress bar in WordPress Gutenberg, using ZoloBlocks, are you interested in giving it a try?
A progress bar is a simple yet powerful way to enhance user experience. It provides a clear visual indicator of progress, keeps users engaged, and adds a professional touch to your site.
Follow the steps outlined in this guide to create and customize a progress bar that fits your needs. Experiment with different styles and placements to find what works best for your audience.
FAQs
What is a Progress Bar?
A progress bar is a visual indicator, often a colored bar, that displays the progress of a task or data point. It helps users quickly understand how much progress has been made towards a goal.
How Does a Progress Bar Enhance User Experience?
Progress bars enhance user experience by providing clear, visual feedback on the status of tasks or data. They make information easy to understand at a glance, keeping users informed and engaged.
Can I Add Multiple Progress Bars to a Single Page?
Yes, you can add multiple progress bars to a single page. This is useful for displaying different data sets, such as project milestones or various campaign goals.
Are Progress Bars Compatible with All WordPress Themes?
Progress bars created with ZoloBlocks are designed to be compatible with most WordPress themes. However, it’s always a good idea to test the progress bar on your specific theme to ensure seamless integration.


